BetterDocs is your ultimate solution for creating a detailed documentation page in Shopify. It lets you add new documentation easily by following a few easy steps. These documents can help users understand your products and services better, and find answers to all of their queries from one place.
How To Add A New Documentation With BetterDocs? #
Follow the step-by-step guide below to learn how to add new documentation in just a few steps.
Nota: You must have BetterDocs for Shopify app installed on your store to add the documents.
Step 1: Add New Documentation #
To add new documentation on Shopify using BetterDocs, go to BetterDocs dashboard and click on the ‘Create doc’ button, as shown below.

Step 2: Add A Title & Permalink To Your Doc #
Clicking on this will open a customizer window. In this popup window, you can add a suitable title to your documentation in the editable field under ‘Title’, as shown below.
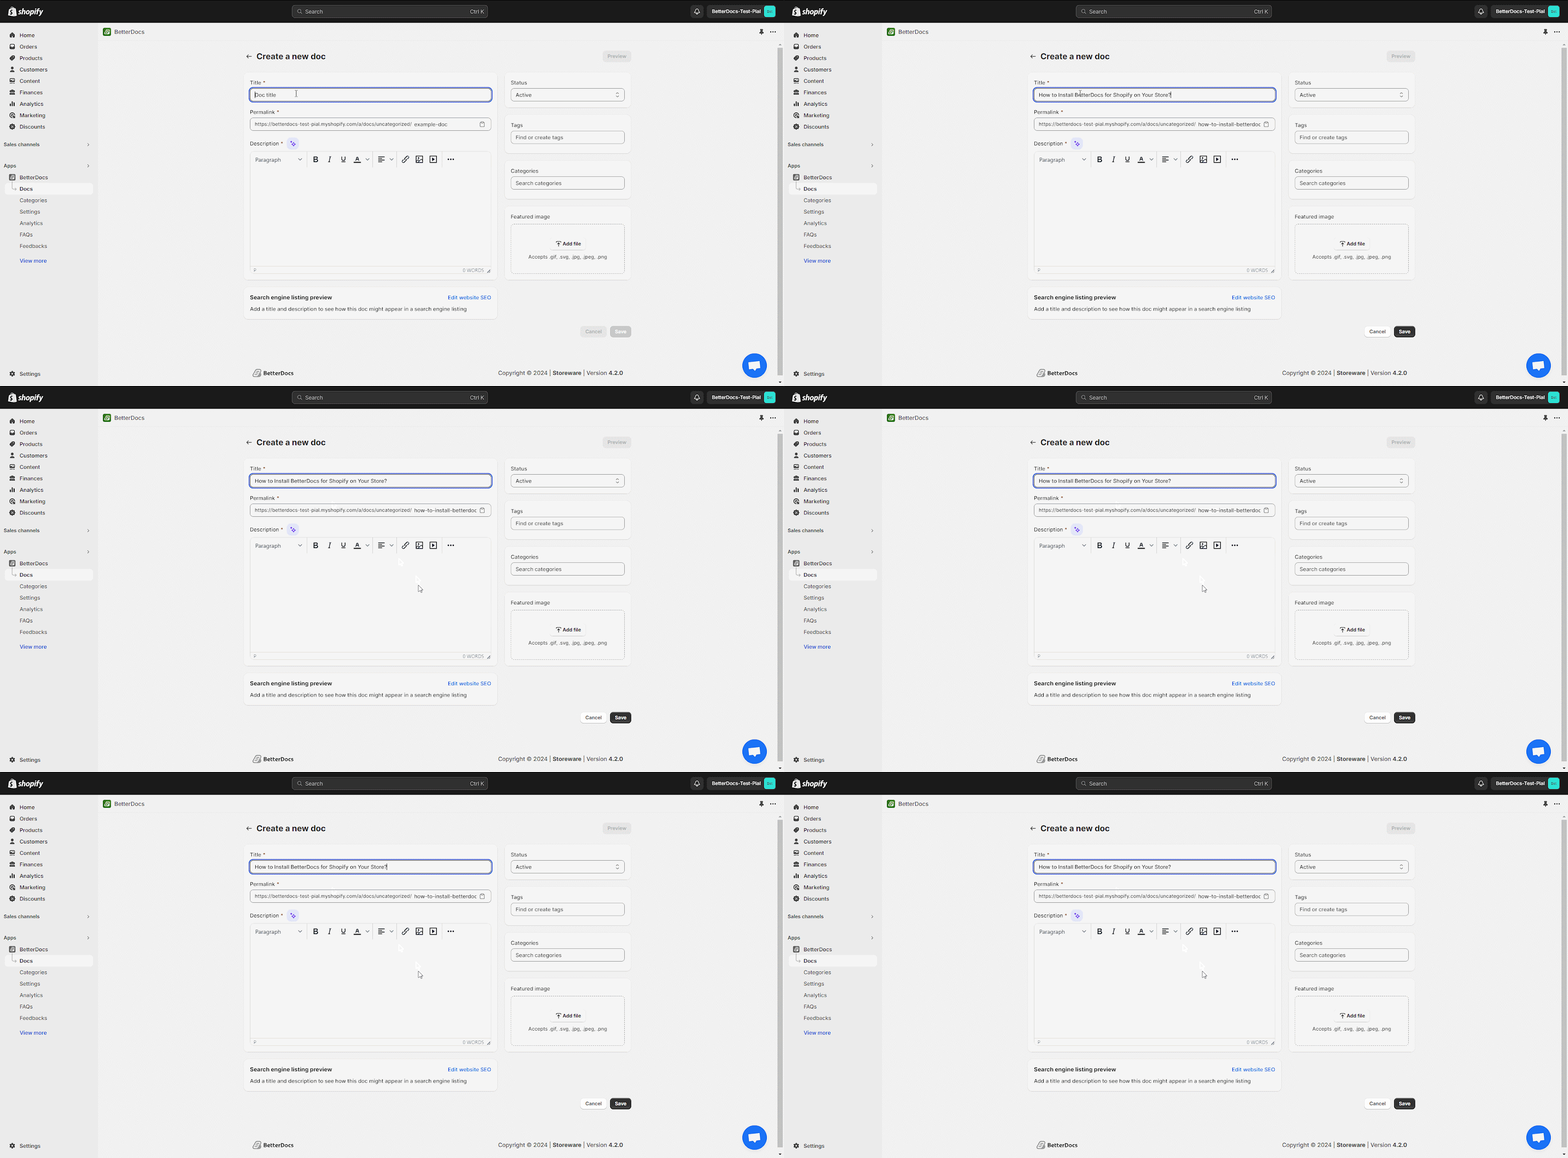
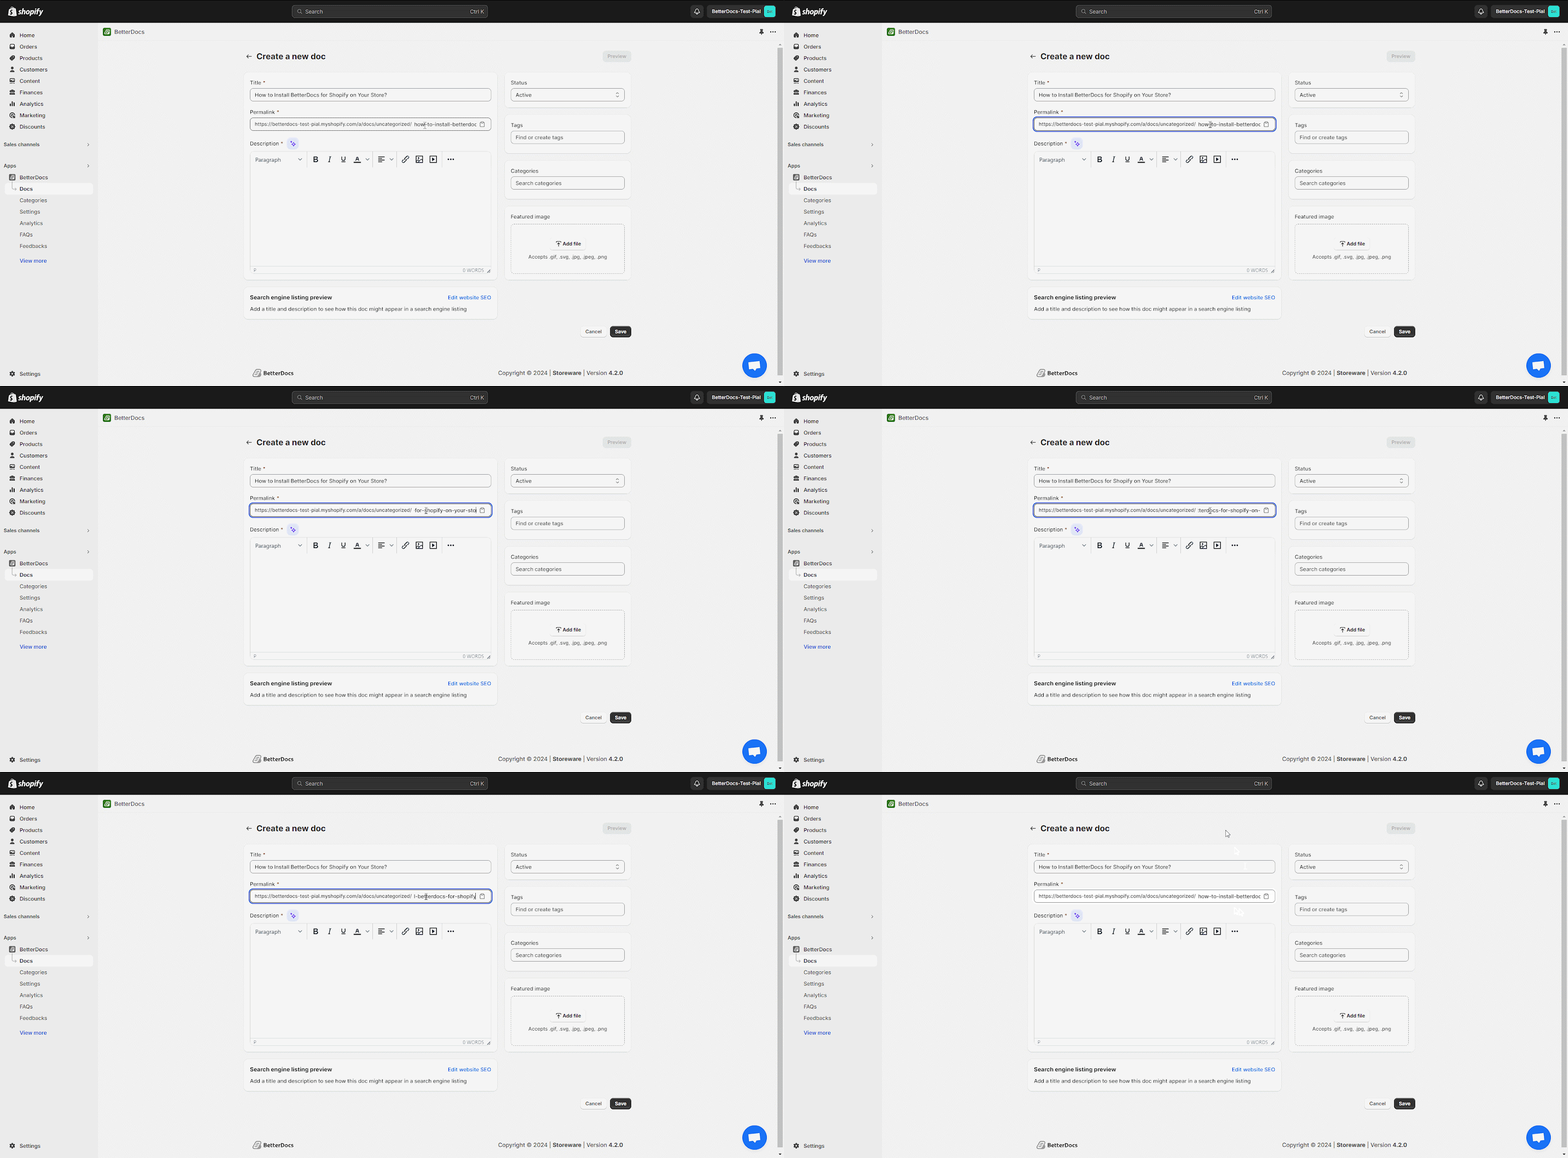
This will automatically add a slug for the permalink of your documentation. However, you can easily click on the editable permalink slug to make necessary changes, as shown.
Step 3: Add The Documentation Content #
Then, simply add your documentation content to the ‘Description’ field. You can also add descriptions with the ‘Generate with AI’ option along with adding images and videos directly to this input field, and edit using the options given.

Step 4: Insert A Featured Image #
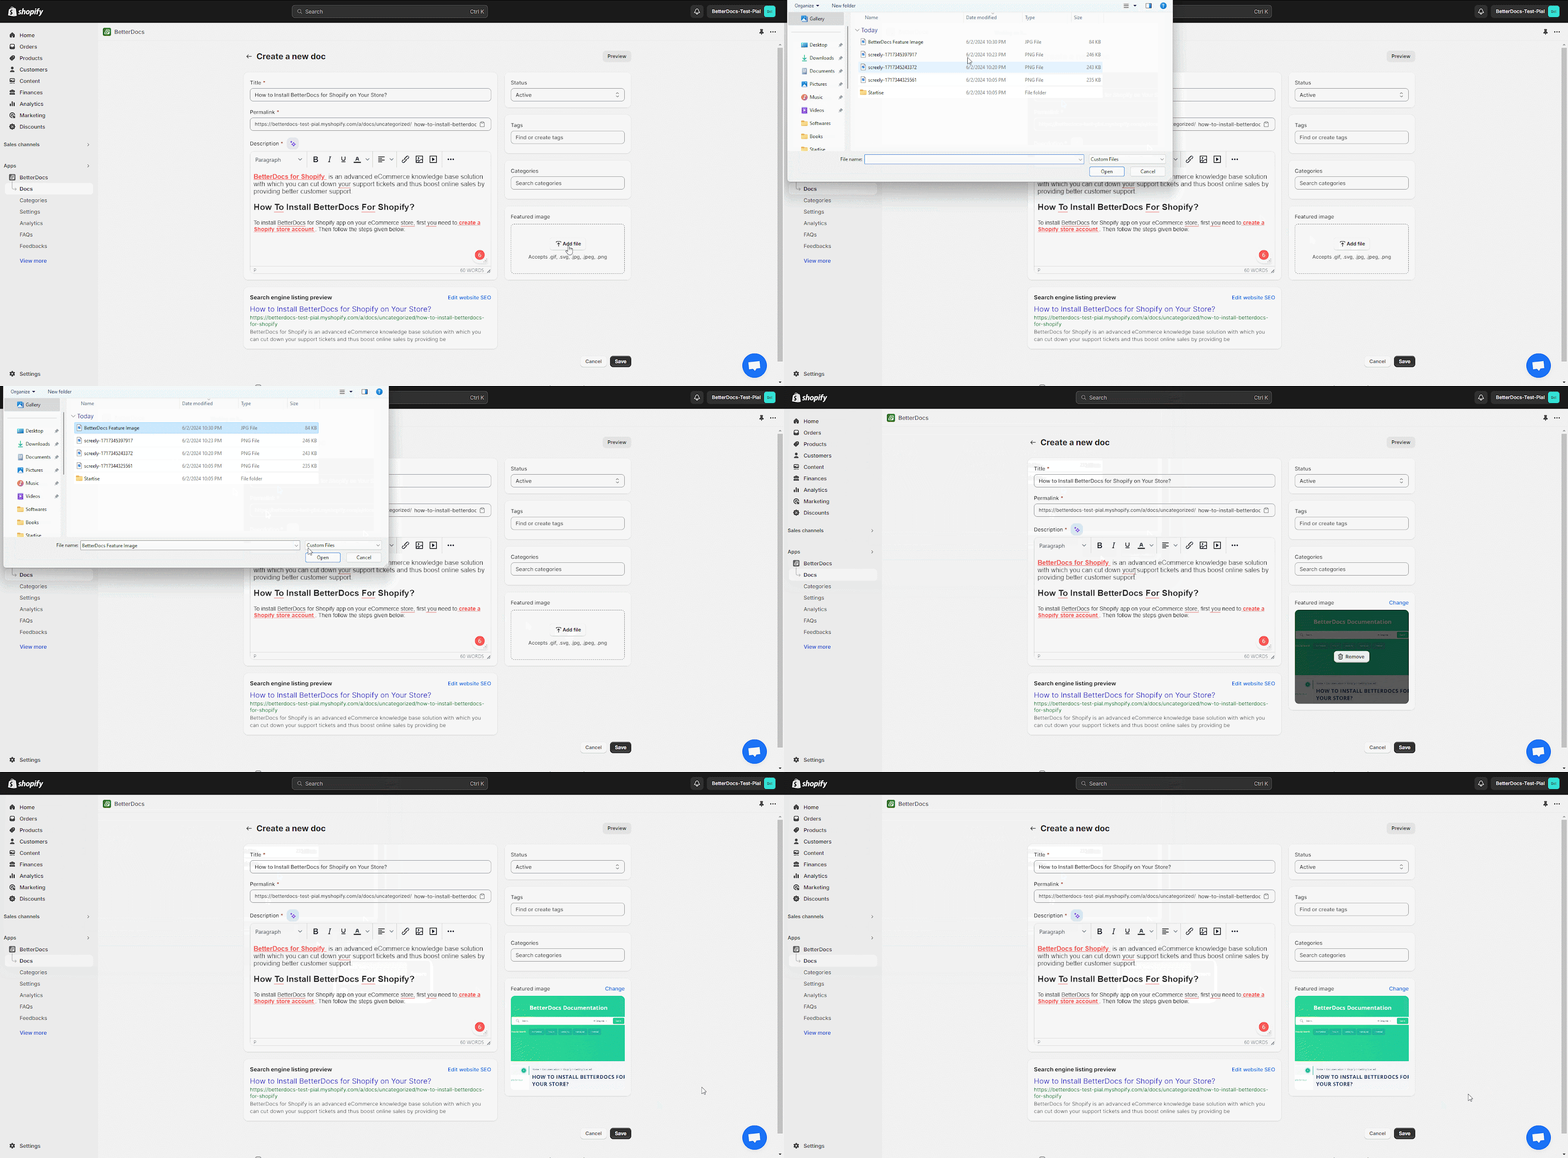
Afterward, you can add a featured image to your doc to help your customers understand what the document is about. To do so, simply click on the ‘Add File’ button in the ‘Featured Image’ section. Select the file you want to set as the featured image.
Step 5: Select Doc Tags & Categories #
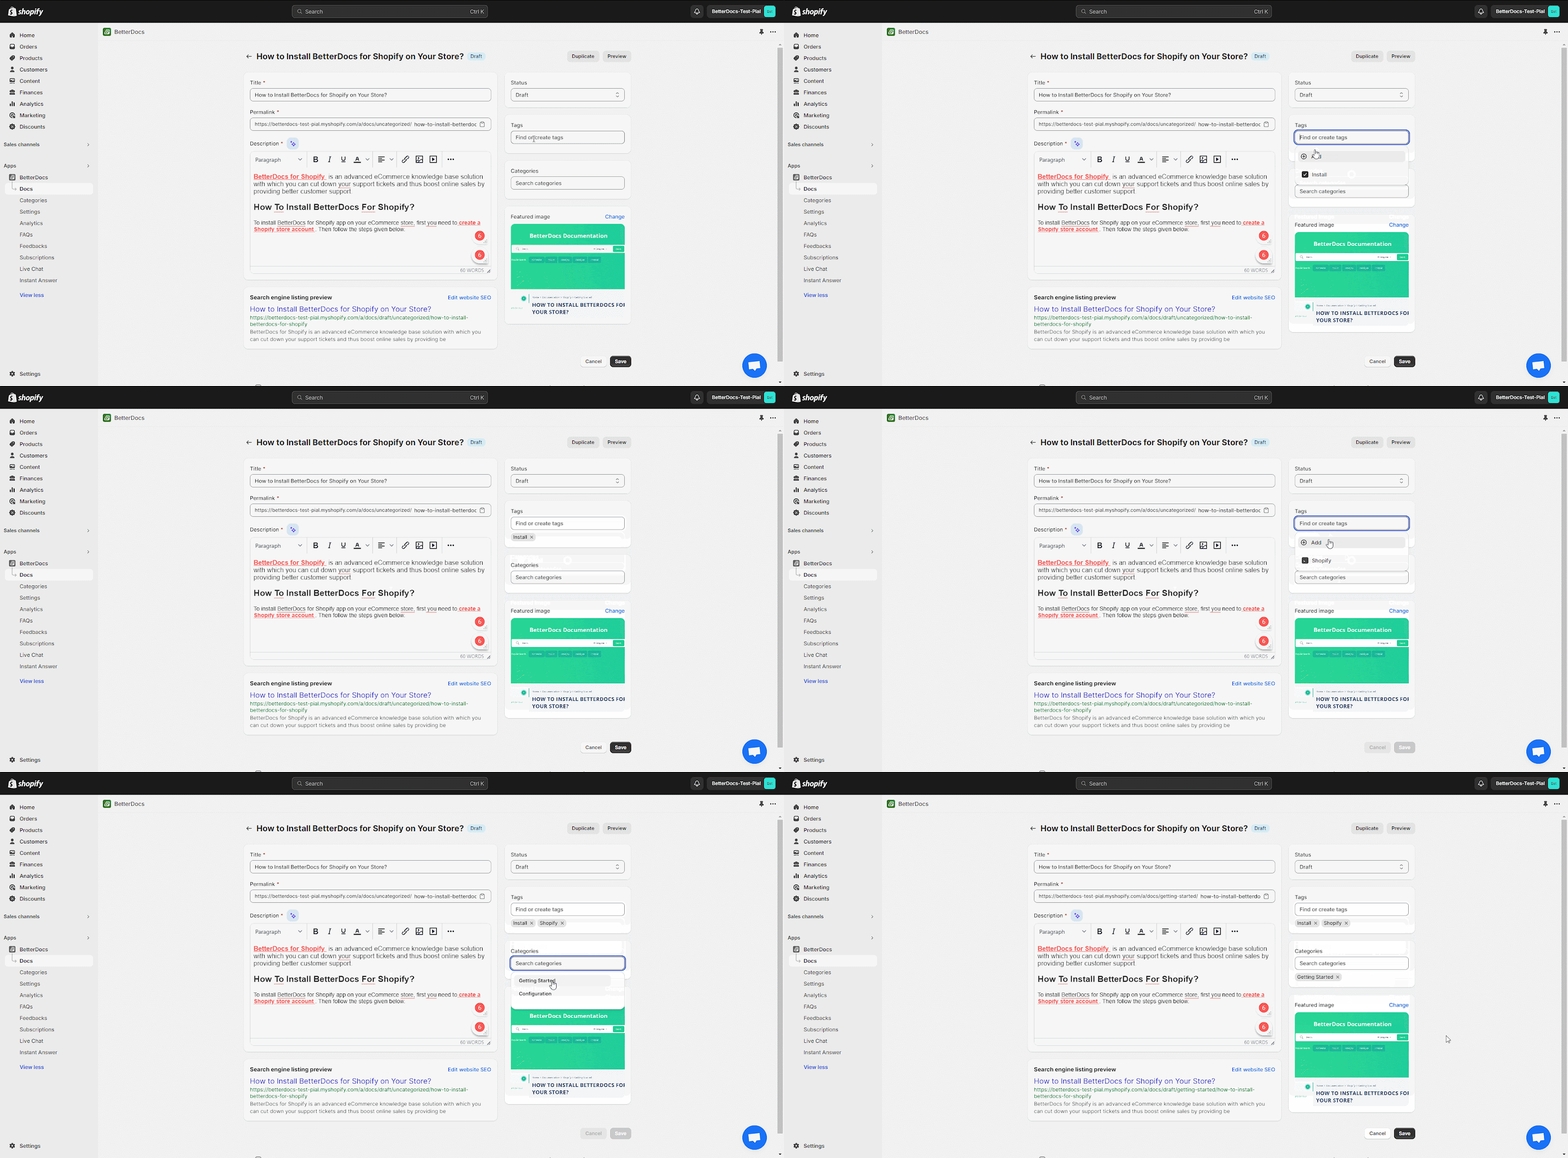
To organize your product documentation page better, set the Tags & Categories of your documentation. Add proper tags as needed. In the ‘Tags’ field, click on ‘+Add’ to add tags. Then select categories. Check out this documentation to learn how you can easily add categories, parent categories, and tags.
Step 6: Publish The Documentation #
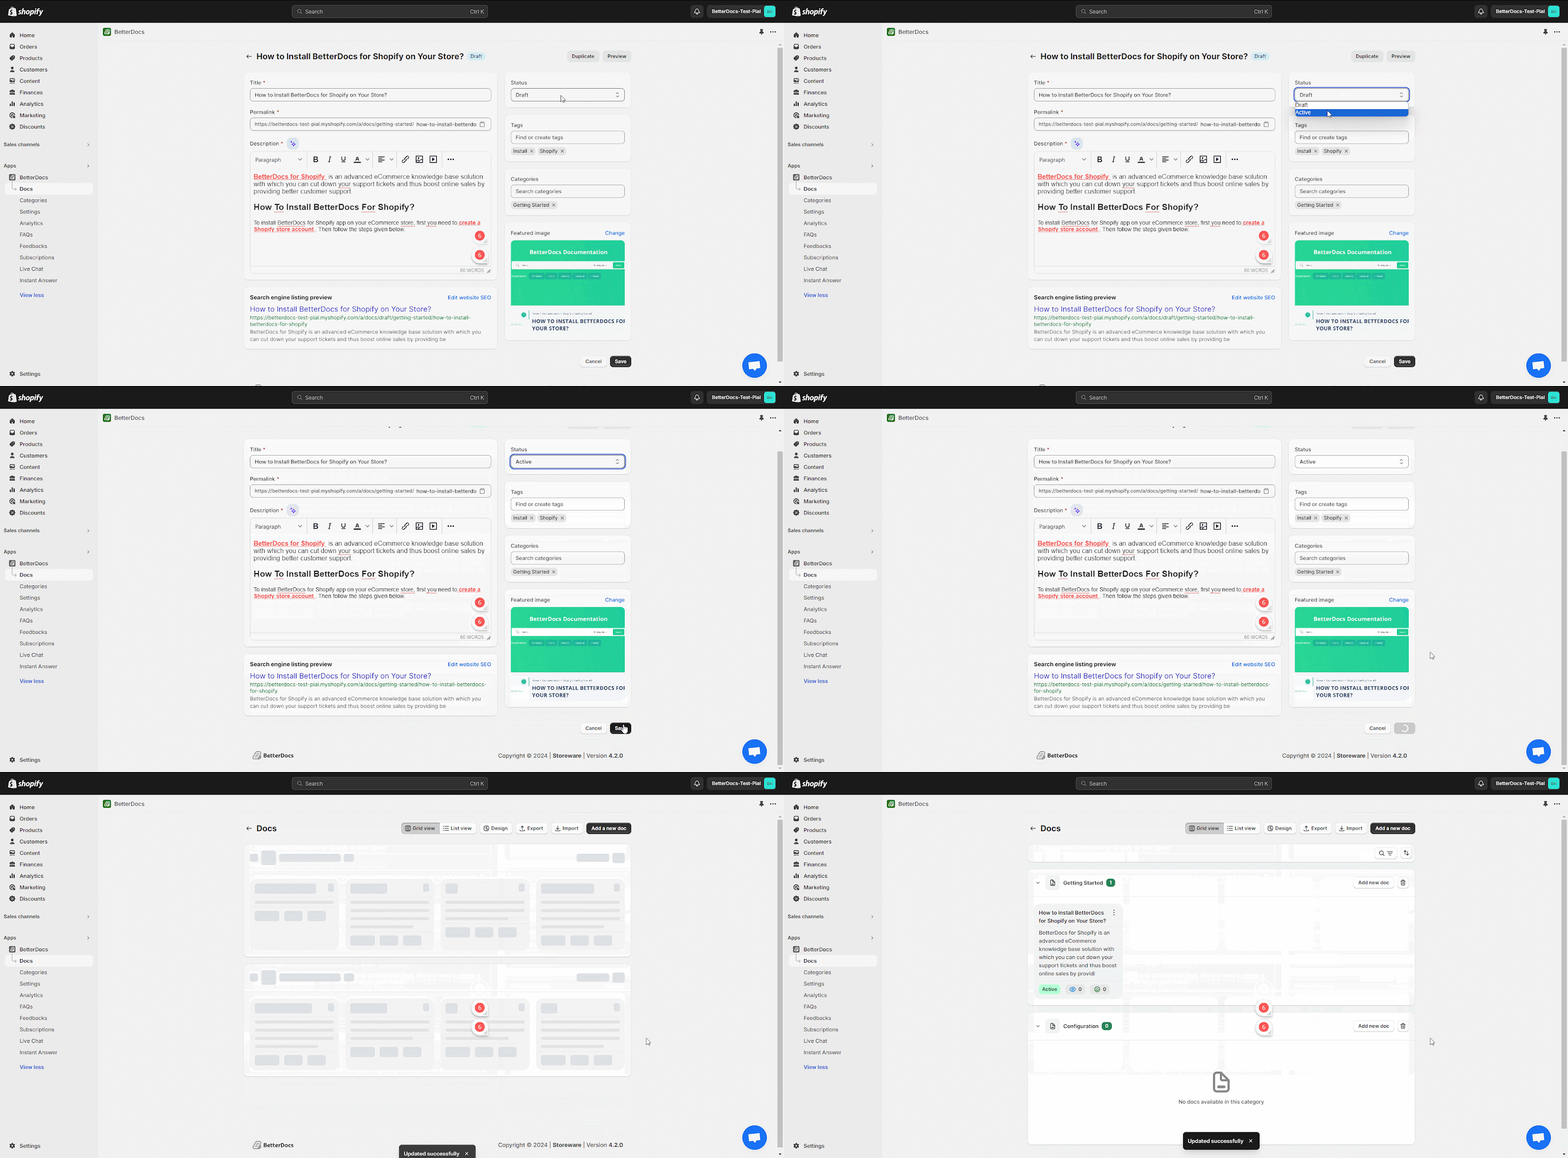
Finally, click on the ‘Status’ drop-down menu and click on the ‘Active’ option and then the ‘Save‘ button to publish and add the new document to your store’s documentation page. You can also keep the doc drafted by simply saving the documentation status ‘Draft’ from the drop-down menu.
The Final Outcome #
The image below shows how your new documentation will look to your store visitors and customers.

This is how easily you can add new documentation to your knowledge base on Shopify using BetterDocs.
Still, facing difficulties in creating and adding new documentation? Feel free to contact our dedicated support team.


