
Content Intelligence is an analytics layer inside BetterDocs Pro that turns the traffic, search and reader data your knowledge base already collects into a straightforward answer to one question: what should I fix next. Instead of scrolling through raw view counts and search logs, you open a screen that has already grouped, scored and ranked your content for you.
Notitie: Before you start, make sure you have BetterDocs Pro installed and activated on your WordPress website. Some steps in this guide also require the BetterDocs AI Chatbot add-on, and each Part says clearly where that applies.
Important: BetterDocs detects the AI Chatbot add-on automatically. It does not check your chatbot licence, whether the chatbot is turned on in its own settings, or whether it has ever synced content. If you deactivate the AI Chatbot add-on, every affected screen switches back to local mode the next time the page loads.
The Overview Tab #
De Overview tab is what you land on when you open BetterDocs → Content IQ, and it is meant to be your starting point rather than another module to work through. Instead of asking you to check four separate screens, it pulls one headline number from each module into a row of stat cards, then surfaces a single recommended action so you always know where to start.
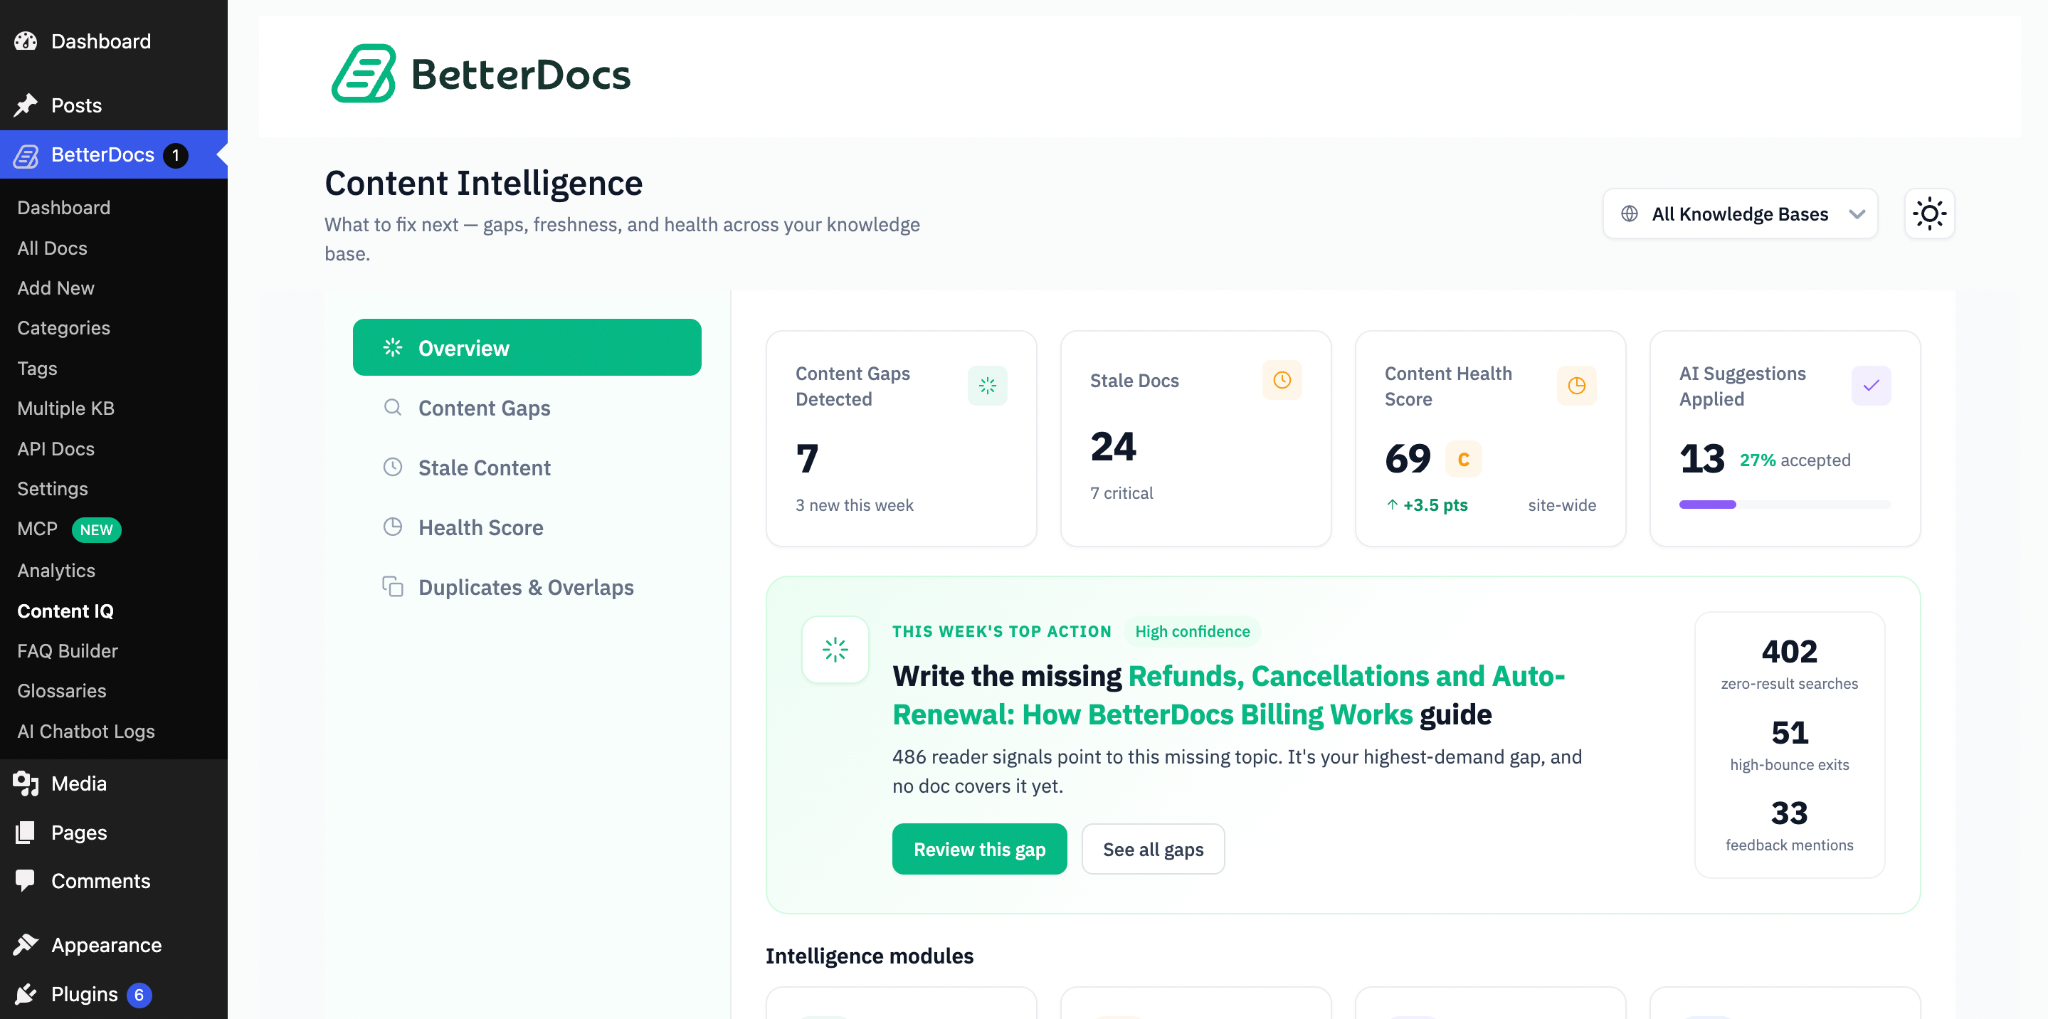
In the left hand sidebar, Content Intelligence lives under its own Content IQ menu item rather than nested inside Analytics, with Overview, Content Gaps, Stale Content, Health Score en Duplicates & Overlaps listed underneath it. All Knowledge Bases selector sits in the top right of the screen if your site runs Multiple KB, so you can scope every card and the top action to a single knowledge base when you need to.
Finding Content Gaps #
Content Gaps is the flagship module. A content gap is a topic your readers repeatedly search for that your knowledge base does not actually answer. BetterDocs clusters reader search queries into topics, checks whether any published article covers each topic and surfaces the uncovered ones ranked by how often readers looked for them.
Step 1: Open the Content Gaps Tab #
Ga naar BetterDocs → Analytics → Content Intelligence and click the Content Gaps tab. On a Pro only site you will see a grey Search analytics badge at the top of the screen, which tells you the local lexical engine is running. If the AI Chatbot add-on is active, that badge turns into a purple AI-detected badge and the semantic engine takes over instead.
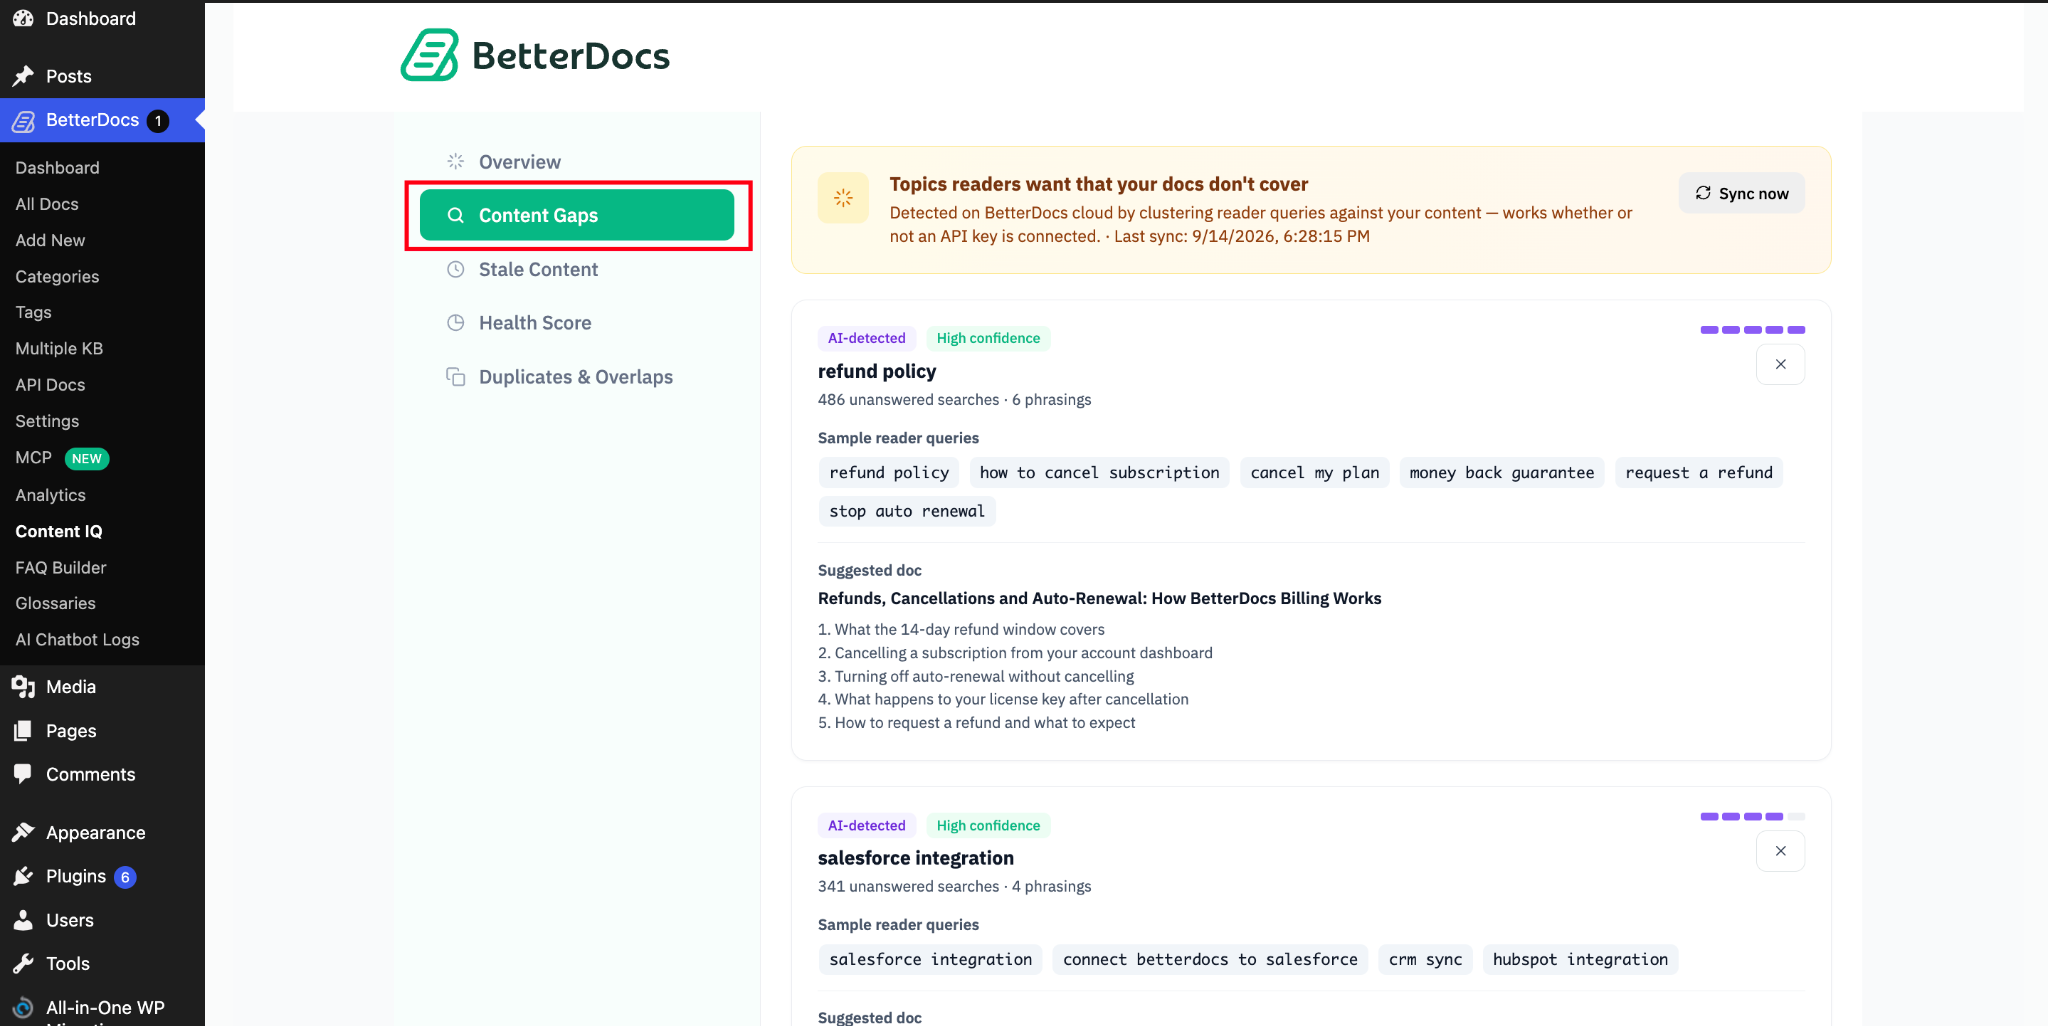
The badge on any individual gap row reflects how that specific row was originally found, not your site’s current mode. If you switch the AI Chatbot on or off after accepting some gaps, you can legitimately see a screen with a mix of grey and purple badges, and that is expected behaviour rather than a bug.
Confidence is High when a gap is both corroborated by multiple queries and in demand, Medium when only one of those is true, and Low when neither is.
Step 2: Draft a Title with AI #
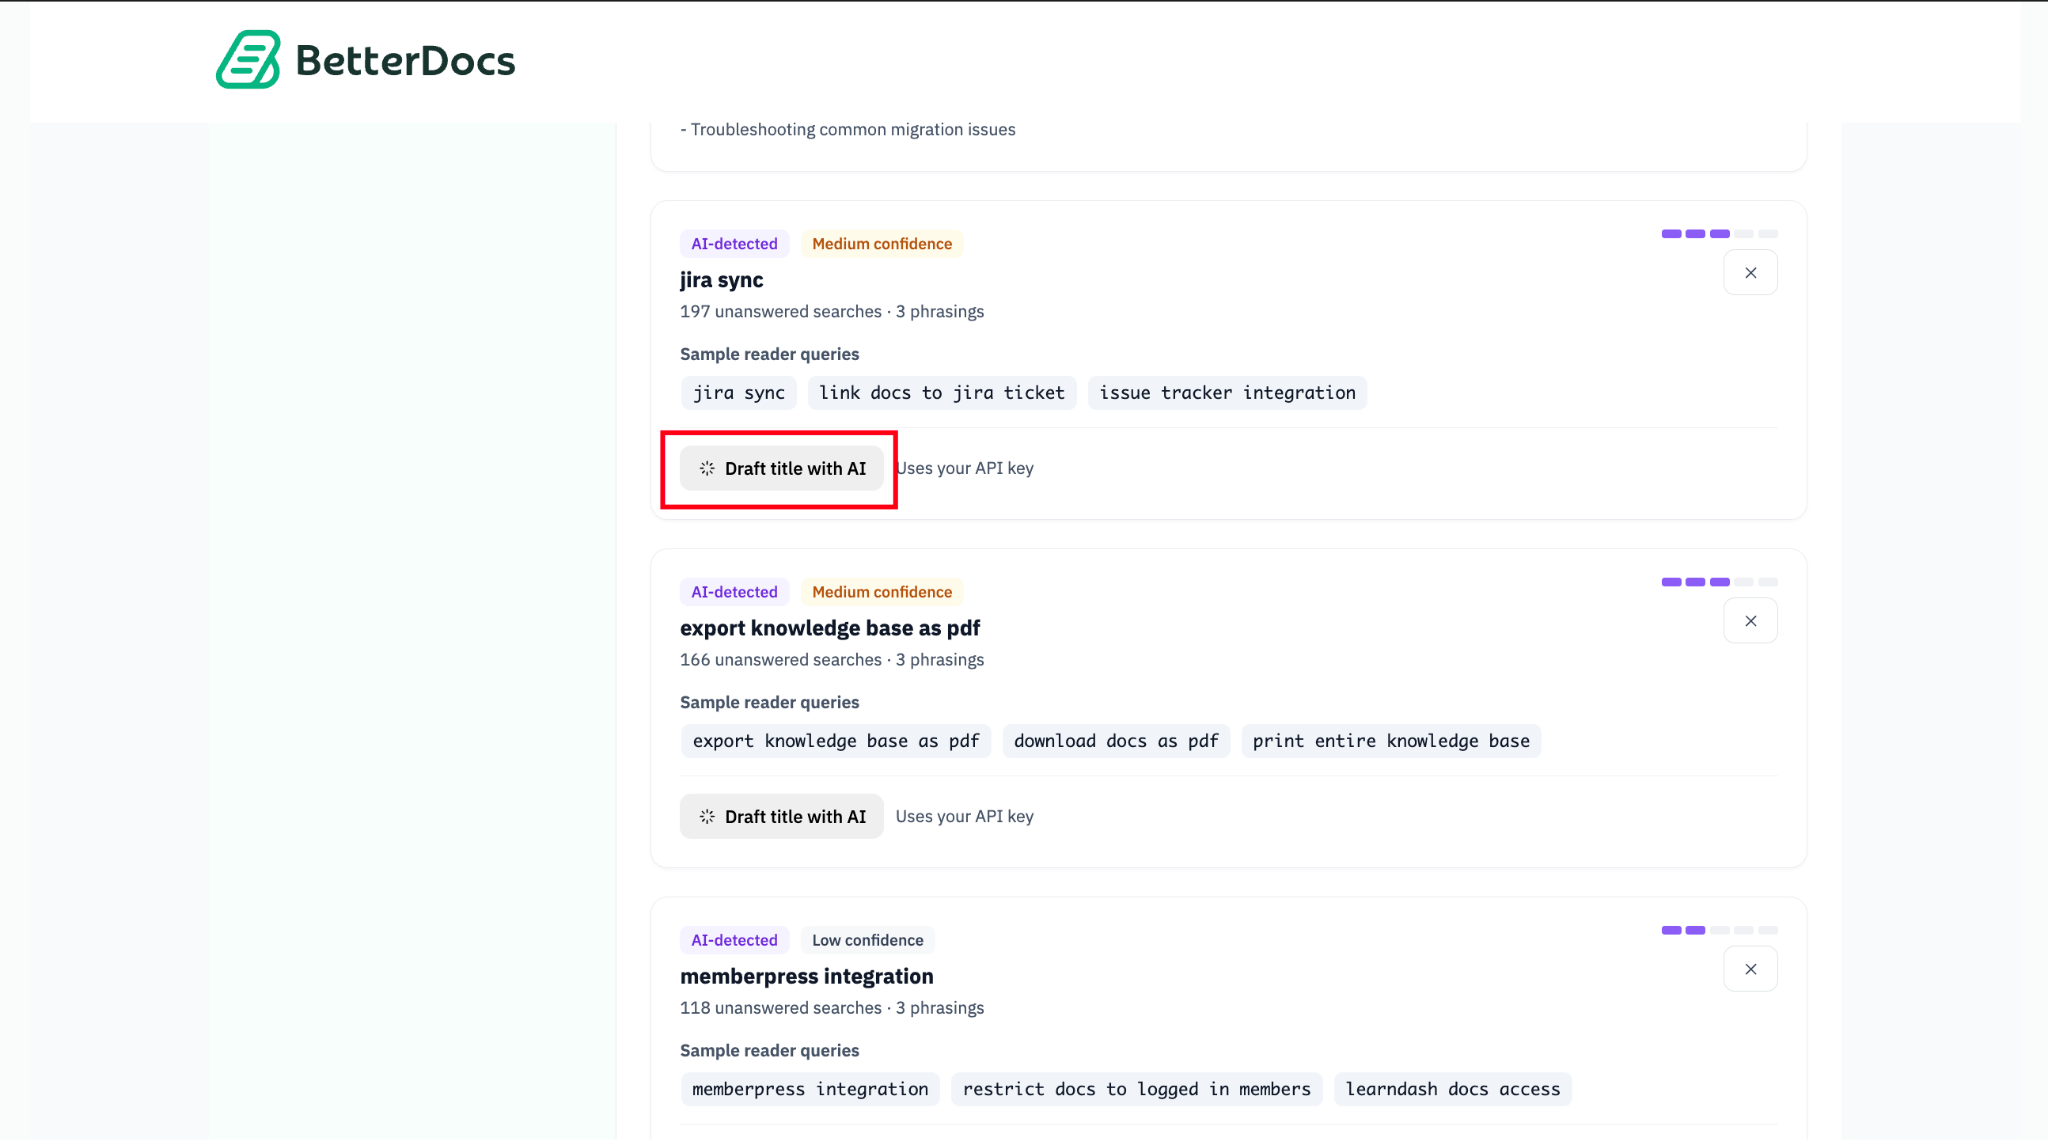
From any gap card you can generate a suggested article title with a Draft title with AI. This step is generative rather than detection, so it always needs an API key. On a Pro only site you supply any AI key of your own. Once the AI Chatbot add-on is active, this action reuses the chatbot’s existing key automatically, so there is nothing extra to configure.
Reviewing Stale Content #
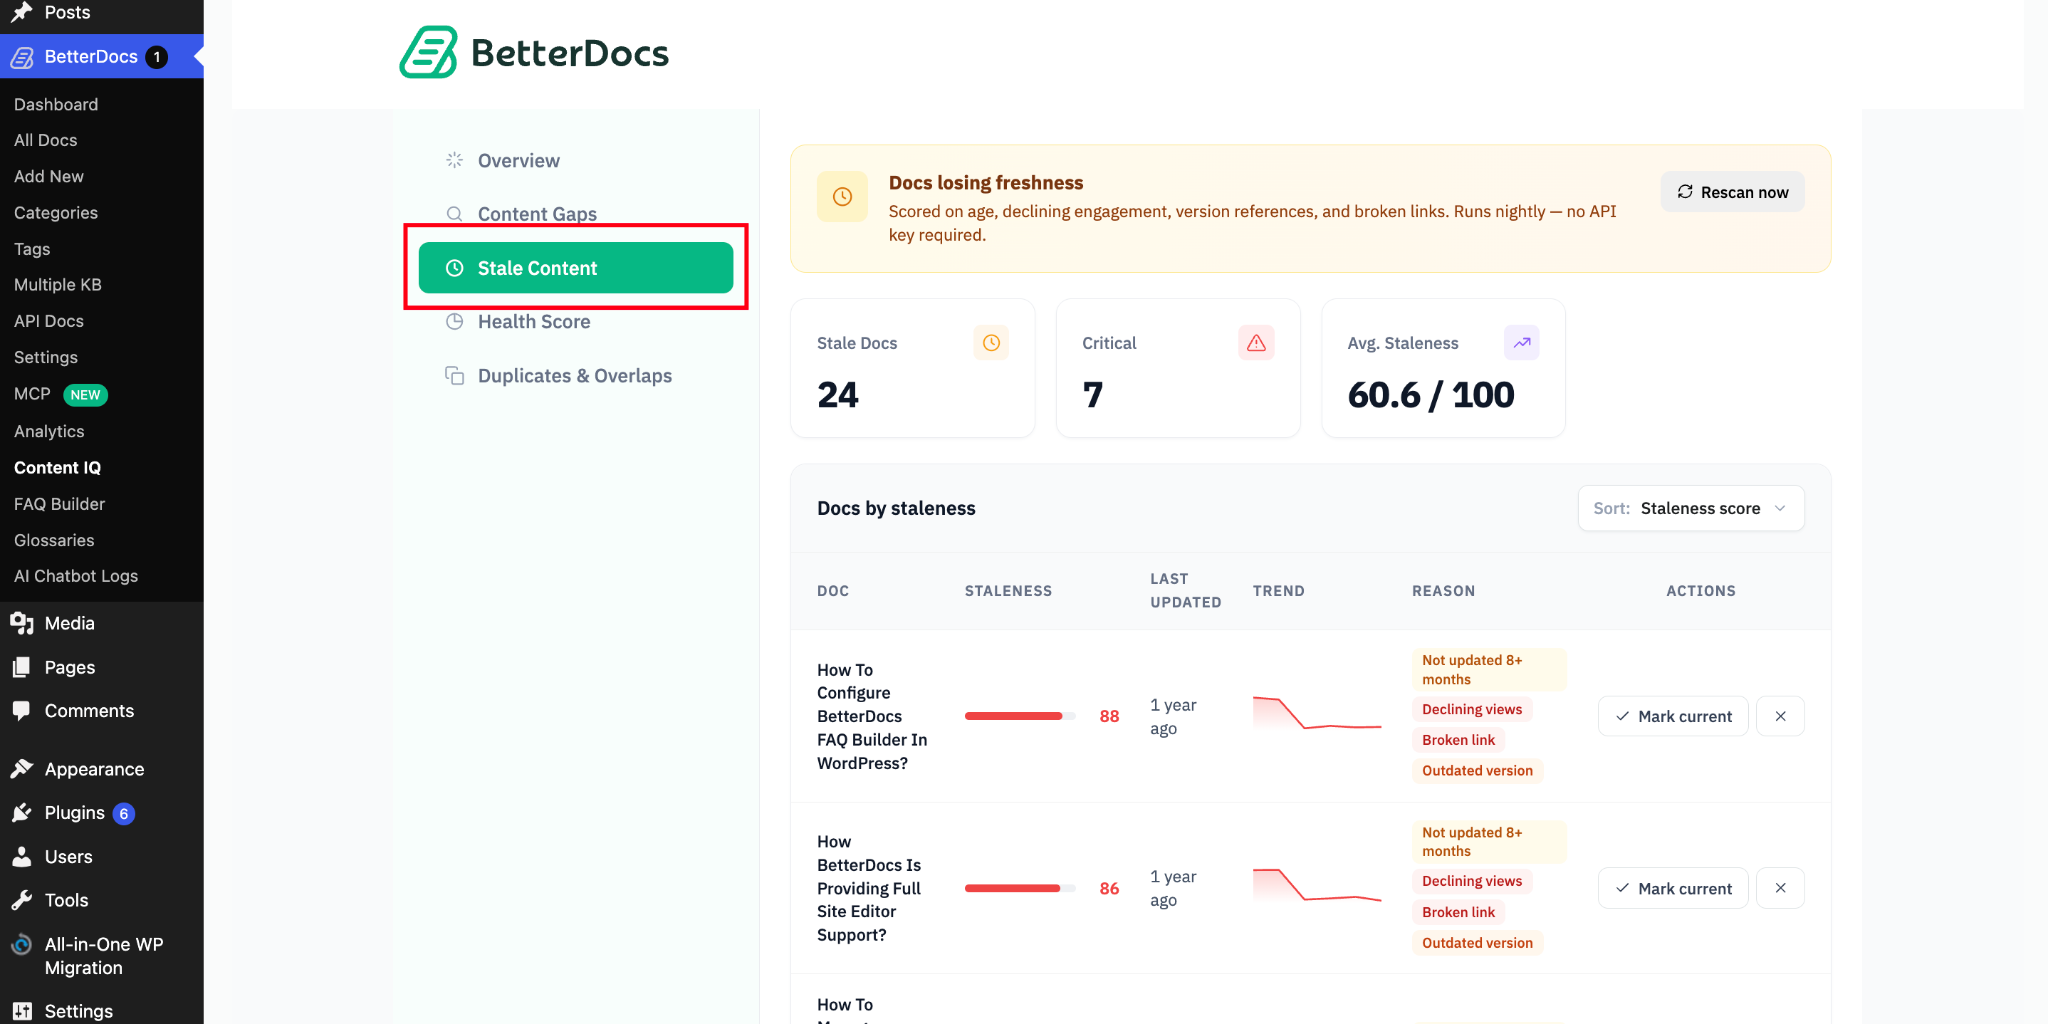
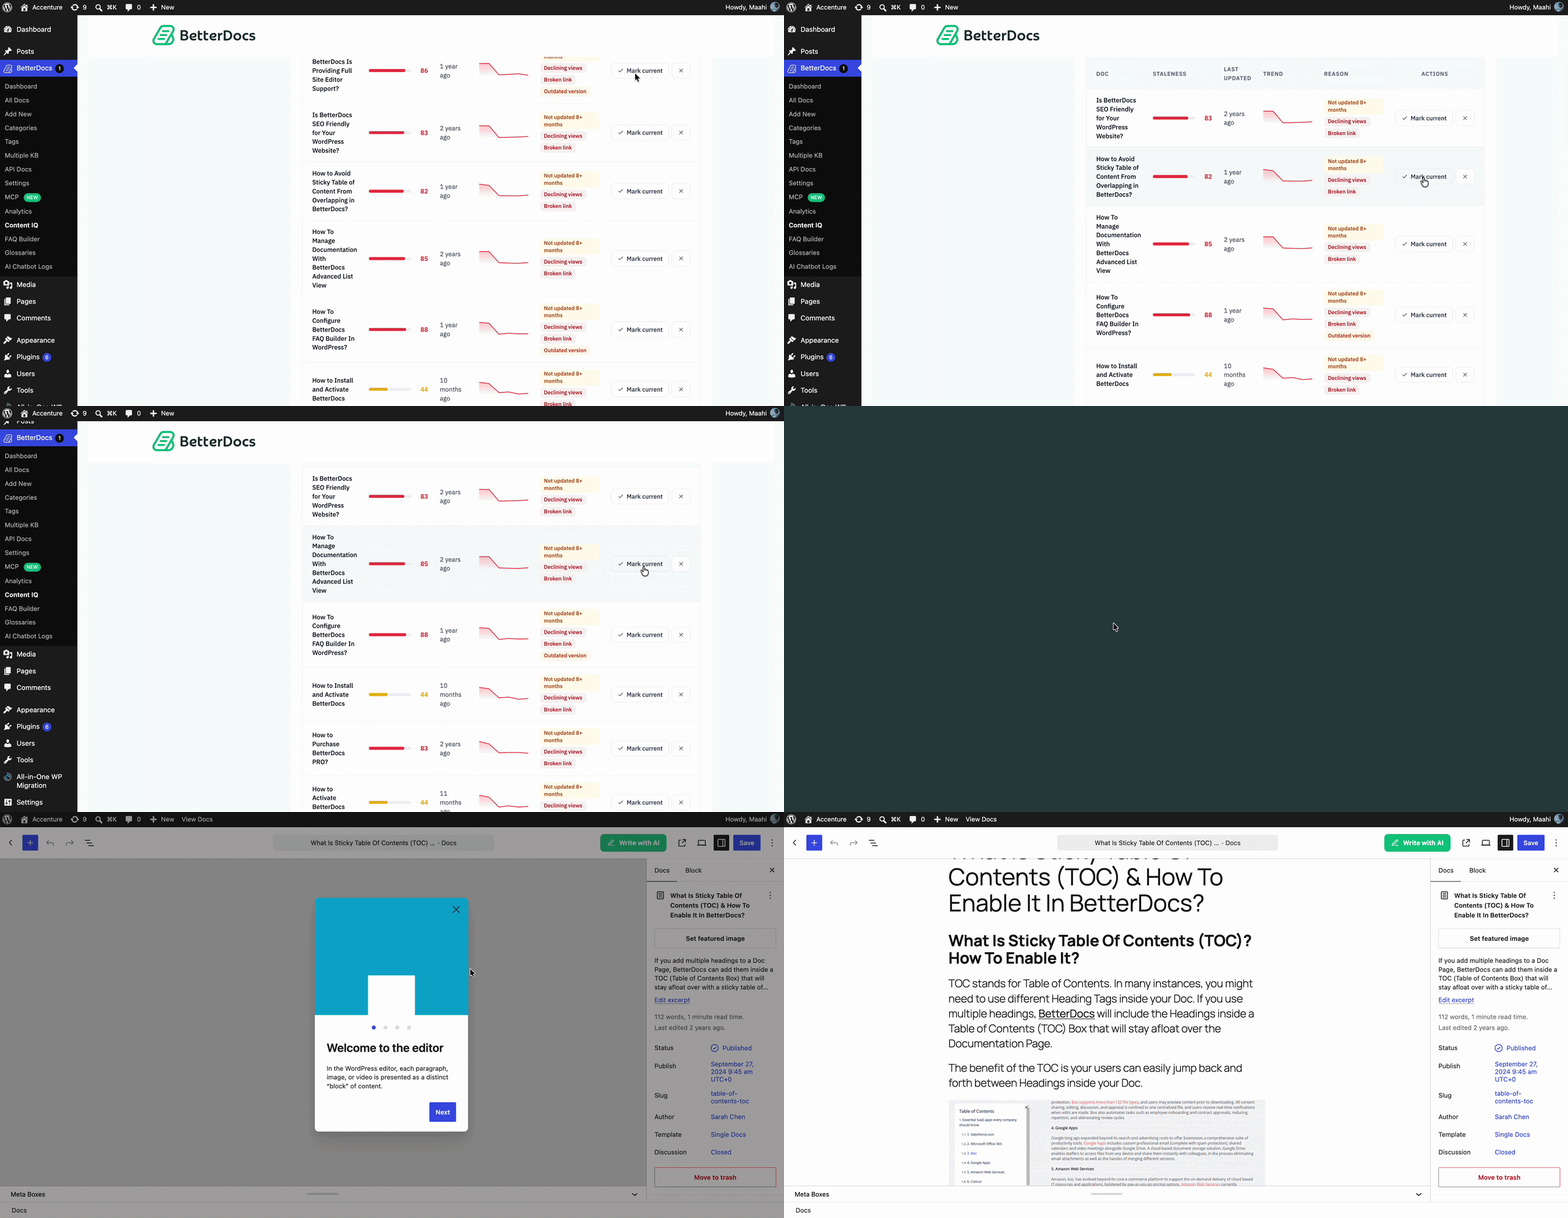
Stale Content flags articles that are decaying: getting old, losing traffic, collecting unhappy reactions or accumulating broken links. Unlike Content Gaps, this module is entirely rule based arithmetic that runs locally. There is no LLM call, no API key and no network request involved, and the results are byte for byte identical whether or not the AI Chatbot add-on is installed.
Step 1: Open the Stale Content tab #
Click the Stale Content tab inside Content Intelligence. A recurring daily job scores every published article and stores the ones that cross a staleness threshold. The very first pass is scheduled one hour after you activate the feature, and on larger knowledge bases the scanner works through your documents in batches of 25 rather than all at once, so it can take a little while for the first full list to appear.
Step 2: Read the Staleness Score #
Each article accumulates penalty points across six signals and an article is only reported as stale once its total score reaches 30. A higher score means more stale. The table below shows what each signal contributes and when it stops counting.
| Signal | Max points | What it needs to trigger |
|---|---|---|
| Age | 40 | Zero for the first 3 months, then ramps up, capping at 18 months |
| View decline | 25 | At least 5 prior views, then a drop of 30 percent or more in the last 30 days |
| Unhappy reactions | 15 | At least 3 reactions in the last 30 days with a rising sad ratio |
| Broken links | 10 | 5 points per broken link, capping at 2 links |
| AI fetch decline | 10 | At least 5 prior AI crawler fetches, then a 30 day drop |
| Outdated version | 8 | Article mentions an older product version and never the current one |
Notitie: Unhappy reactions and AI fetch decline add to the score but do not display a reason badge, so an article can show an empty Reason cell even while those two signals are what pushed it over the threshold.
Step 3: Act on a Stale Article #
From a stale row you can jump straight to the editor to refresh the content, mark the article as current if it is actually fine as is, or dismiss the flag. None of these actions happen automatically. Marking an article currently resets its age penalty, while editing and republishing naturally clears most of the other signals over the following days as fresh view and reaction data comes in.
Checking the Content Health Score #
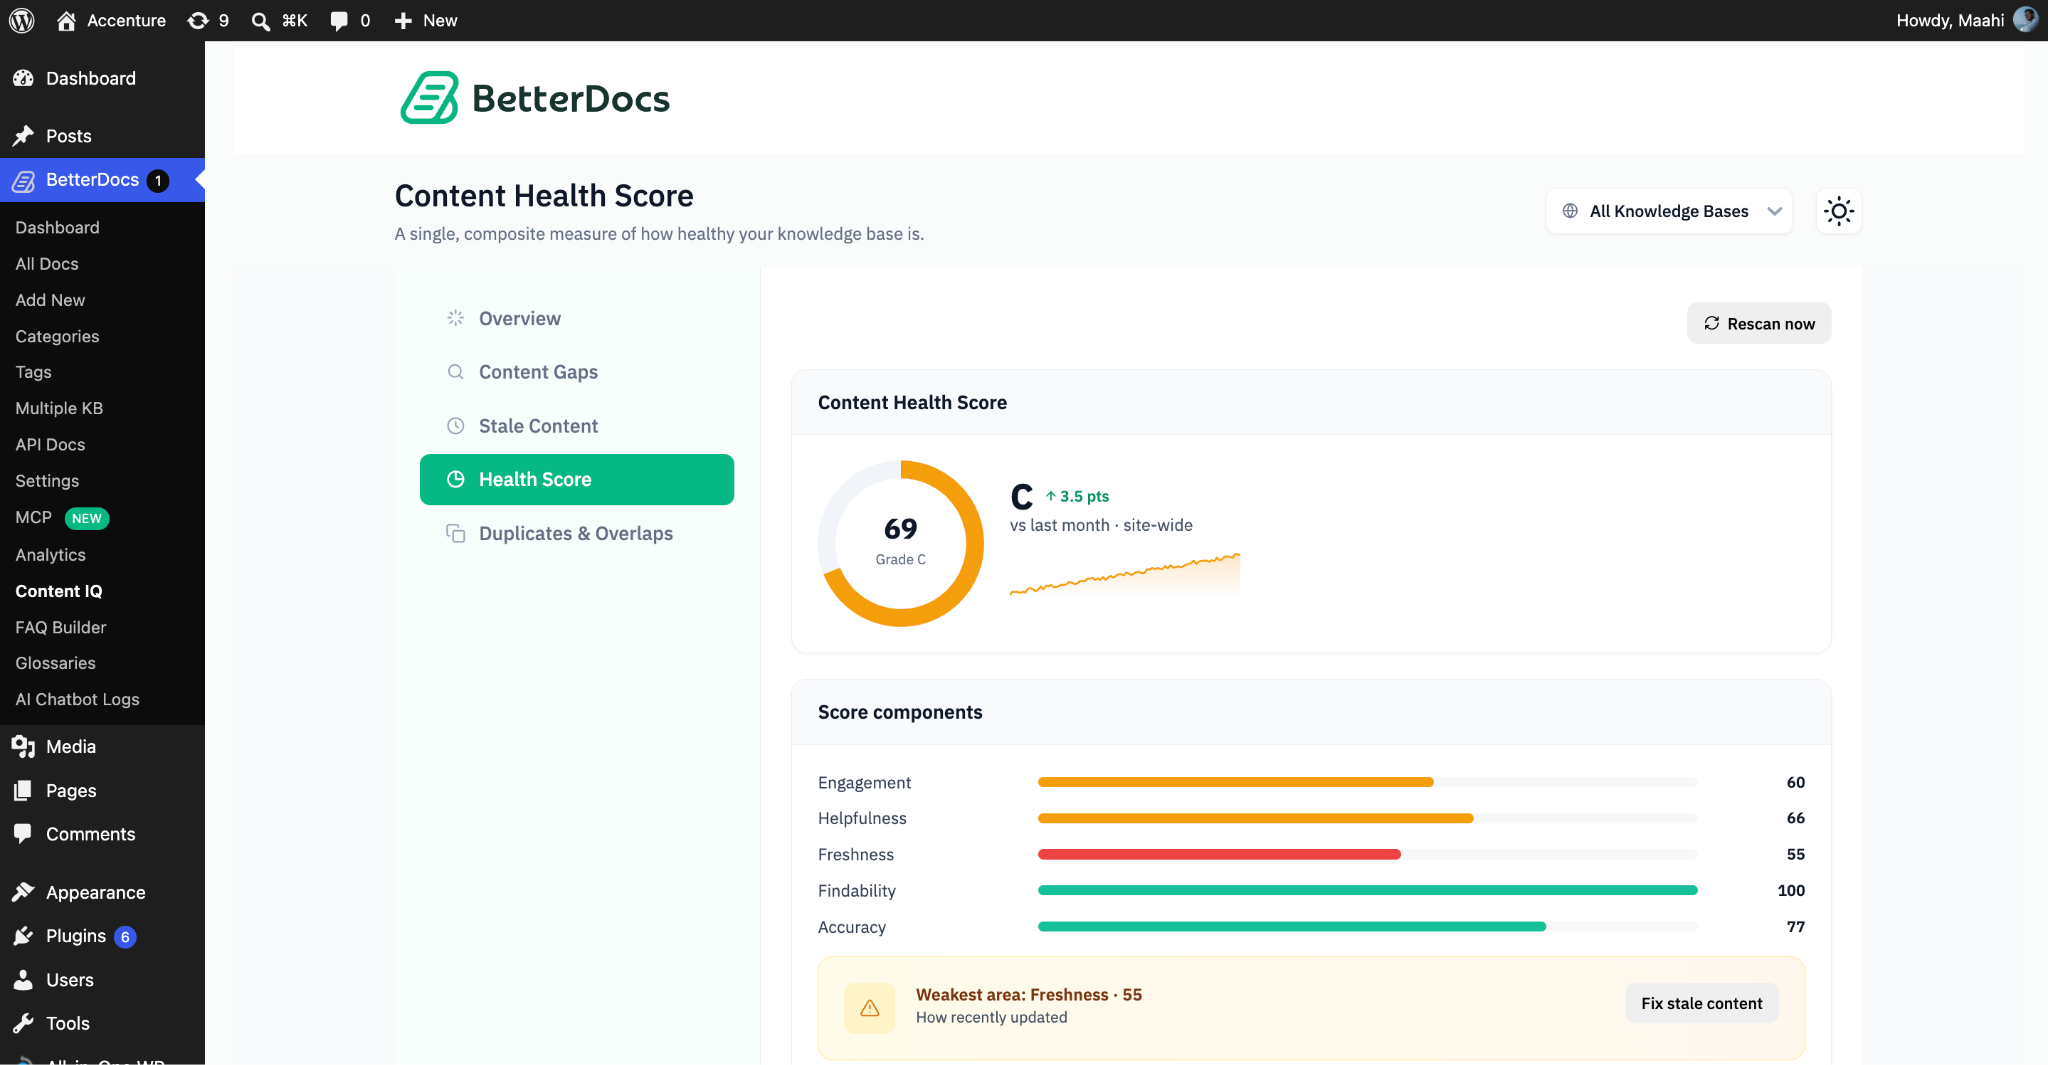
The Content Health Score rates every published article from 0 to 100 and rolls those individual scores into a site level grade. Like Stale Content, this module is entirely local SQL arithmetic. There is no LLM involved and the AI Chatbot add-on has no effect on the numbers you see here.
Step 1: Open the Health Score tab #
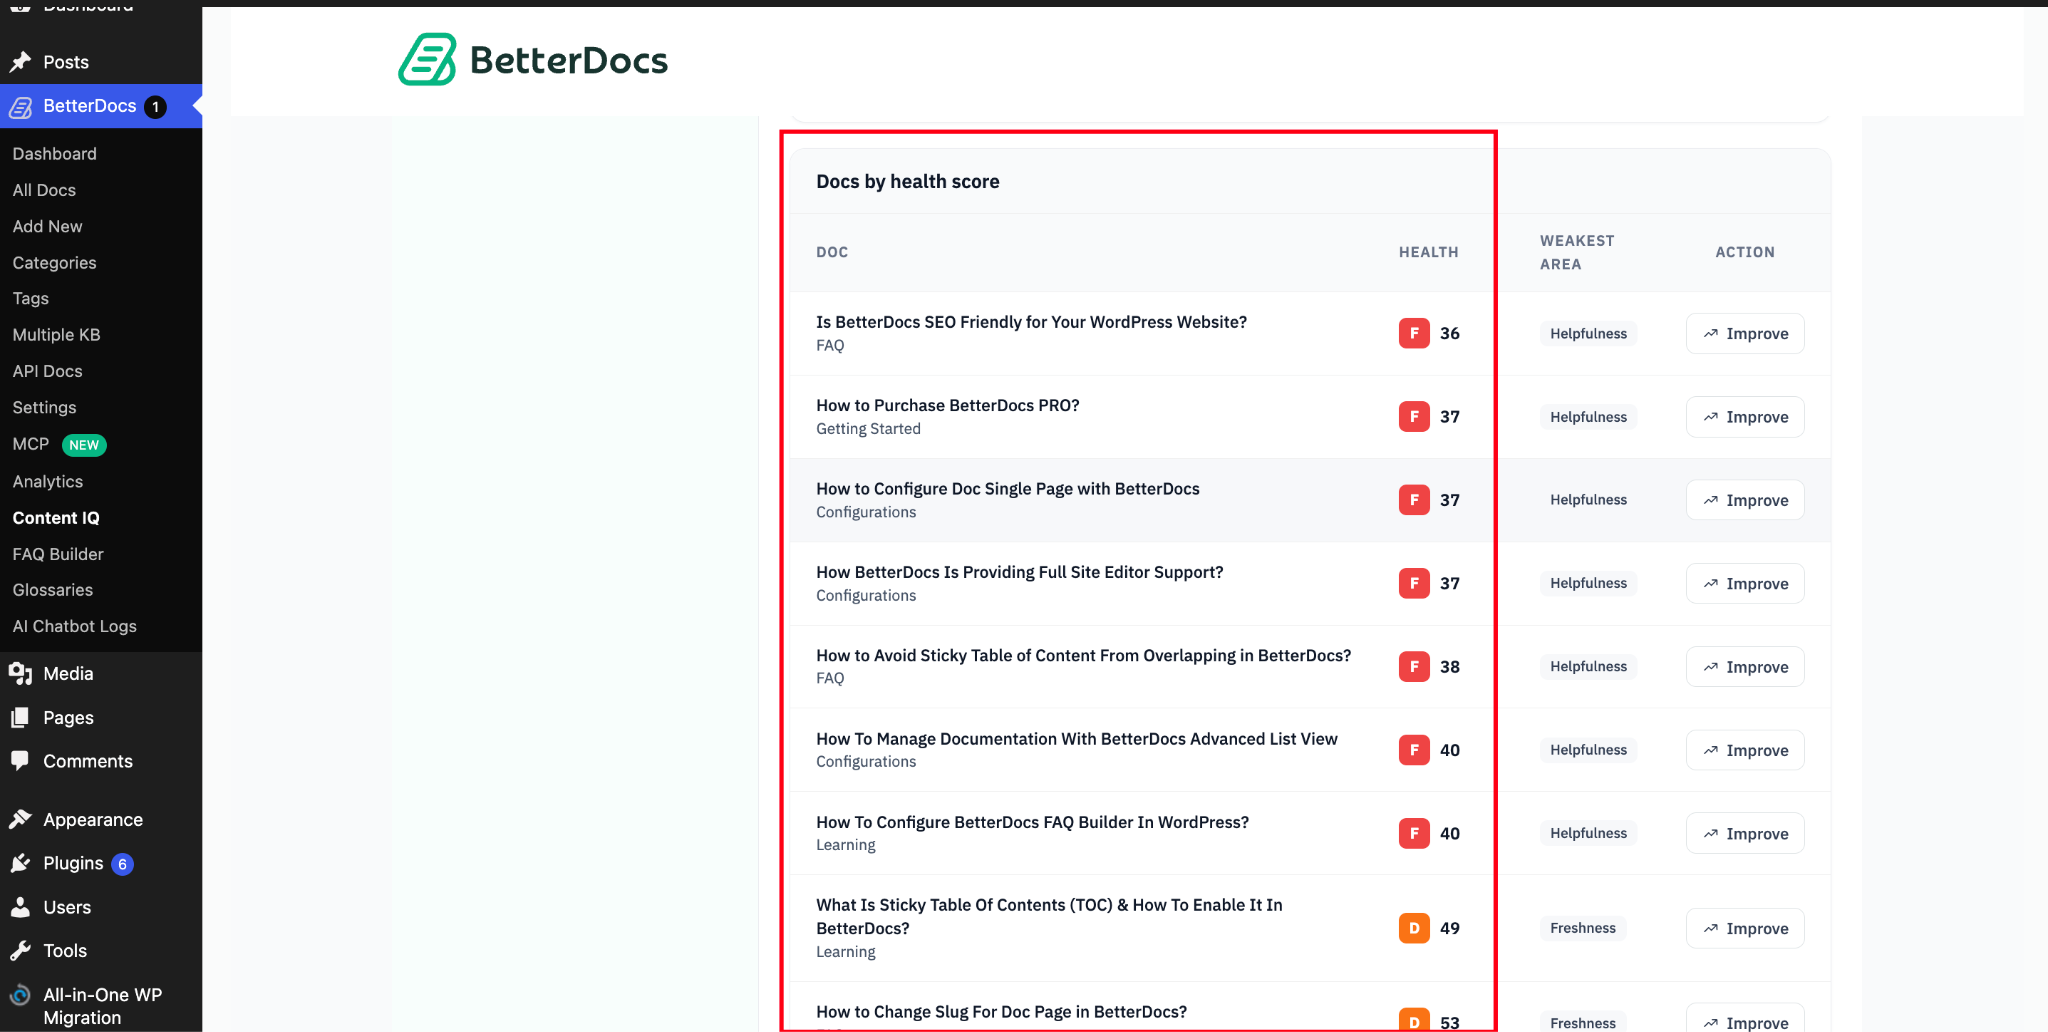
Click the Health Score tab to see every published article listed with its current score and letter grade. A site level snapshot is appended once a day and BetterDocs keeps the last 120 entries, which is enough history to plot a meaningful trend line for your knowledge base.
Step 2: Read an article’s score #
Health is built from five weighted components. Together they explain why an article scores the way it does.
| Component | Weight | What it measures |
|---|---|---|
| Engagement | 25% | Half average scroll depth, half how often readers scroll past 90 percent |
| Helpfulness | 25% | Happy reactions as a share of happy plus sad reactions |
| Freshness | 20% | Starts at 100 and decays 8 points every 30 days since the article was last modified |
| Findability | 15% | How views compare against a benchmark of 50 views per 30 days |
| Accuracy | 15% | Reuses the AI Article Quality Score if one exists, minus a broken link penalty |
| Grade | A | B | C | D | F |
|---|---|---|---|---|---|
| Score | 90 or higher | 75 or higher | 60 or higher | 40 or higher | Below 40 |
Working with Duplicates And Overlaps #
Duplicates and Overlaps finds pairs of articles that cover the same ground. This is the one module that genuinely cannot run without the BetterDocs AI Chatbot add-on, because it works directly on the document embeddings the chatbot already creates when it indexes your knowledge base for answering questions.
Important: Duplicates and Overlaps have exactly one similarity threshold and one flat results list. There is no separate duplicate versus overlap tier. Any pair you see on this screen has already cleared a 92 percent chunk level similarity match.
Step 1: Open the Duplicates And Overlaps tab #
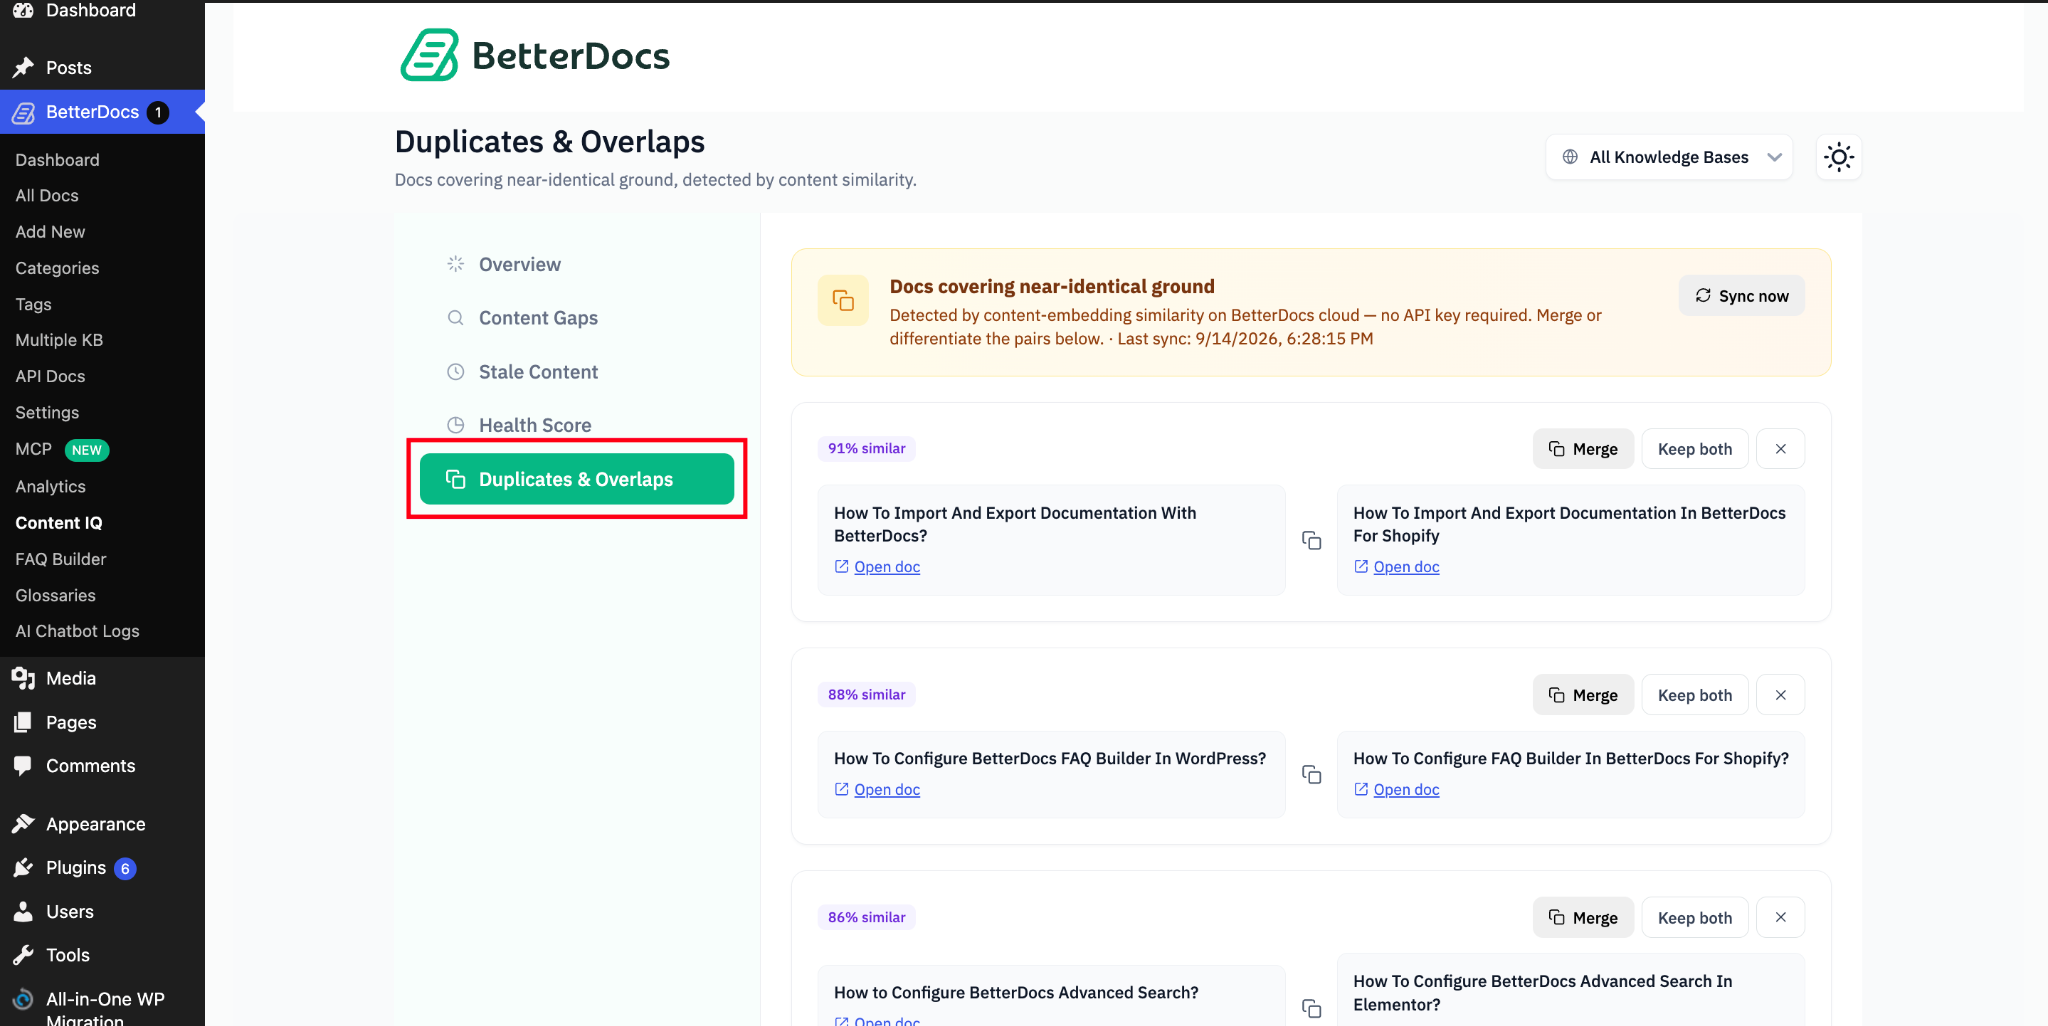
Click the Duplicates & Overlaps tab. If the AI Chatbot add-on is not active, you will see a locked preview panel telling you the module needs BetterDocs AI Chatbot, with a call to action that leads to the AI Chatbot purchase page rather than a generic upgrade page, since you already have Pro. There is no leftover data shown here from any earlier period when the chatbot happened to be installed.
Step 2: Run a Sync #
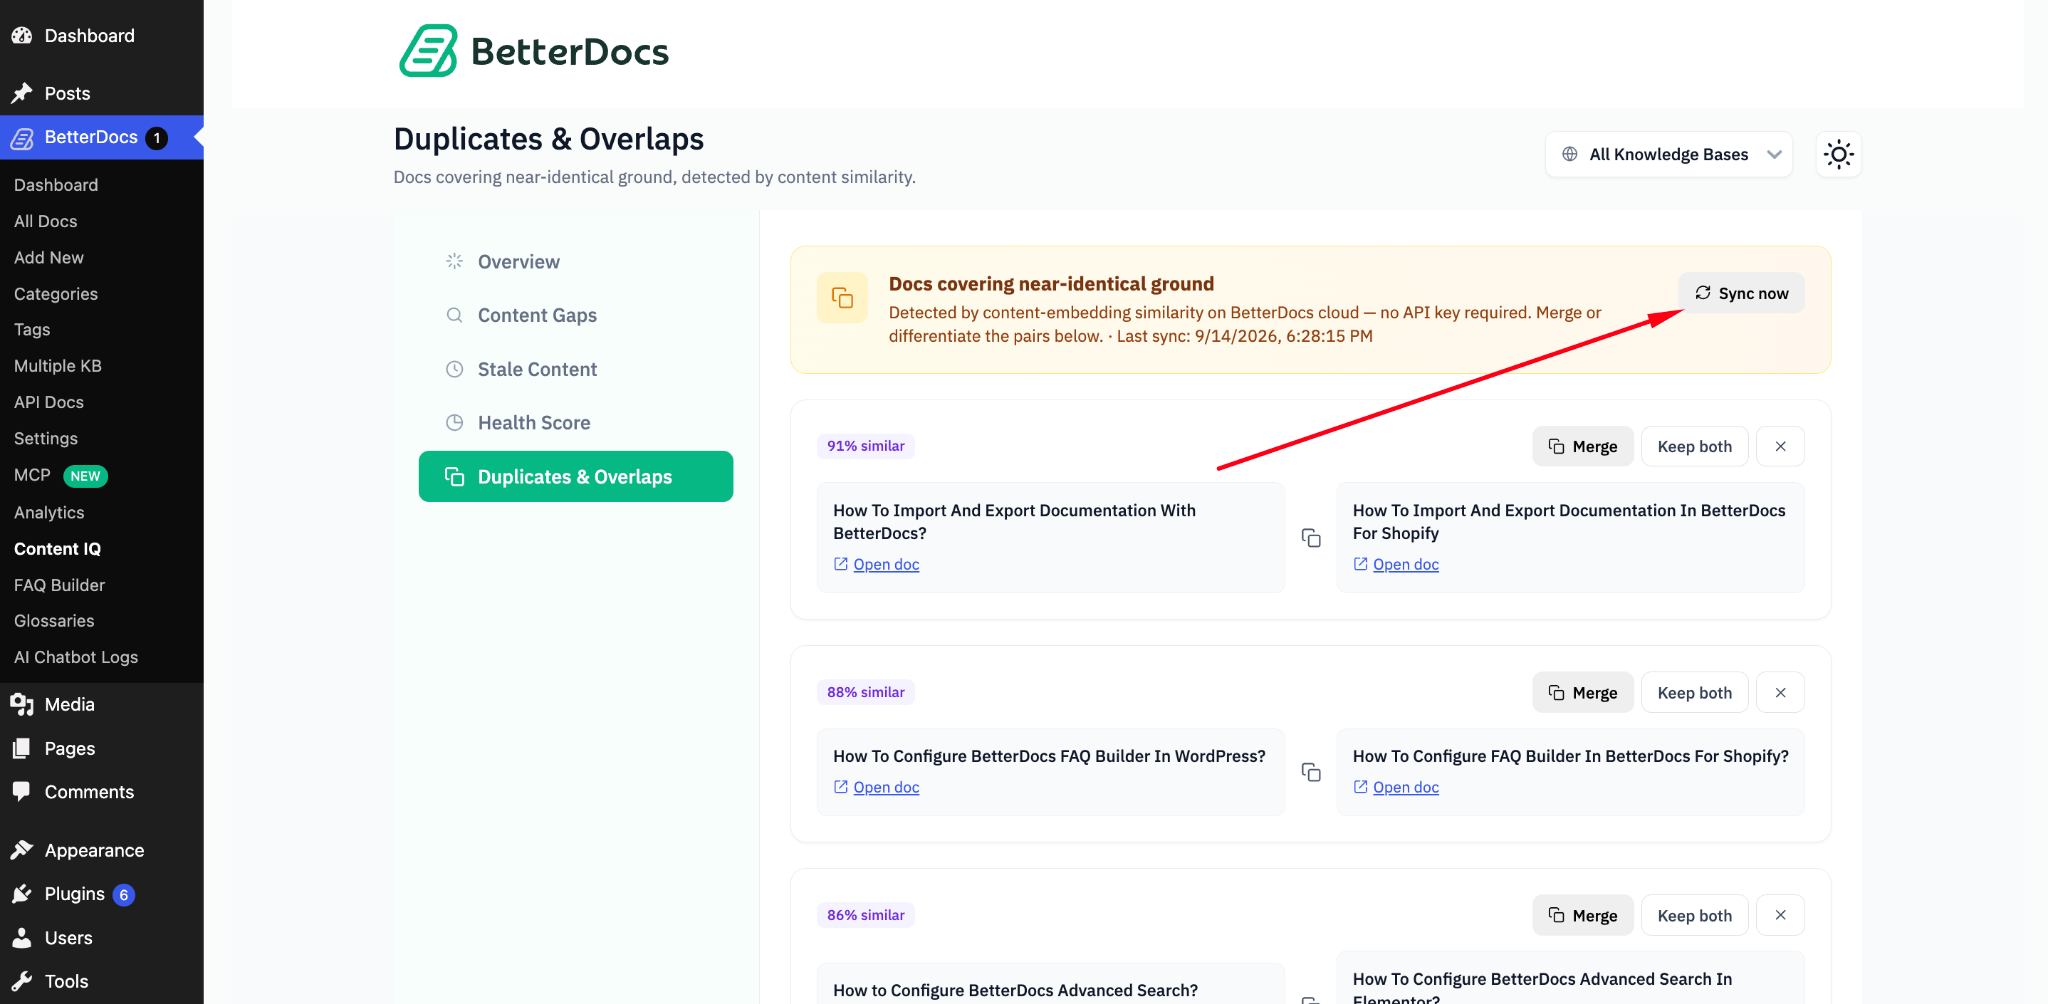
Once the AI Chatbot add-on is active and has synced your content, click Sync now to start a duplicate sweep. BetterDocs collects every stored embedding for your site, averages each article’s chunks into a single representative vector and discards any pair scoring below 80 percent similarity immediately. Surviving pairs are then compared chunk by chunk, and a pair is only reported if its single strongest chunk match reaches 92 percent or higher.
This two stage design catches the common real world case where one section of a long article duplicates another article entirely, even though the two articles read differently overall. Detection itself is pure vector math over data that already exists, so it costs nothing per run and needs no API key of its own.
Notitie: Analysis is rate limited to one run per domain every 24 hours. Pressing Sync now a second time within that window will not trigger a fresh analysis, so plan your review sessions around that limit rather than repeatedly resyncing to chase new results.
Step 3: Review a Duplicate Pair #
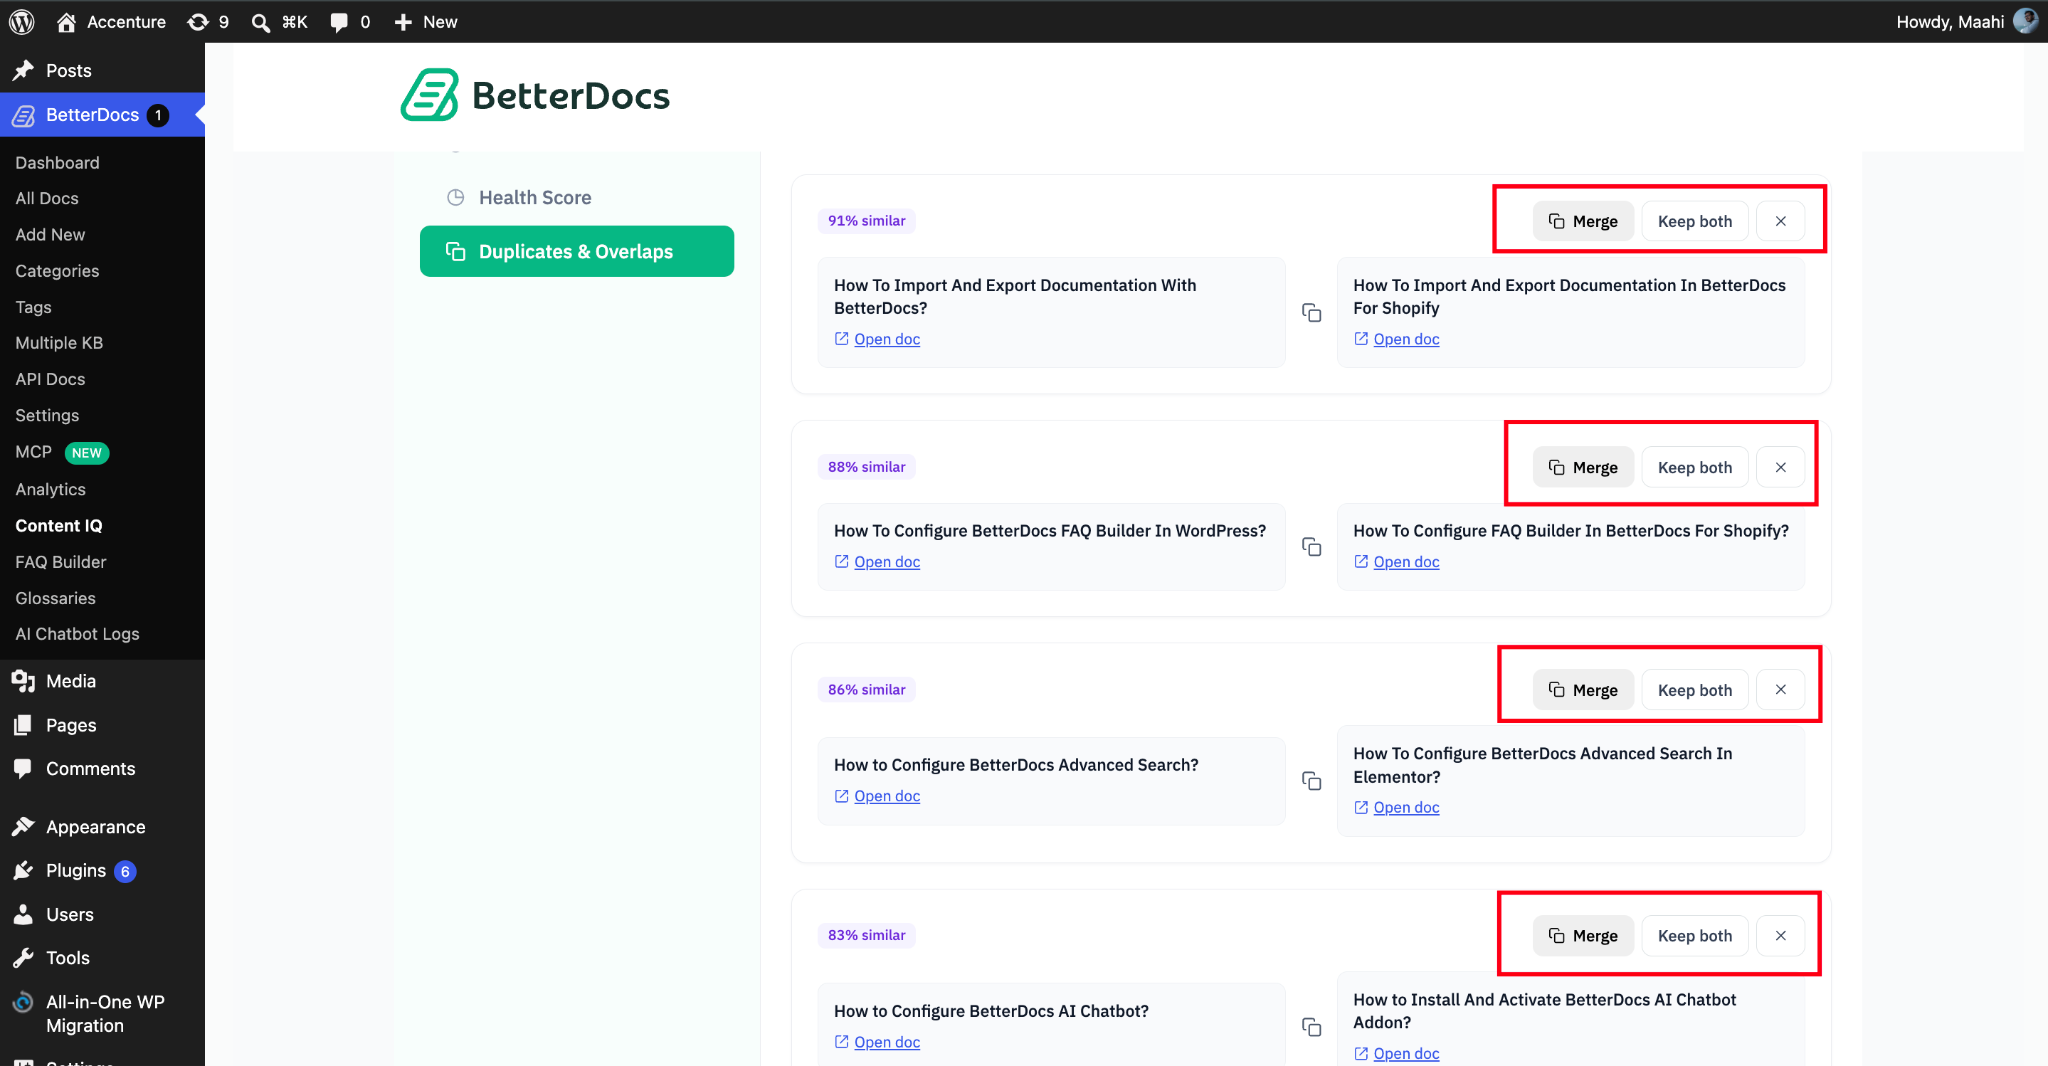
Each pair card shows a similarity badge, both article titles with direct edit links, and three actions: Merge, Keep both en dismiss. All three only change that row’s status inside Content Intelligence. No article is ever automatically edited, merged or deleted on your behalf, so it is always safe to review these pairs without worrying about accidental content loss.
Getting stuck or facing issues? Feel free to contact our support team voor verdere assistentie.