
BetterDocs PRO allows you to keep track of how your knowledge base is performing. With its ‘Advanced Analytics’ feature, you can easily check how many users have viewed, reacted, and even see which search terms have been used the most for your documentation. It comes with an excellent graphical interface that lets you check the feedback you have received in a statistical format.
Nota: To use this ‘Analytics’ feature, you need to have the BetterDocs Pro version installed & activated on your WordPress dashboard.
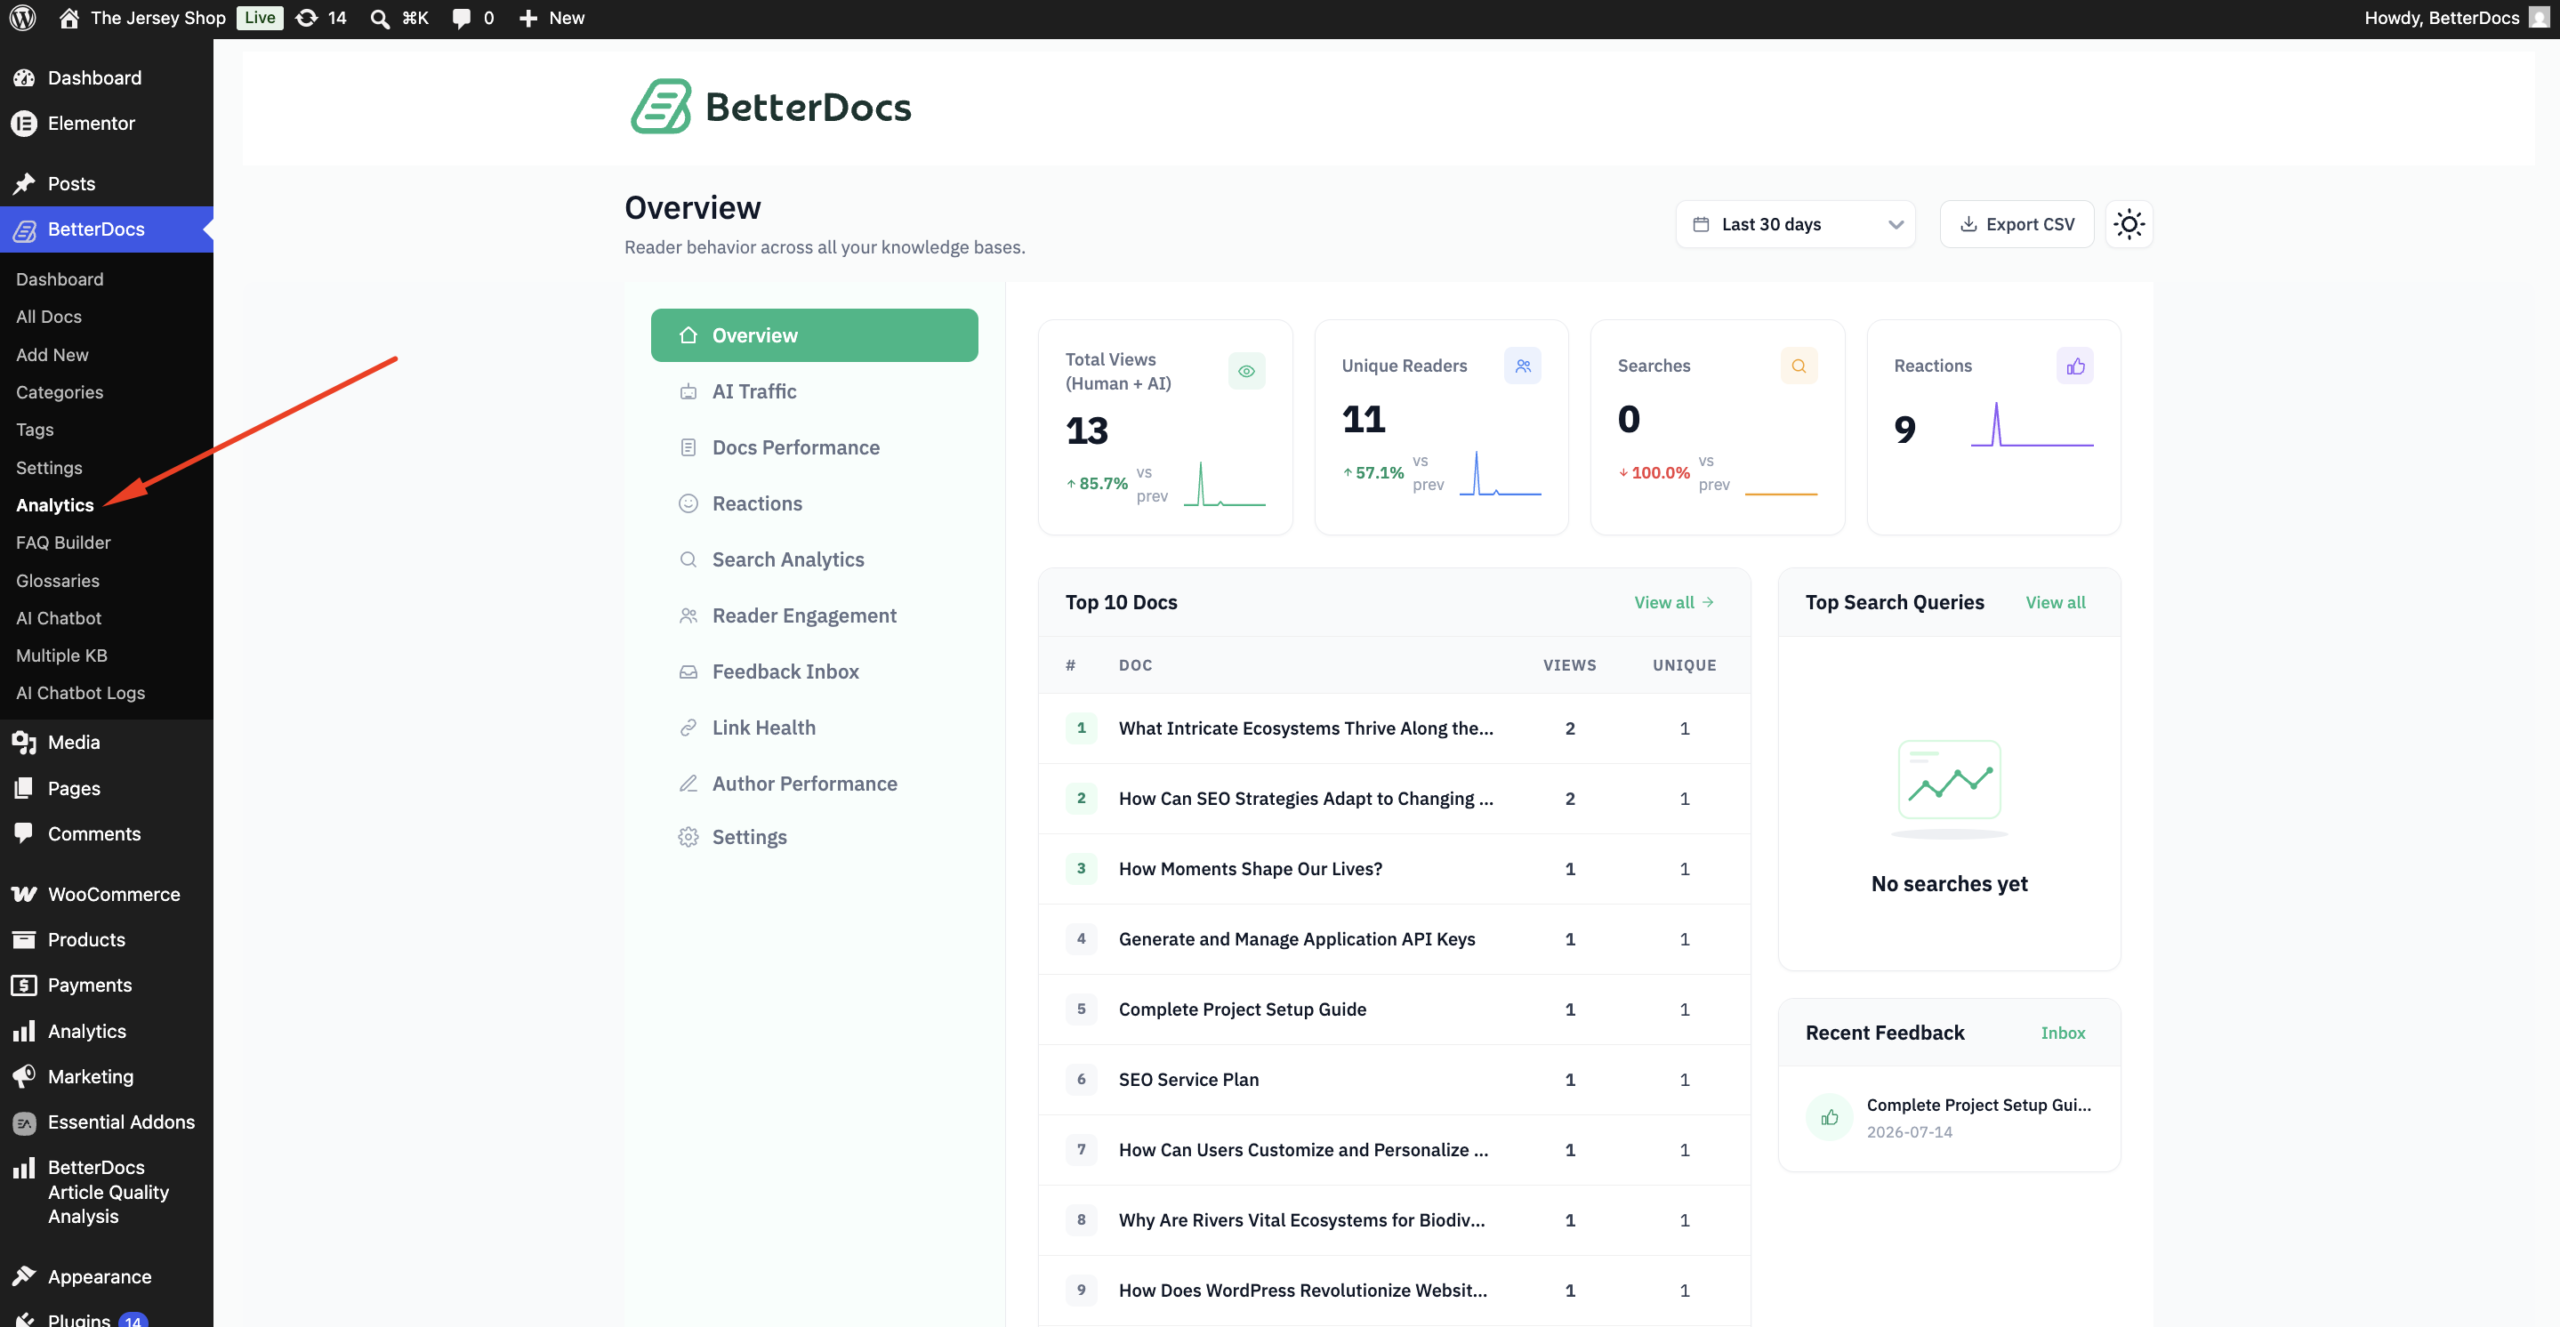
Step 1: Navigate to BetterDocs Analytics #
To explore all the settings of BetterDocs ‘analitica,’ navigate to ‘BetterDocs→Analytics’ from the WordPress dashboard. After clicking on the ‘Analytics’ tab, you will get all the available options to track the performance of your documentation properly.
Step 2: Select the Analytics Overview Tab #
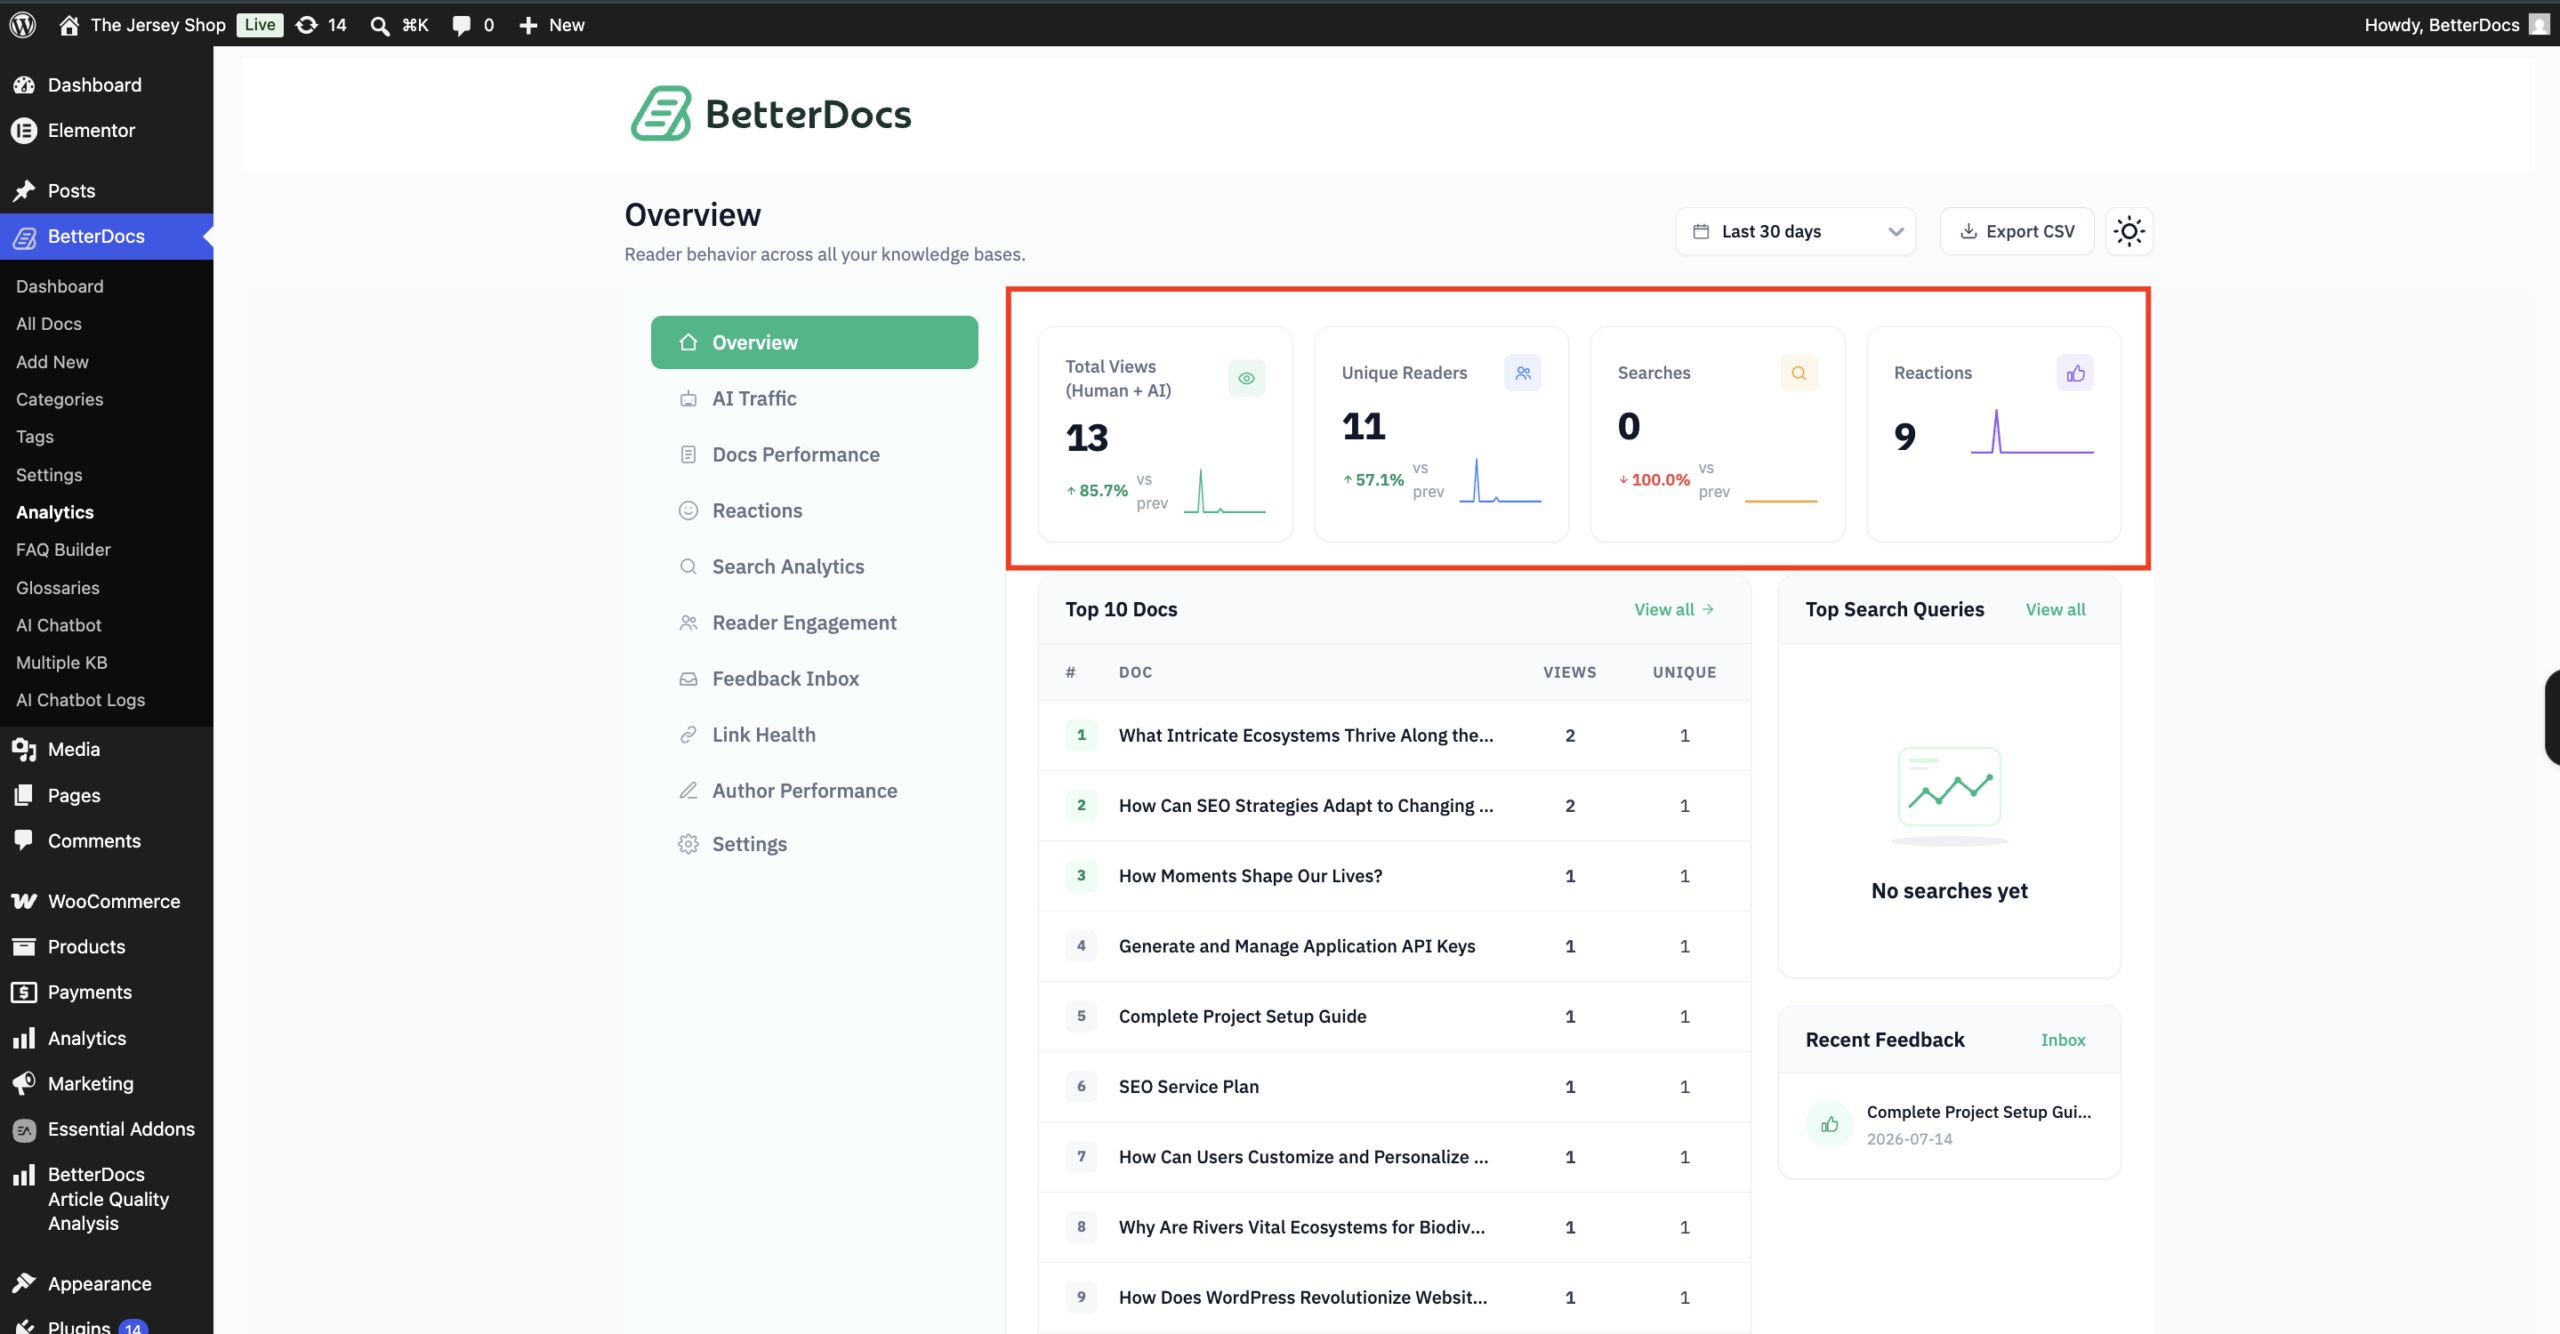
To get the overall performance of your documentation, first, head over to the ‘Overview’ tab. Then, you will get the accumulated performance of your BetterDocs documentation. You can filter your data based on ‘Views’, ‘Unique Readers’, ‘React‘,' & ‘Searches’.
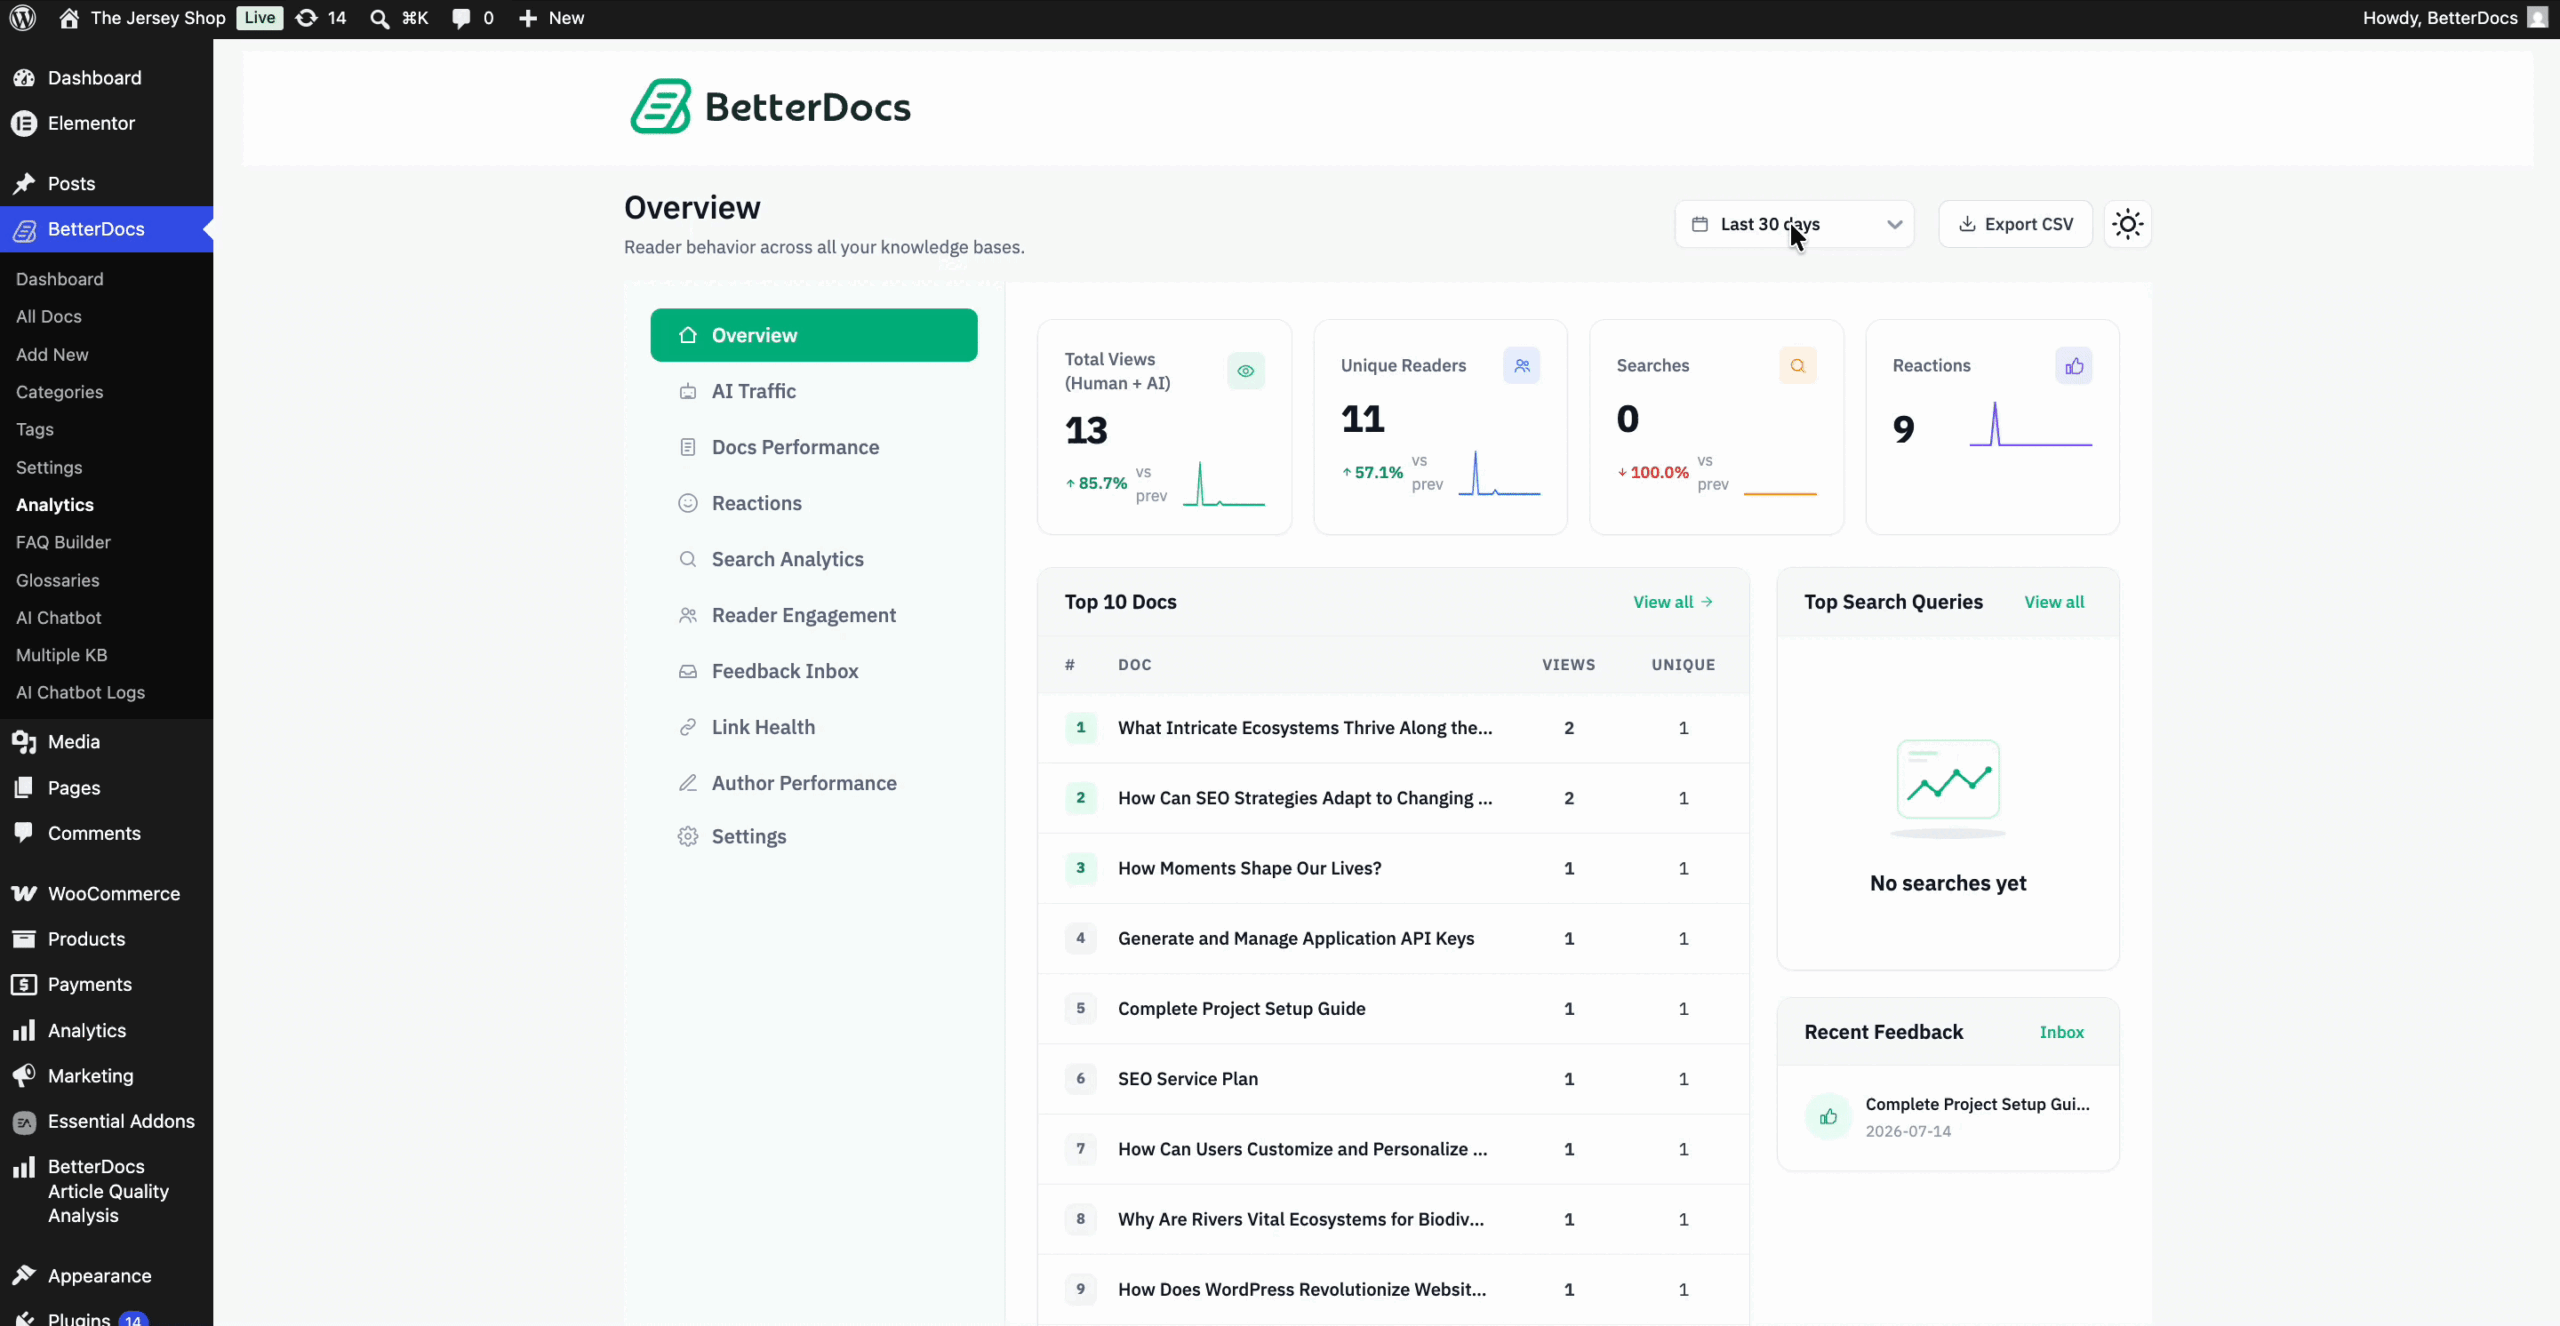
You can also track your performance based on your customized time. You can choose your timeline between ‘All Time’ e ‘Last 30 Days’, or you can insert your ‘Custom Date Range’ to get a clearer picture.
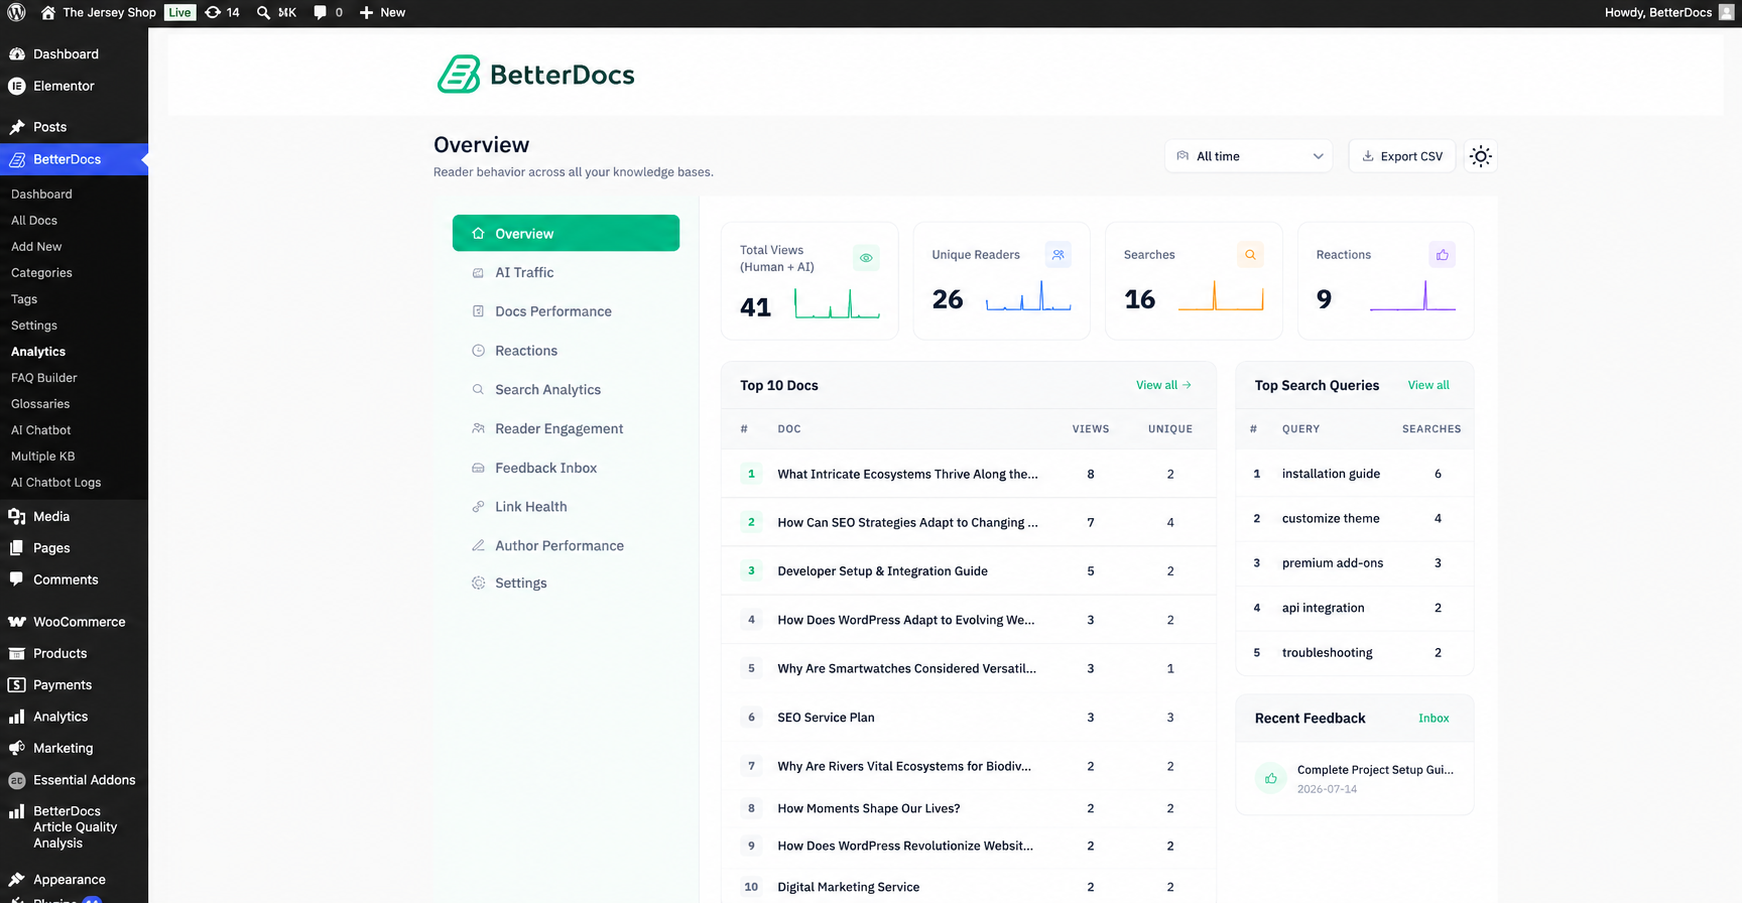
You can also check the list of your Top 10 Articles, top search queries, search trends and recent feedback.
Step 2: View AI Traffic of Your Website #
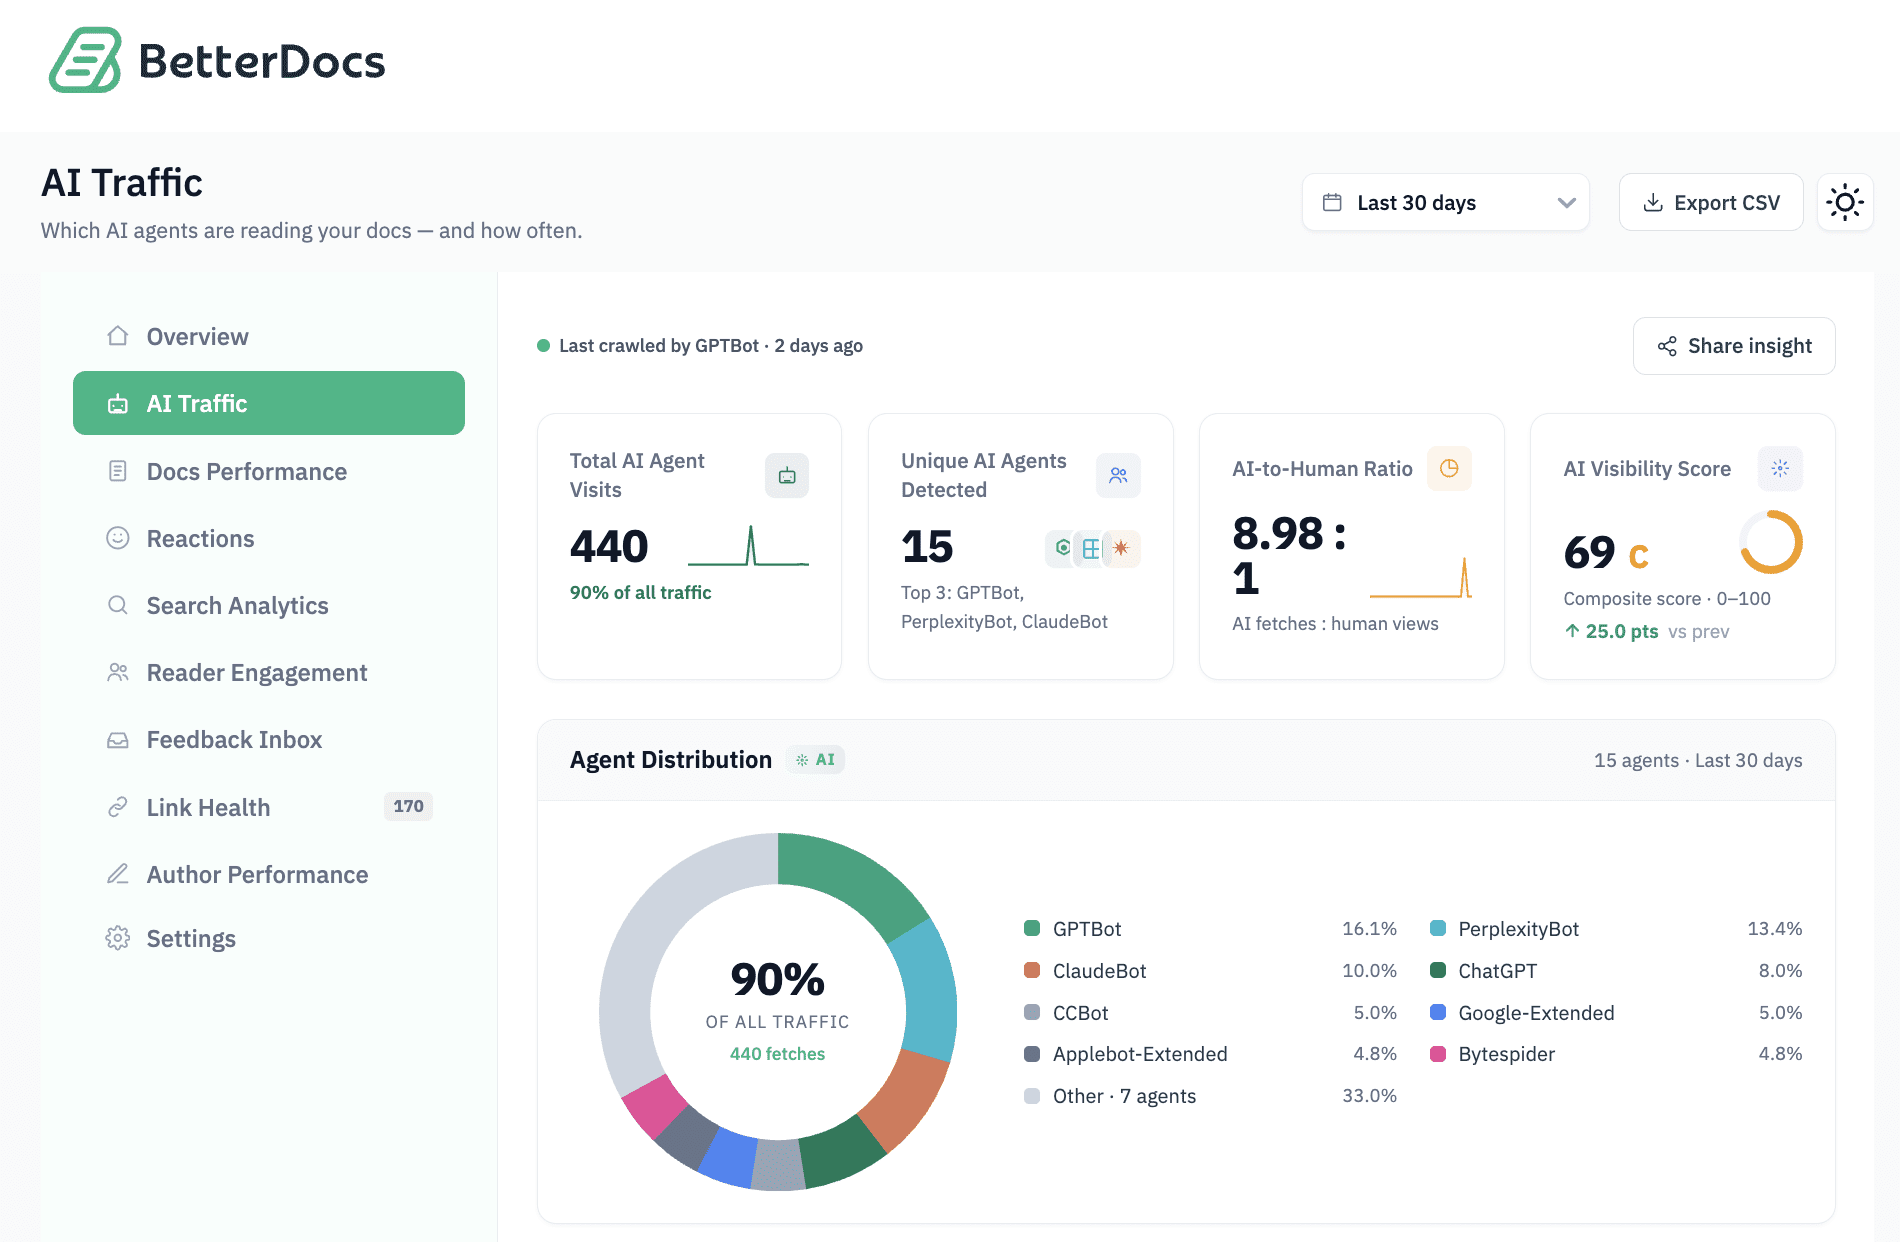
Next, you can see the AI traffic data of your documentation. Whenever AI crawlers such as GPTBot, ClaudeBot, or PerplexityBot access your public documentation, those visits are picked up and displayed in this report. You can typically expect to see the data within a few days of your content going live.
Step 3: View Docs Performance of Your Knowledge Base #
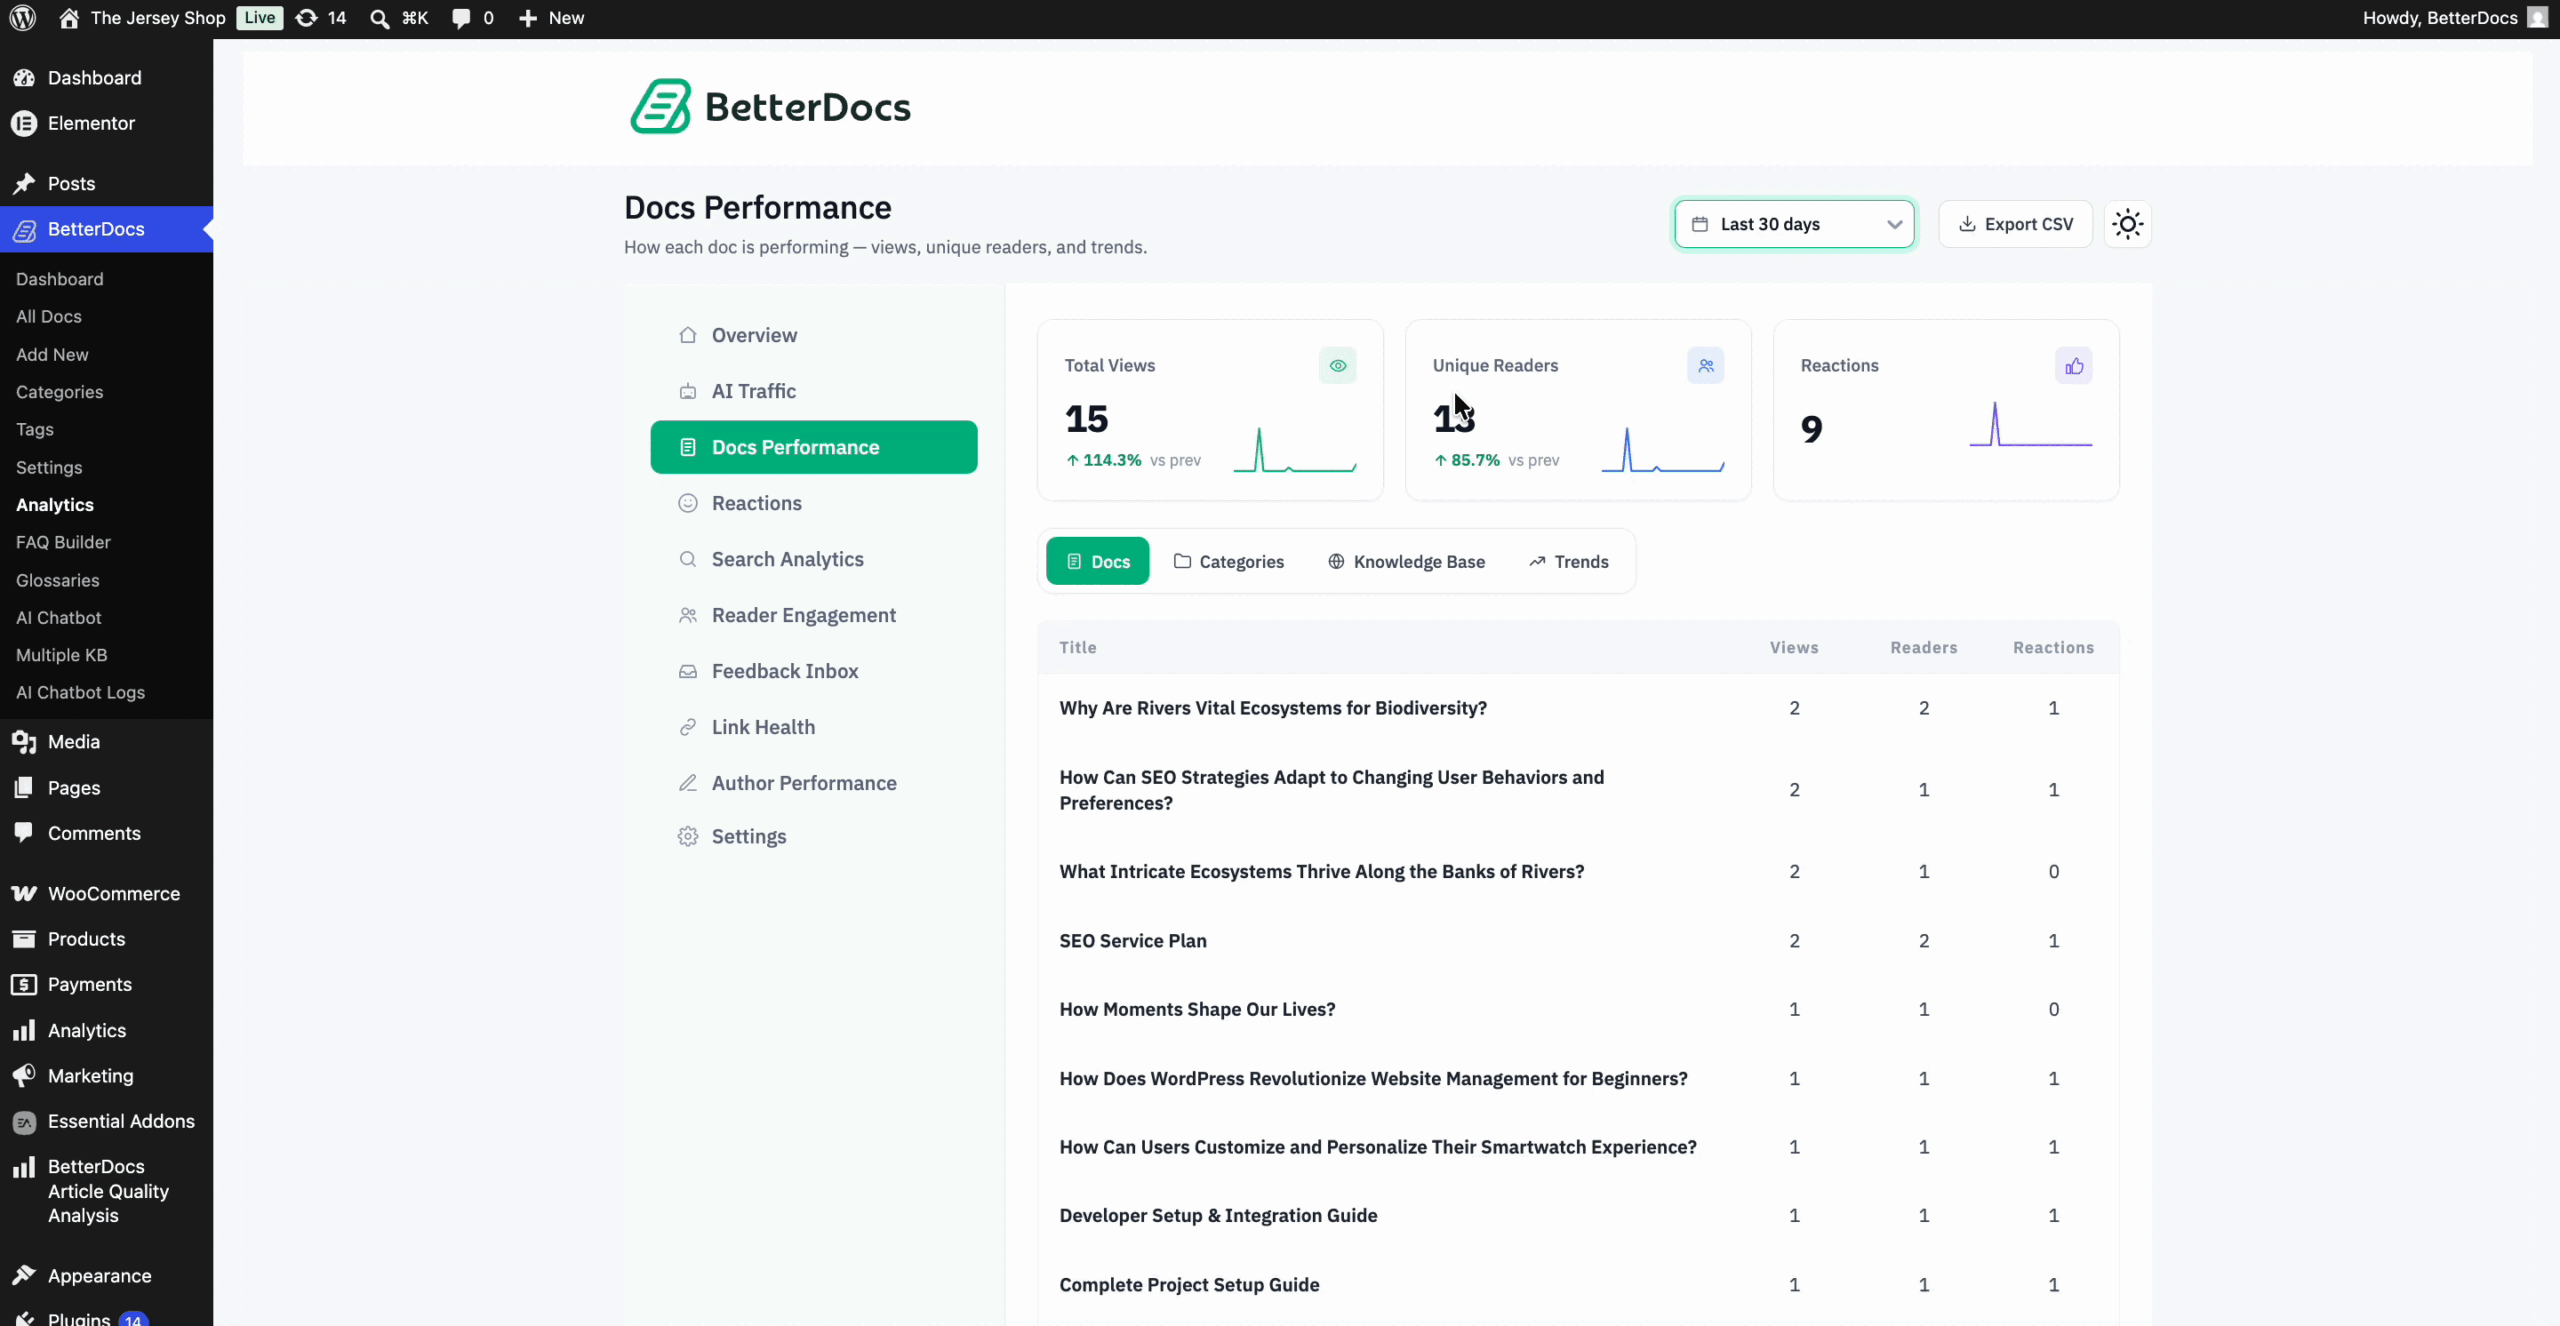
To get the detailed article performance, navigate to the “Docs Performance” tab. From there, you can see the performance of all documentation, categories, knowledge bases, and performance trends based on views, unique readers, and reactions.
Step 4: Check Reactions of Your Documentation #
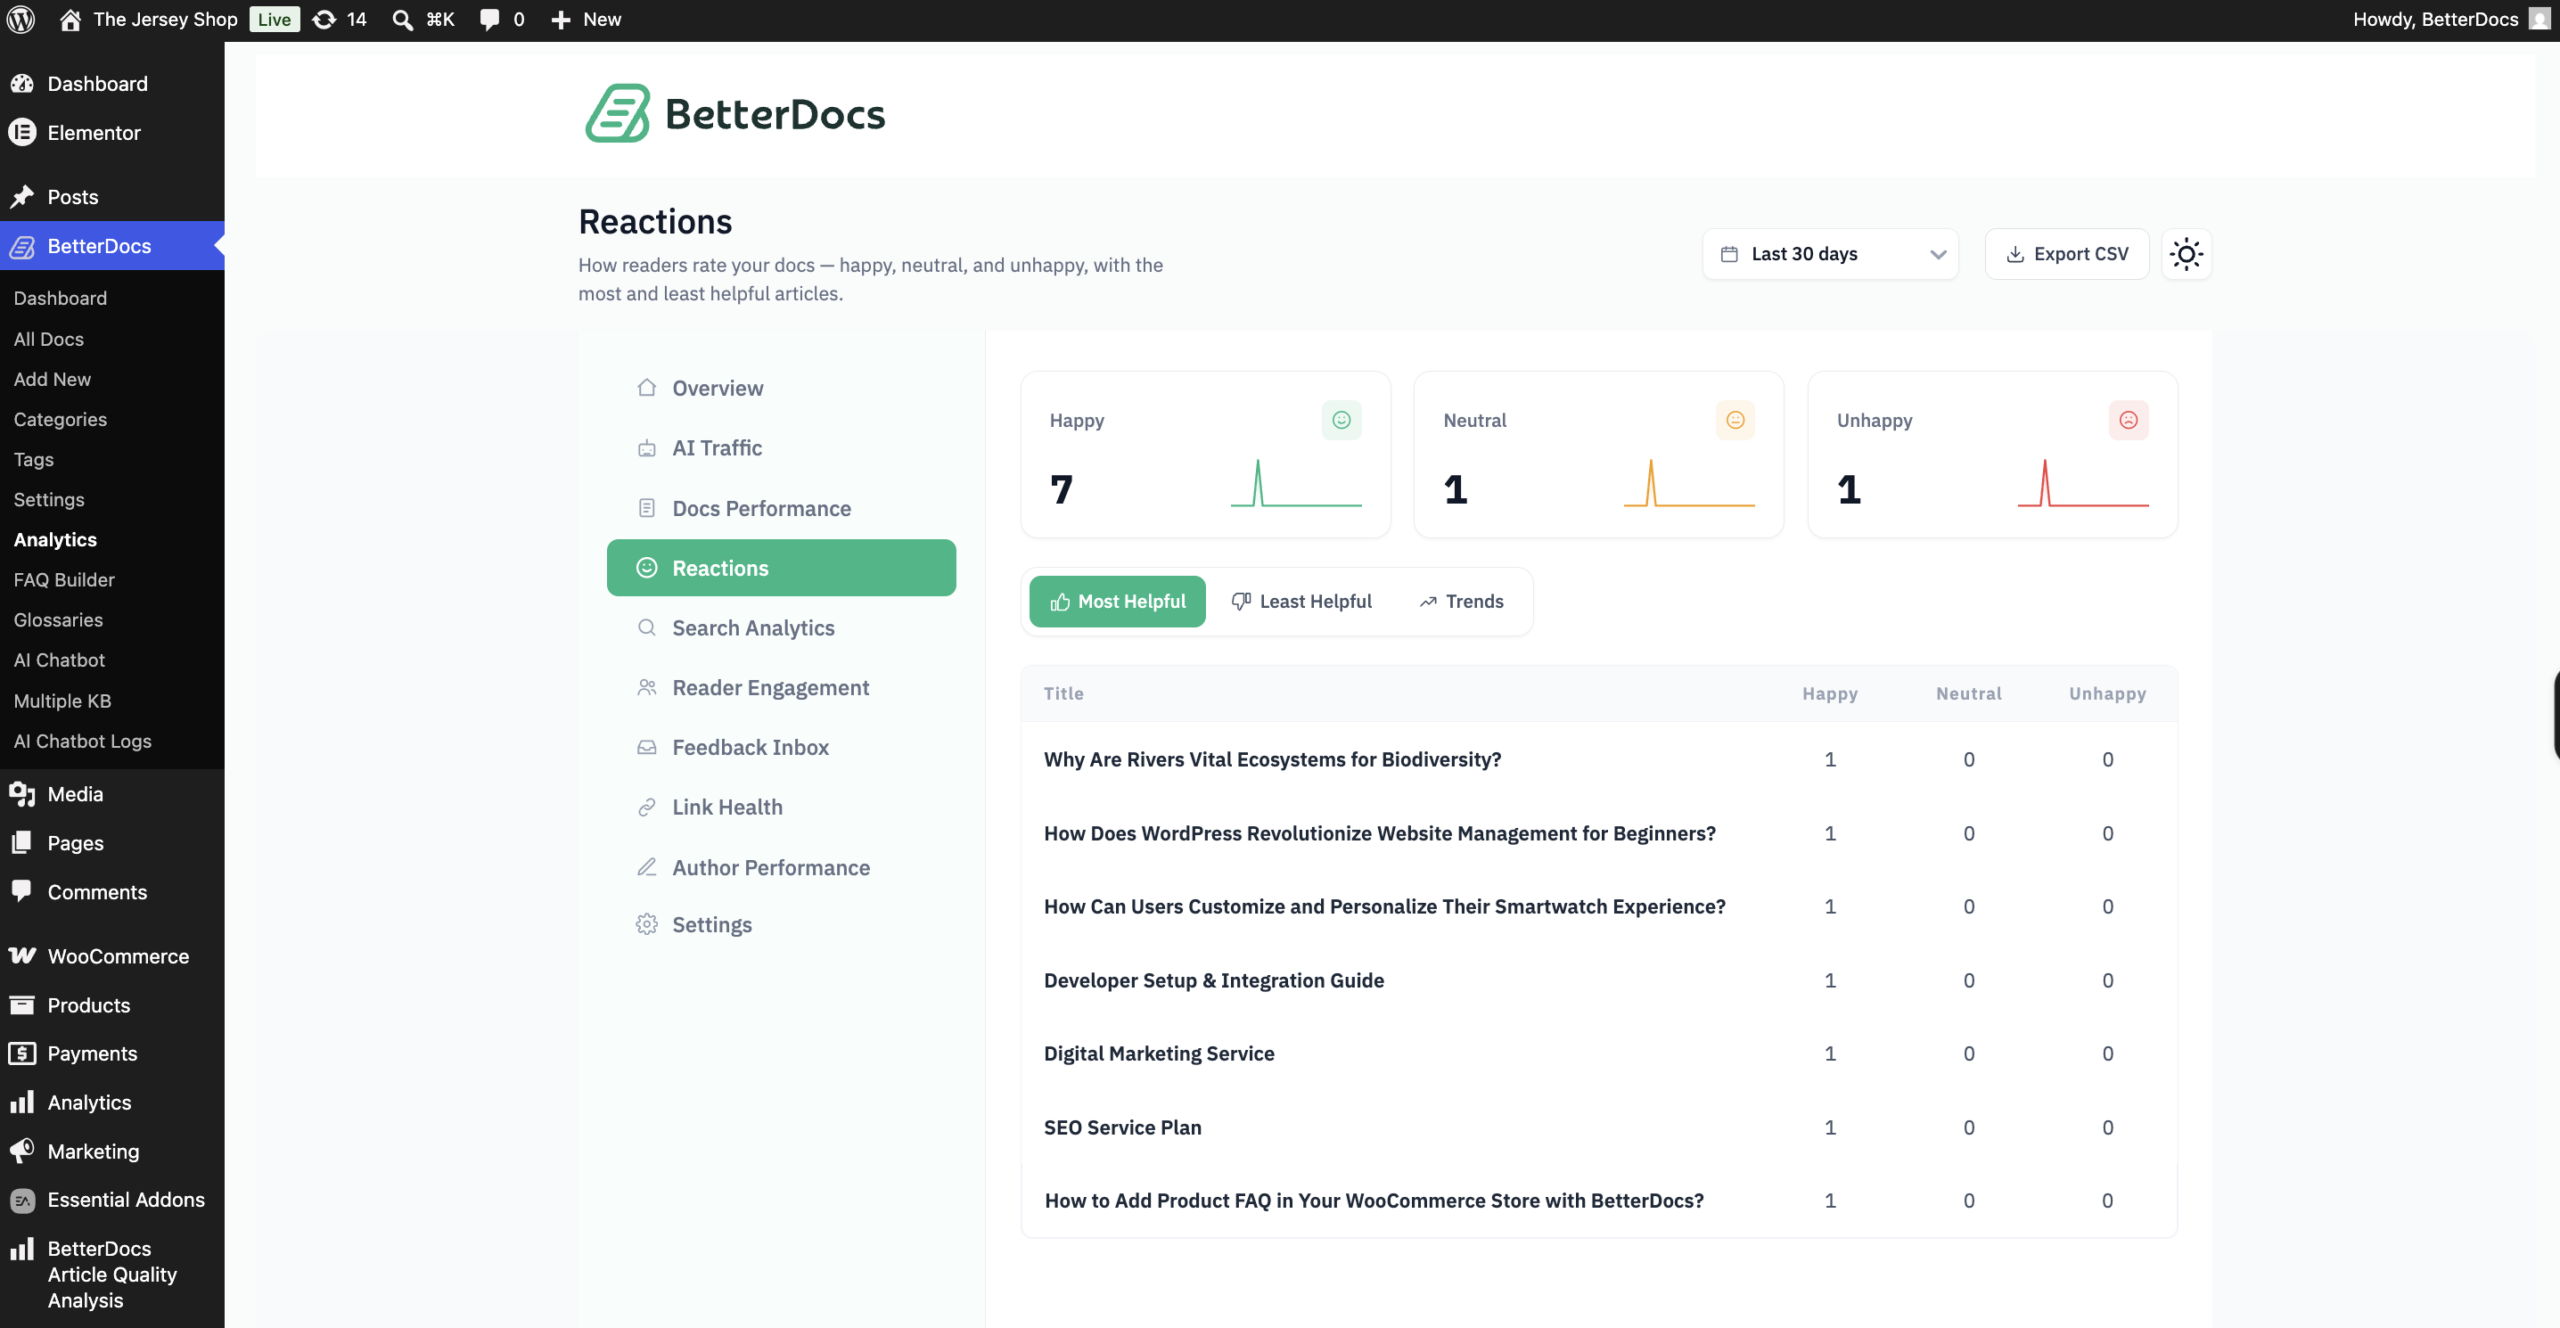
Go to the ‘Reactions’ tab to see how readers rate your docs — happy, neutral, and unhappy, with the most and least helpful articles. You can also look at the trend of reactions from the ‘Trends’ tab.
Step 5: View Search Analytics of the Documentation #
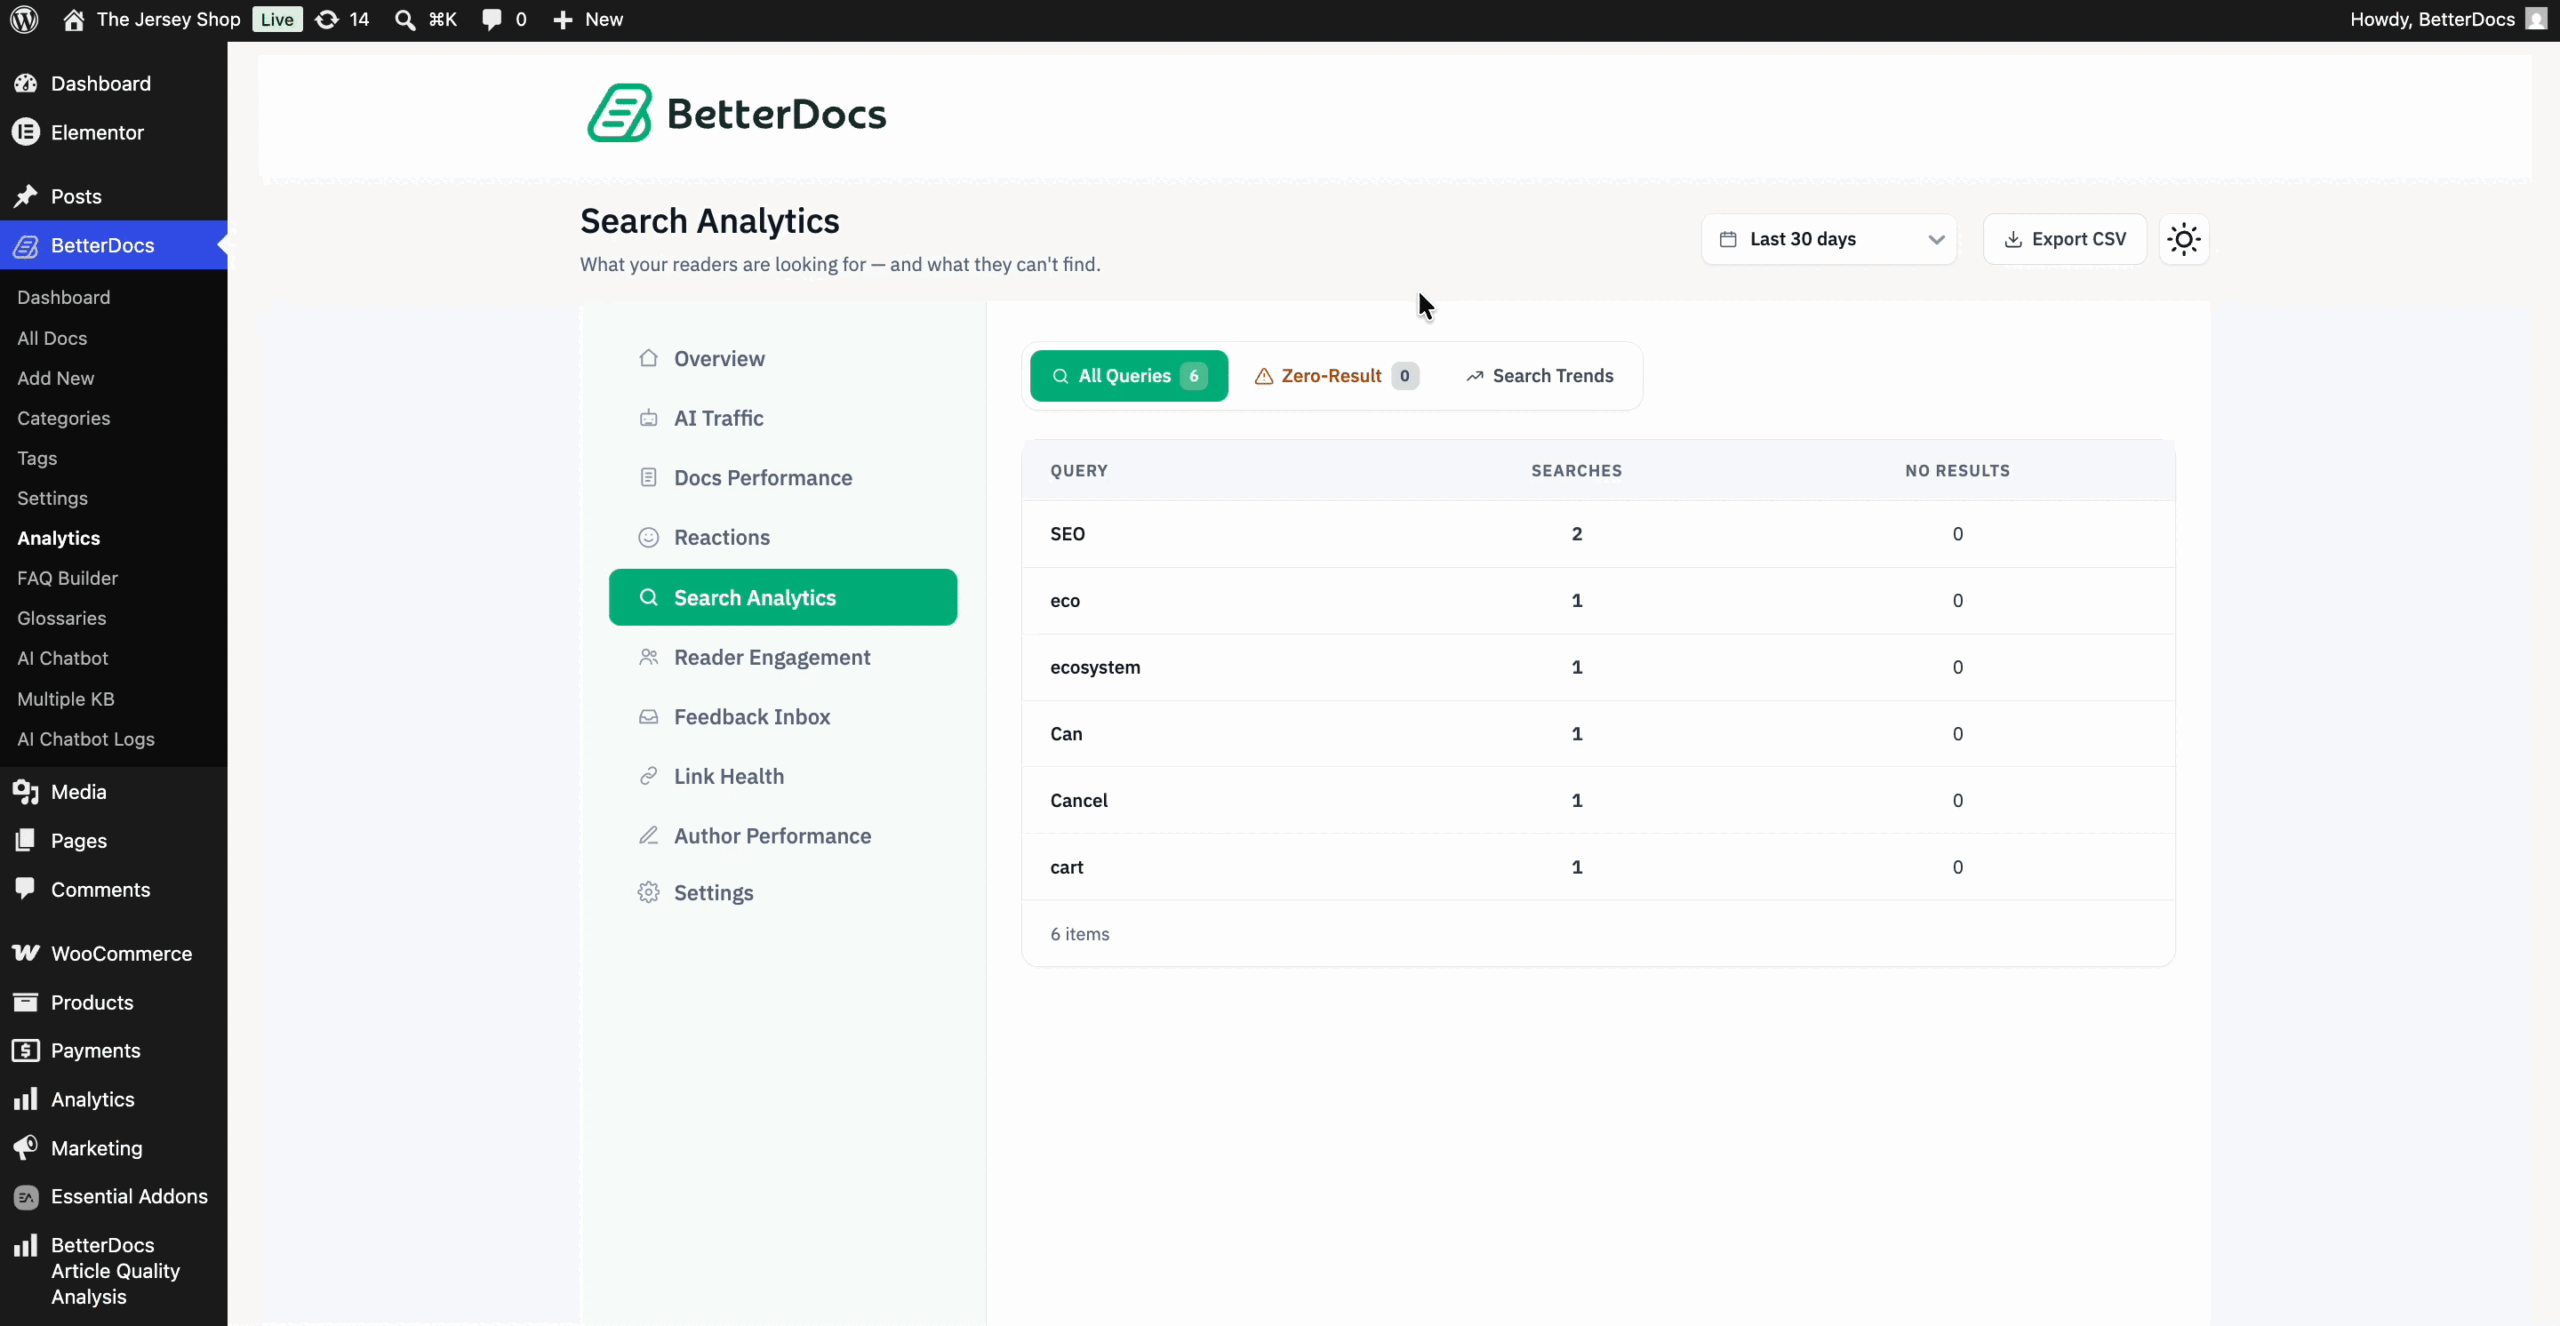
To get information on search volumes of your documentation, first head over to the ‘Search Analytics’ tab. Then, you will get an analysis of your documentation. You can filter your data based on ‘All Queries,’ ‘Zero-result Queries,’ & ‘Search Trends.’
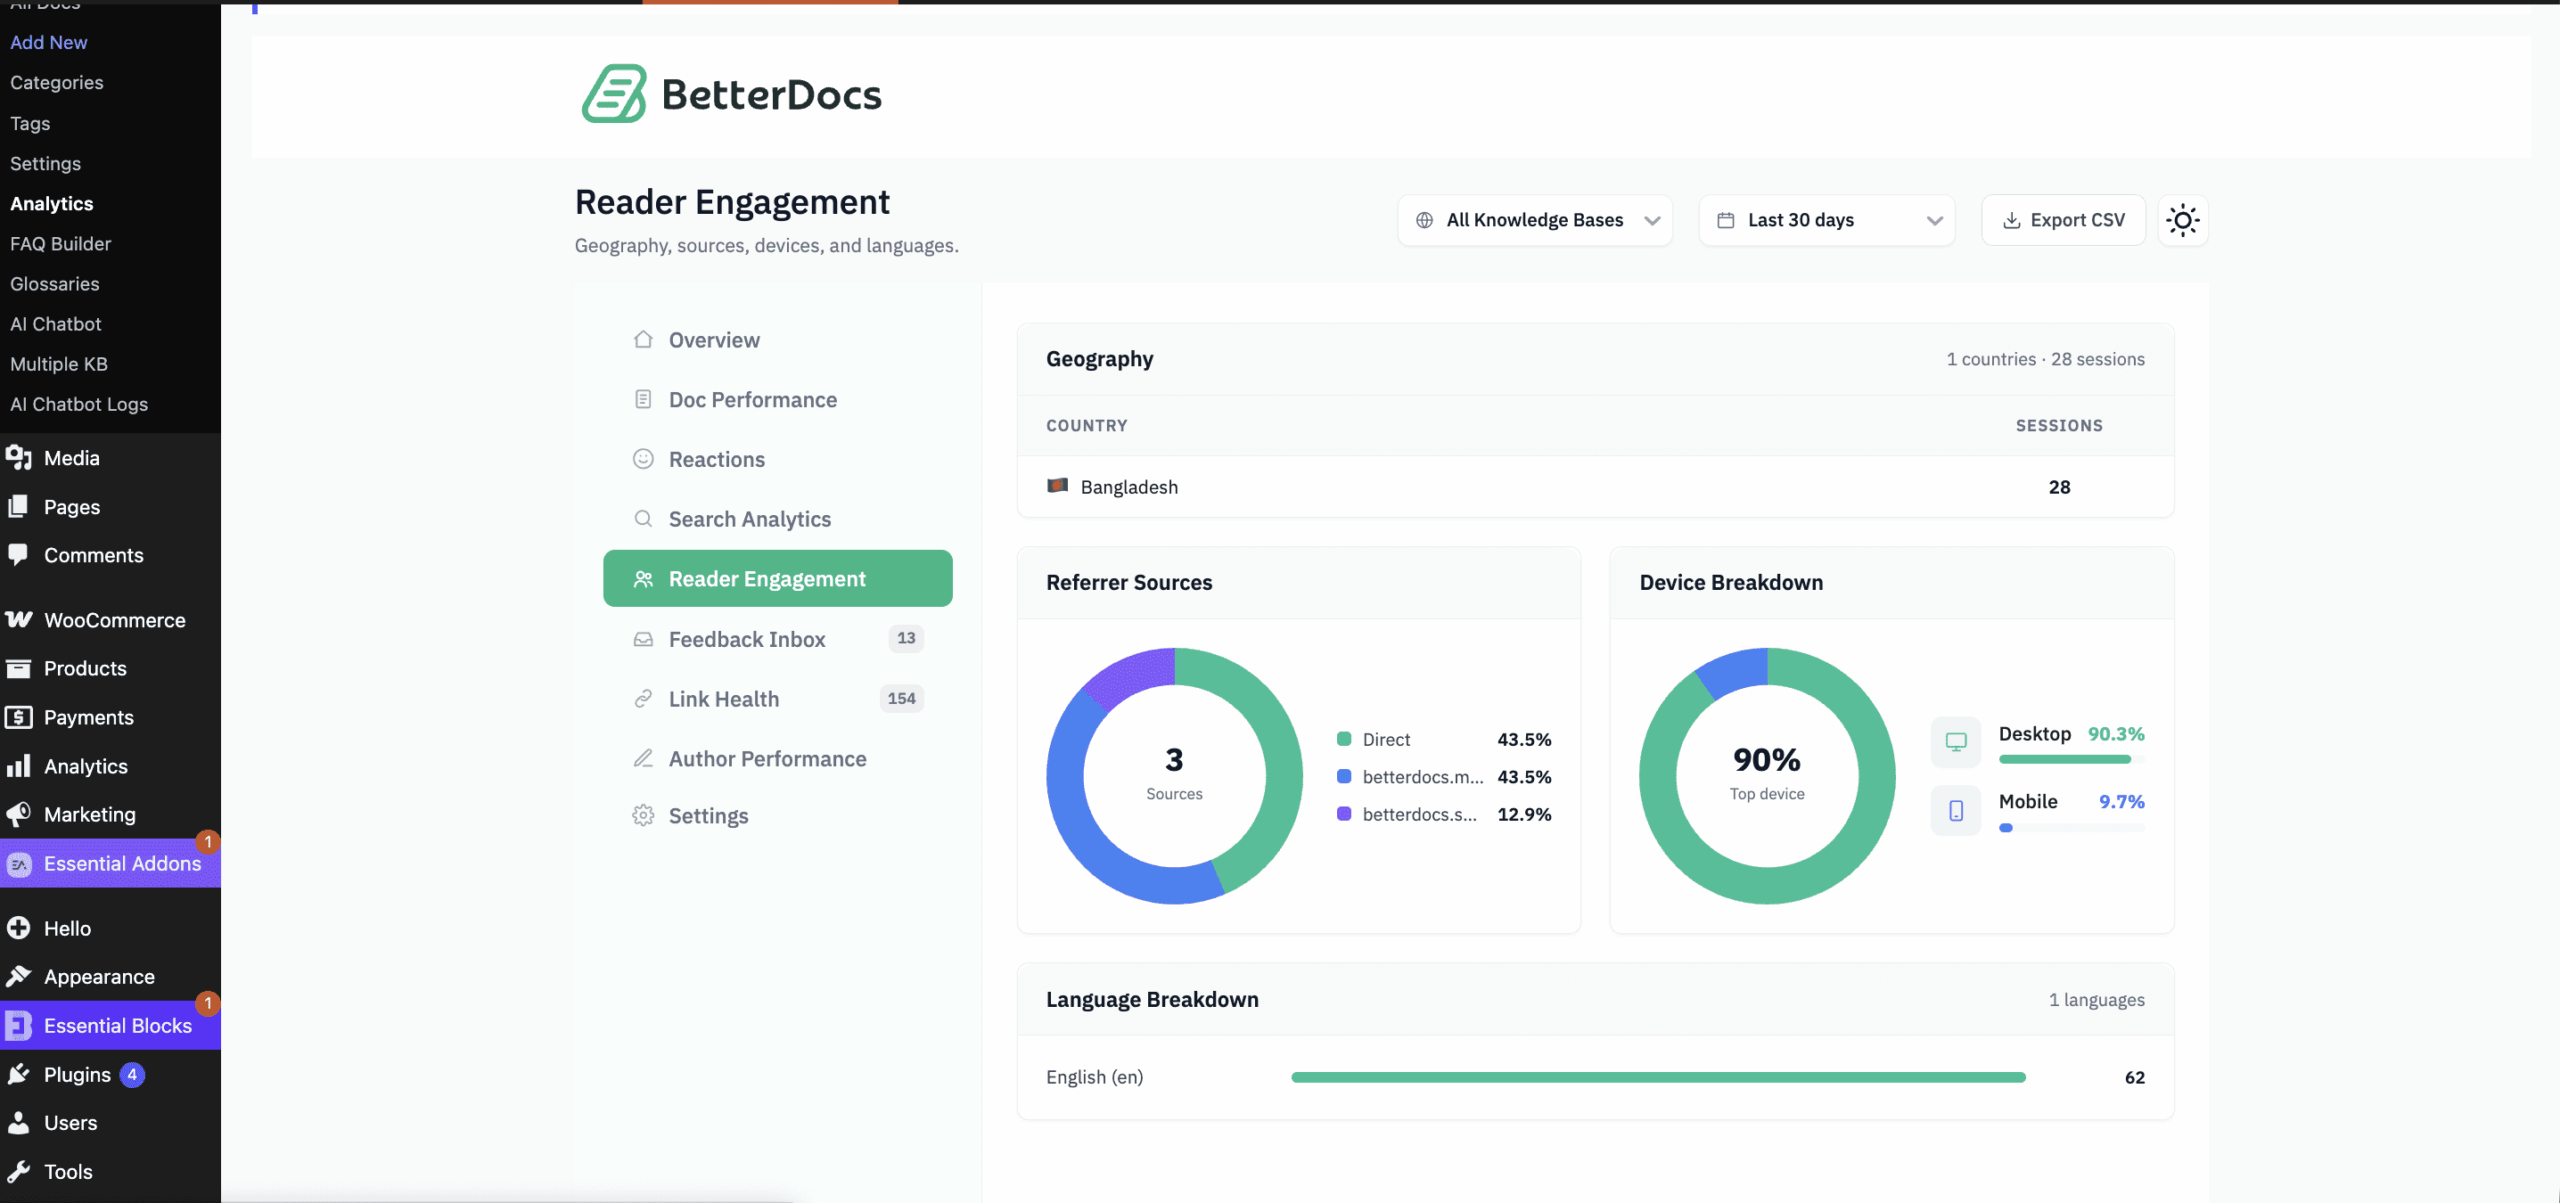
Step 6: View Reader Engagement from the Documentation #
Dal ‘Reader Engagement’ scheda, puoi vedere il file ‘Geography’ data from which location your visitors are navigating. You will also find the ‘Referrer’ data from where your visitors are coming from. You will also find the ‘Device’ breakdown and the ‘Language’ breakdown to see more details about your visitors’ device and regional language.
Step 7: Review And Resolve Visitors’ Feedback #
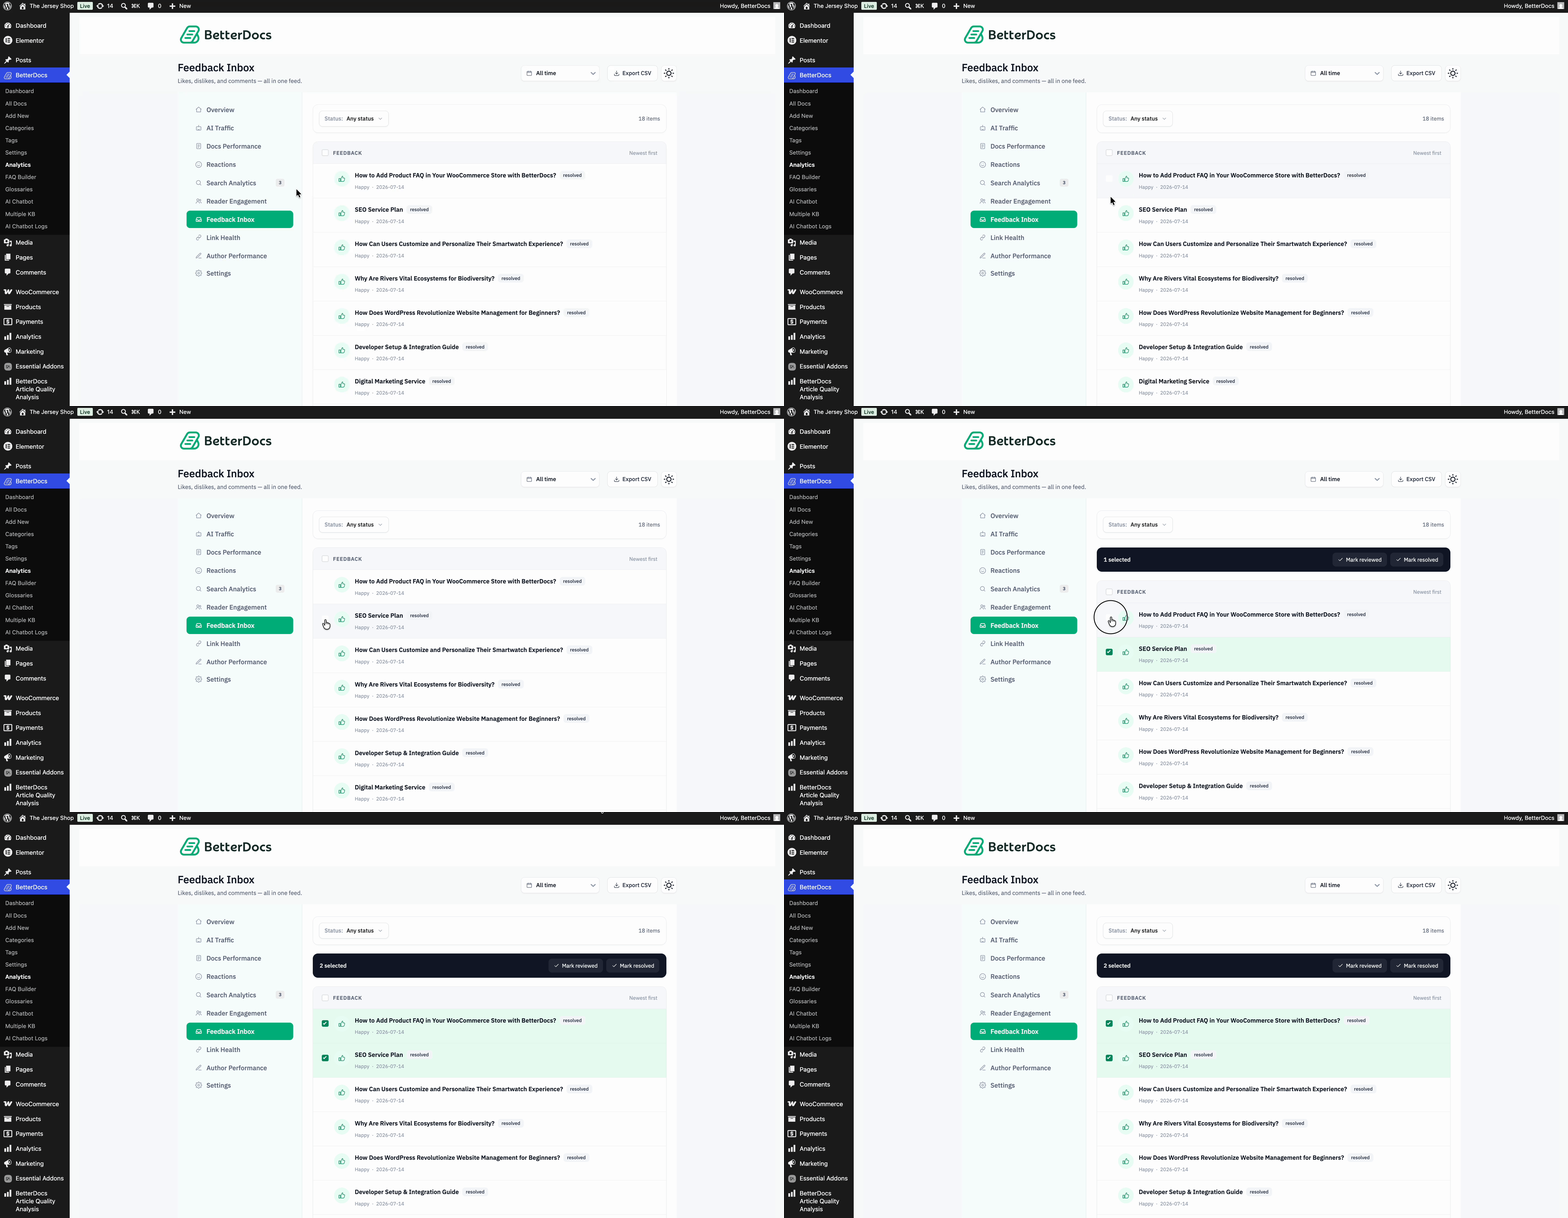
To understand what people are reacting to in your doc, go to the ‘Feedback Inbox’ tab. Here you will see all the feedback based on visitors’ reactions. You can also check feedback and mark it as ‘Reviewed‘ or ‘Resolved’. This way you can identify which feedback you have to take care of and which is updated properly by marking it as resolved. You can also filter this feedback by specific dates or export all the feedback by clicking on the ‘Export as CSV’ pulsante.
Step 8: Check Link Health of Your Documentation #
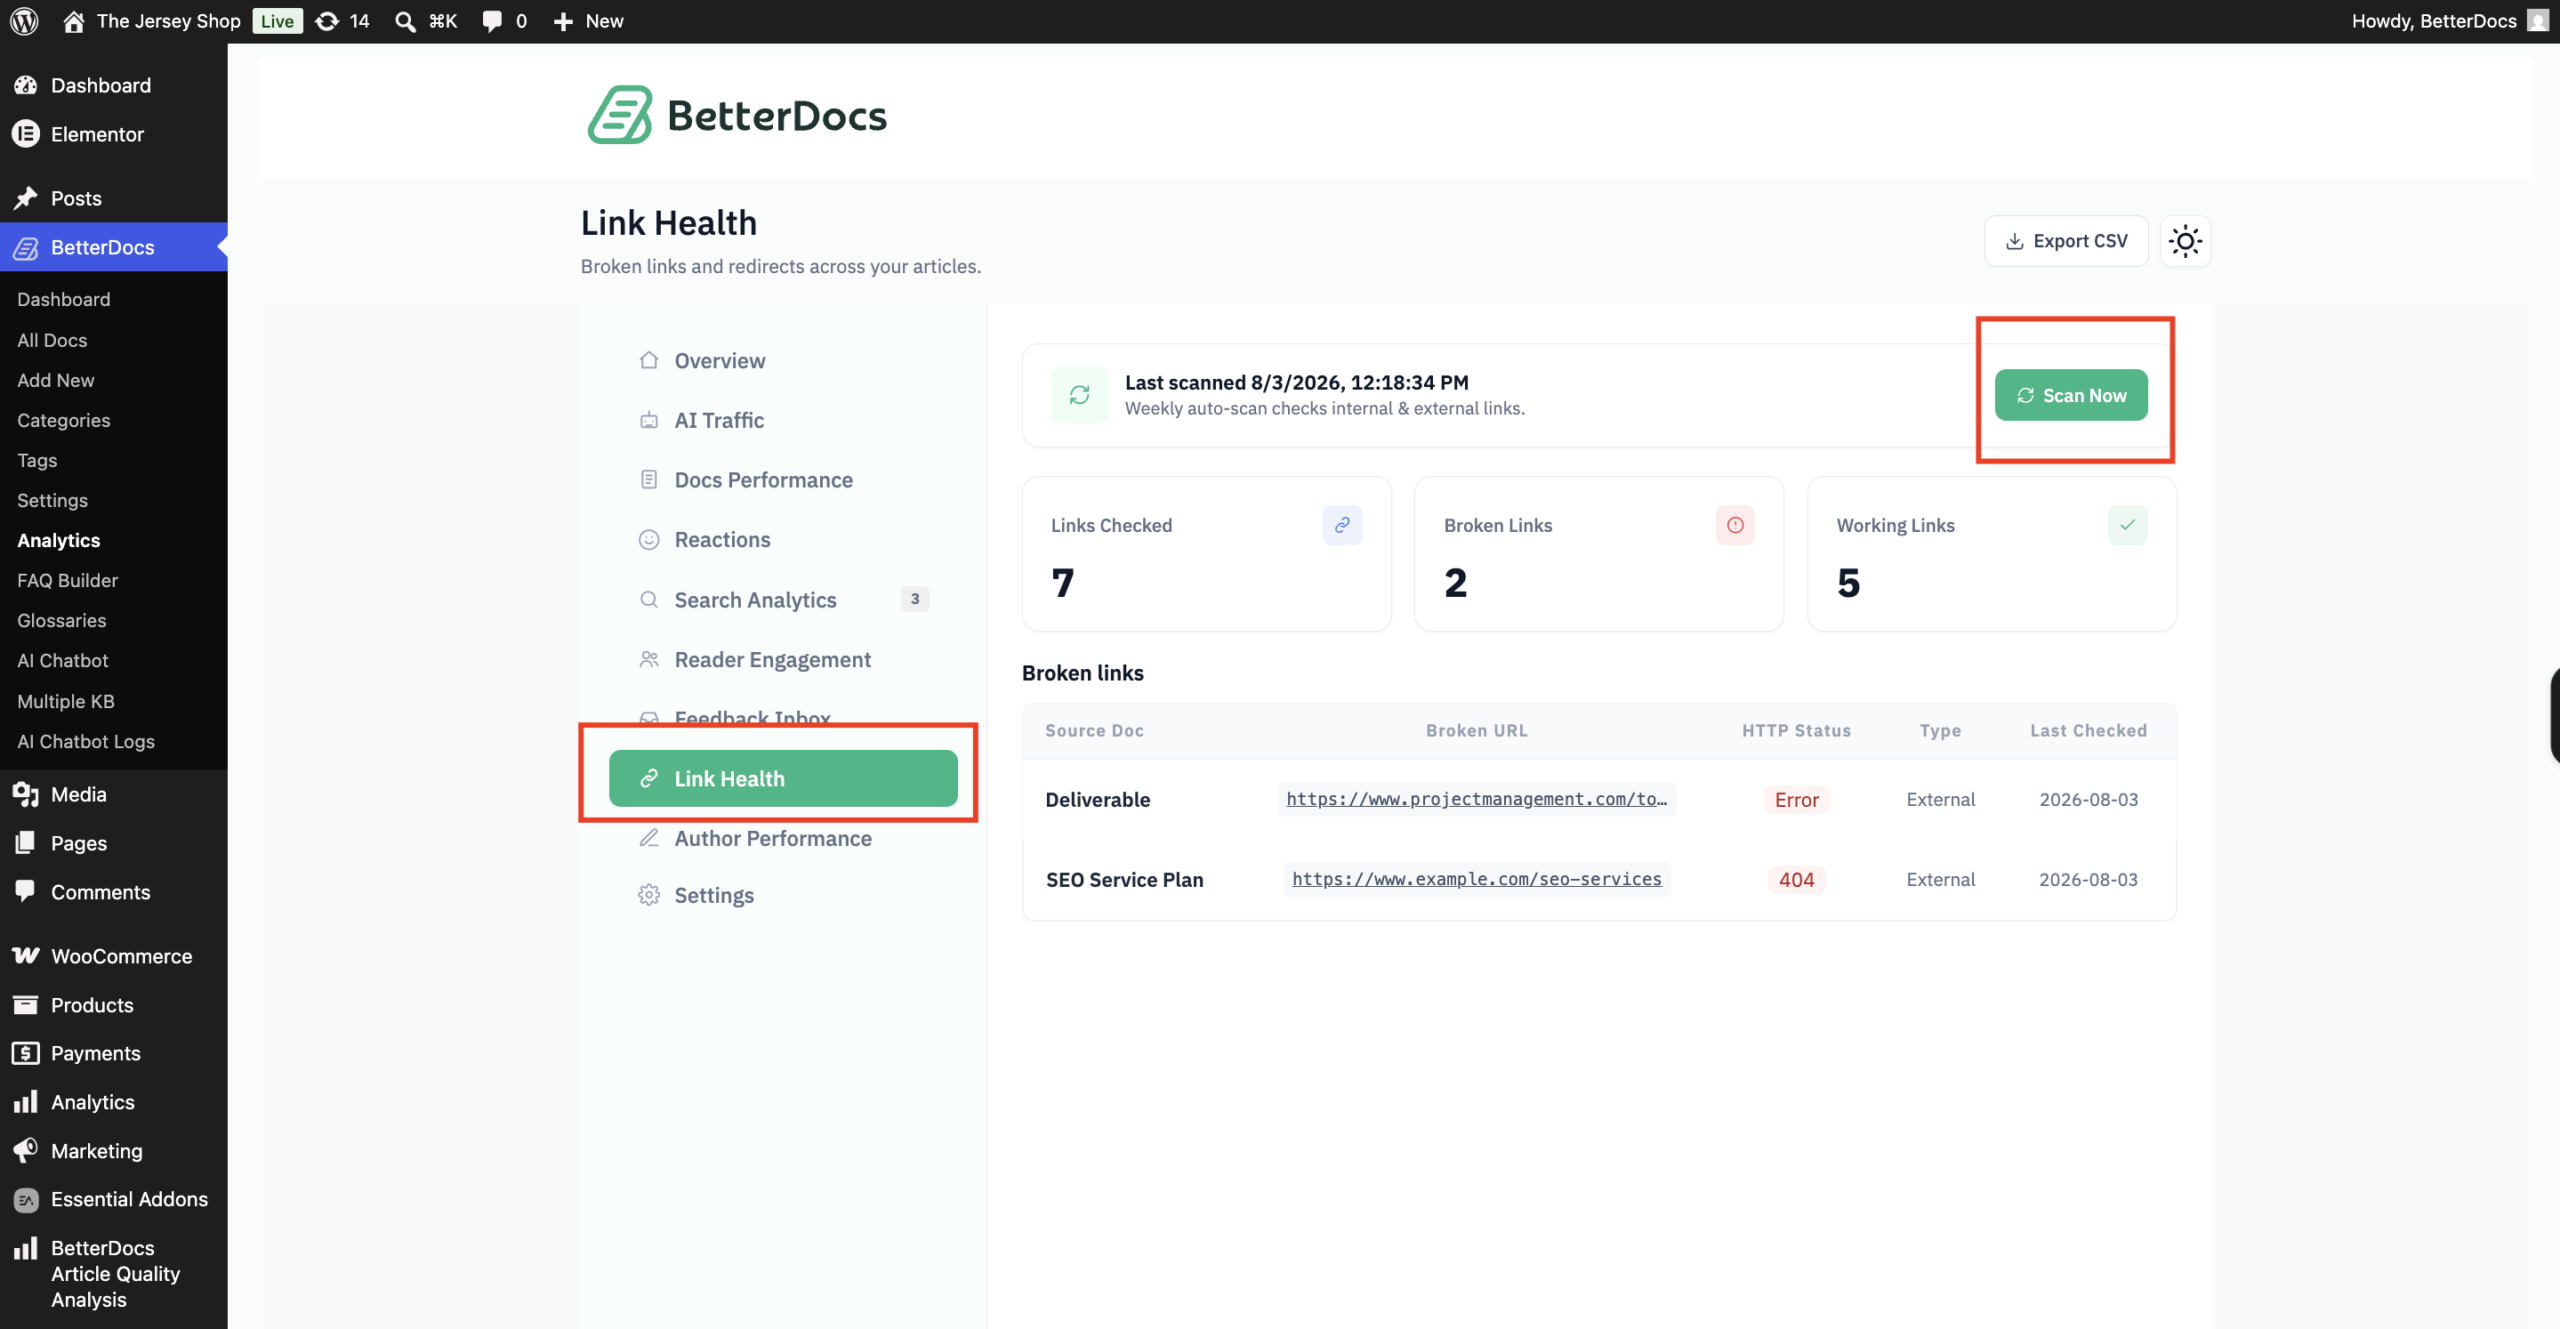
Switch to the ‘Link Health’ tab to check the ‘Broken Links’ e ‘Working Links’ in your documentation. Here, after clicking on the ‘Scan Now’ button, BetterDocs will scan the entire documentation and check the broken and working links in the documentation. This will give detailed insights about which links need to be fixed. You will also be able to export the CSV format by clicking on the ‘Export CSV’ pulsante.
Step 9: Check Author Performance #
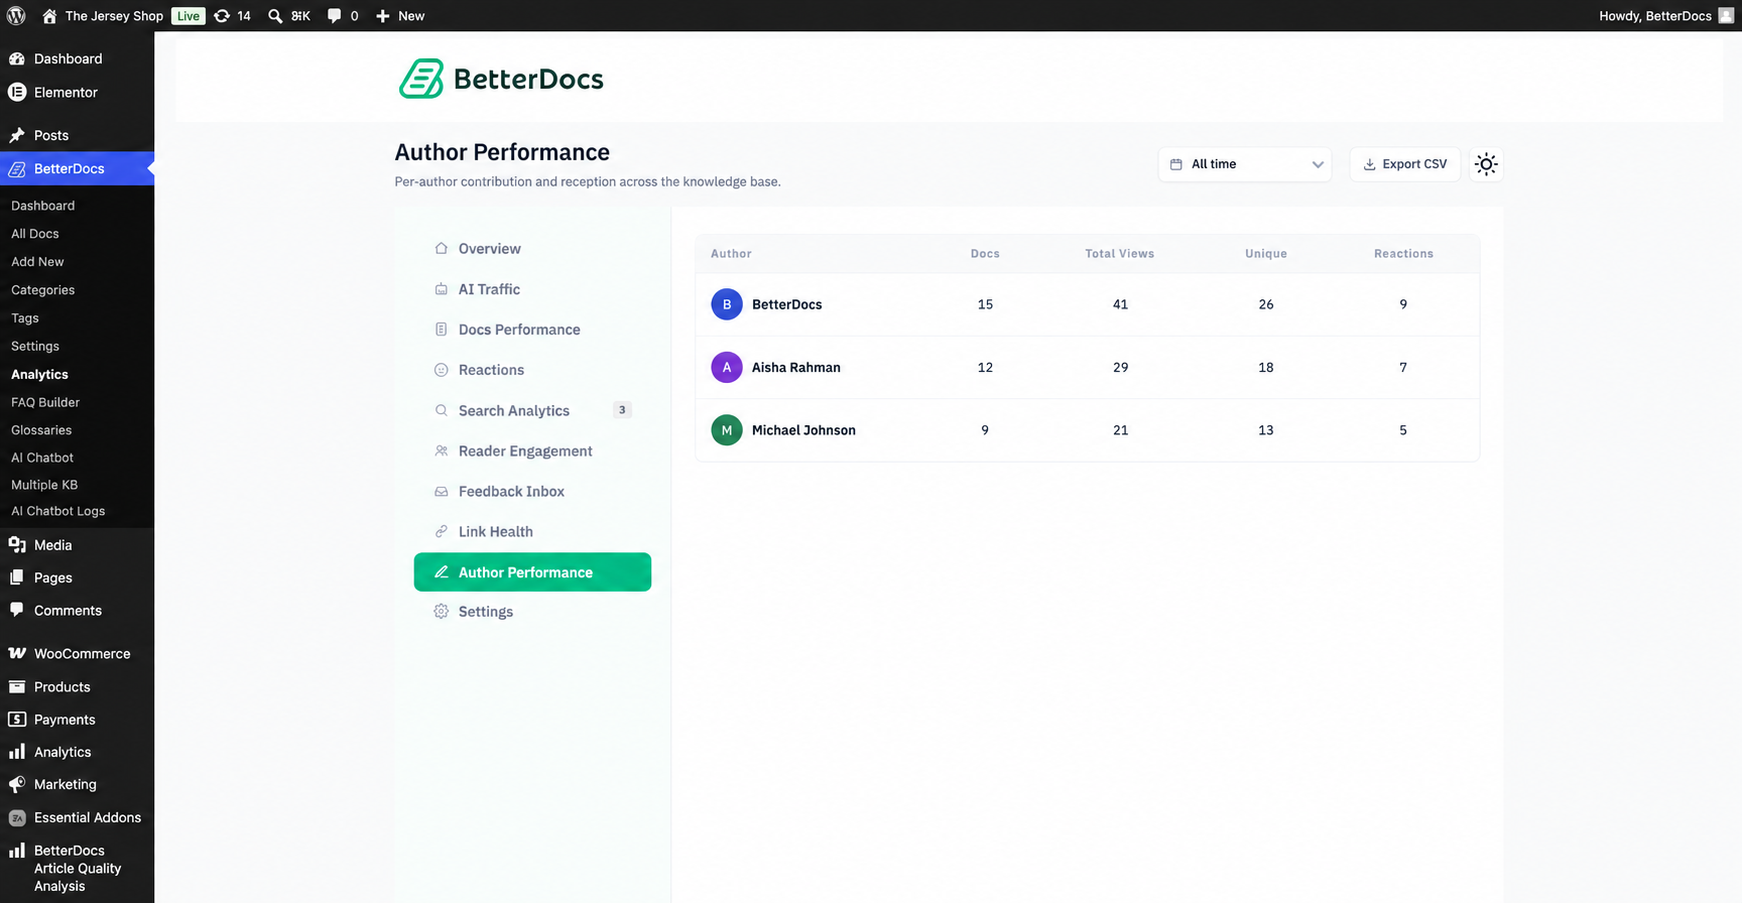
Next, navigate to the ‘Author Performance’ tab. You can see the detailed performance report of your website’s specific authors. Here, you will find the data on how many documents each author wrote, what are the total views of their written doc, the number of unique views and reactions to that specific author’s documentation.
How to Configure BetterDocs Settings? #
In BetterDocs Settings for the Advanced Analytics feature, you can configure the following data to set up your documentation analytics.
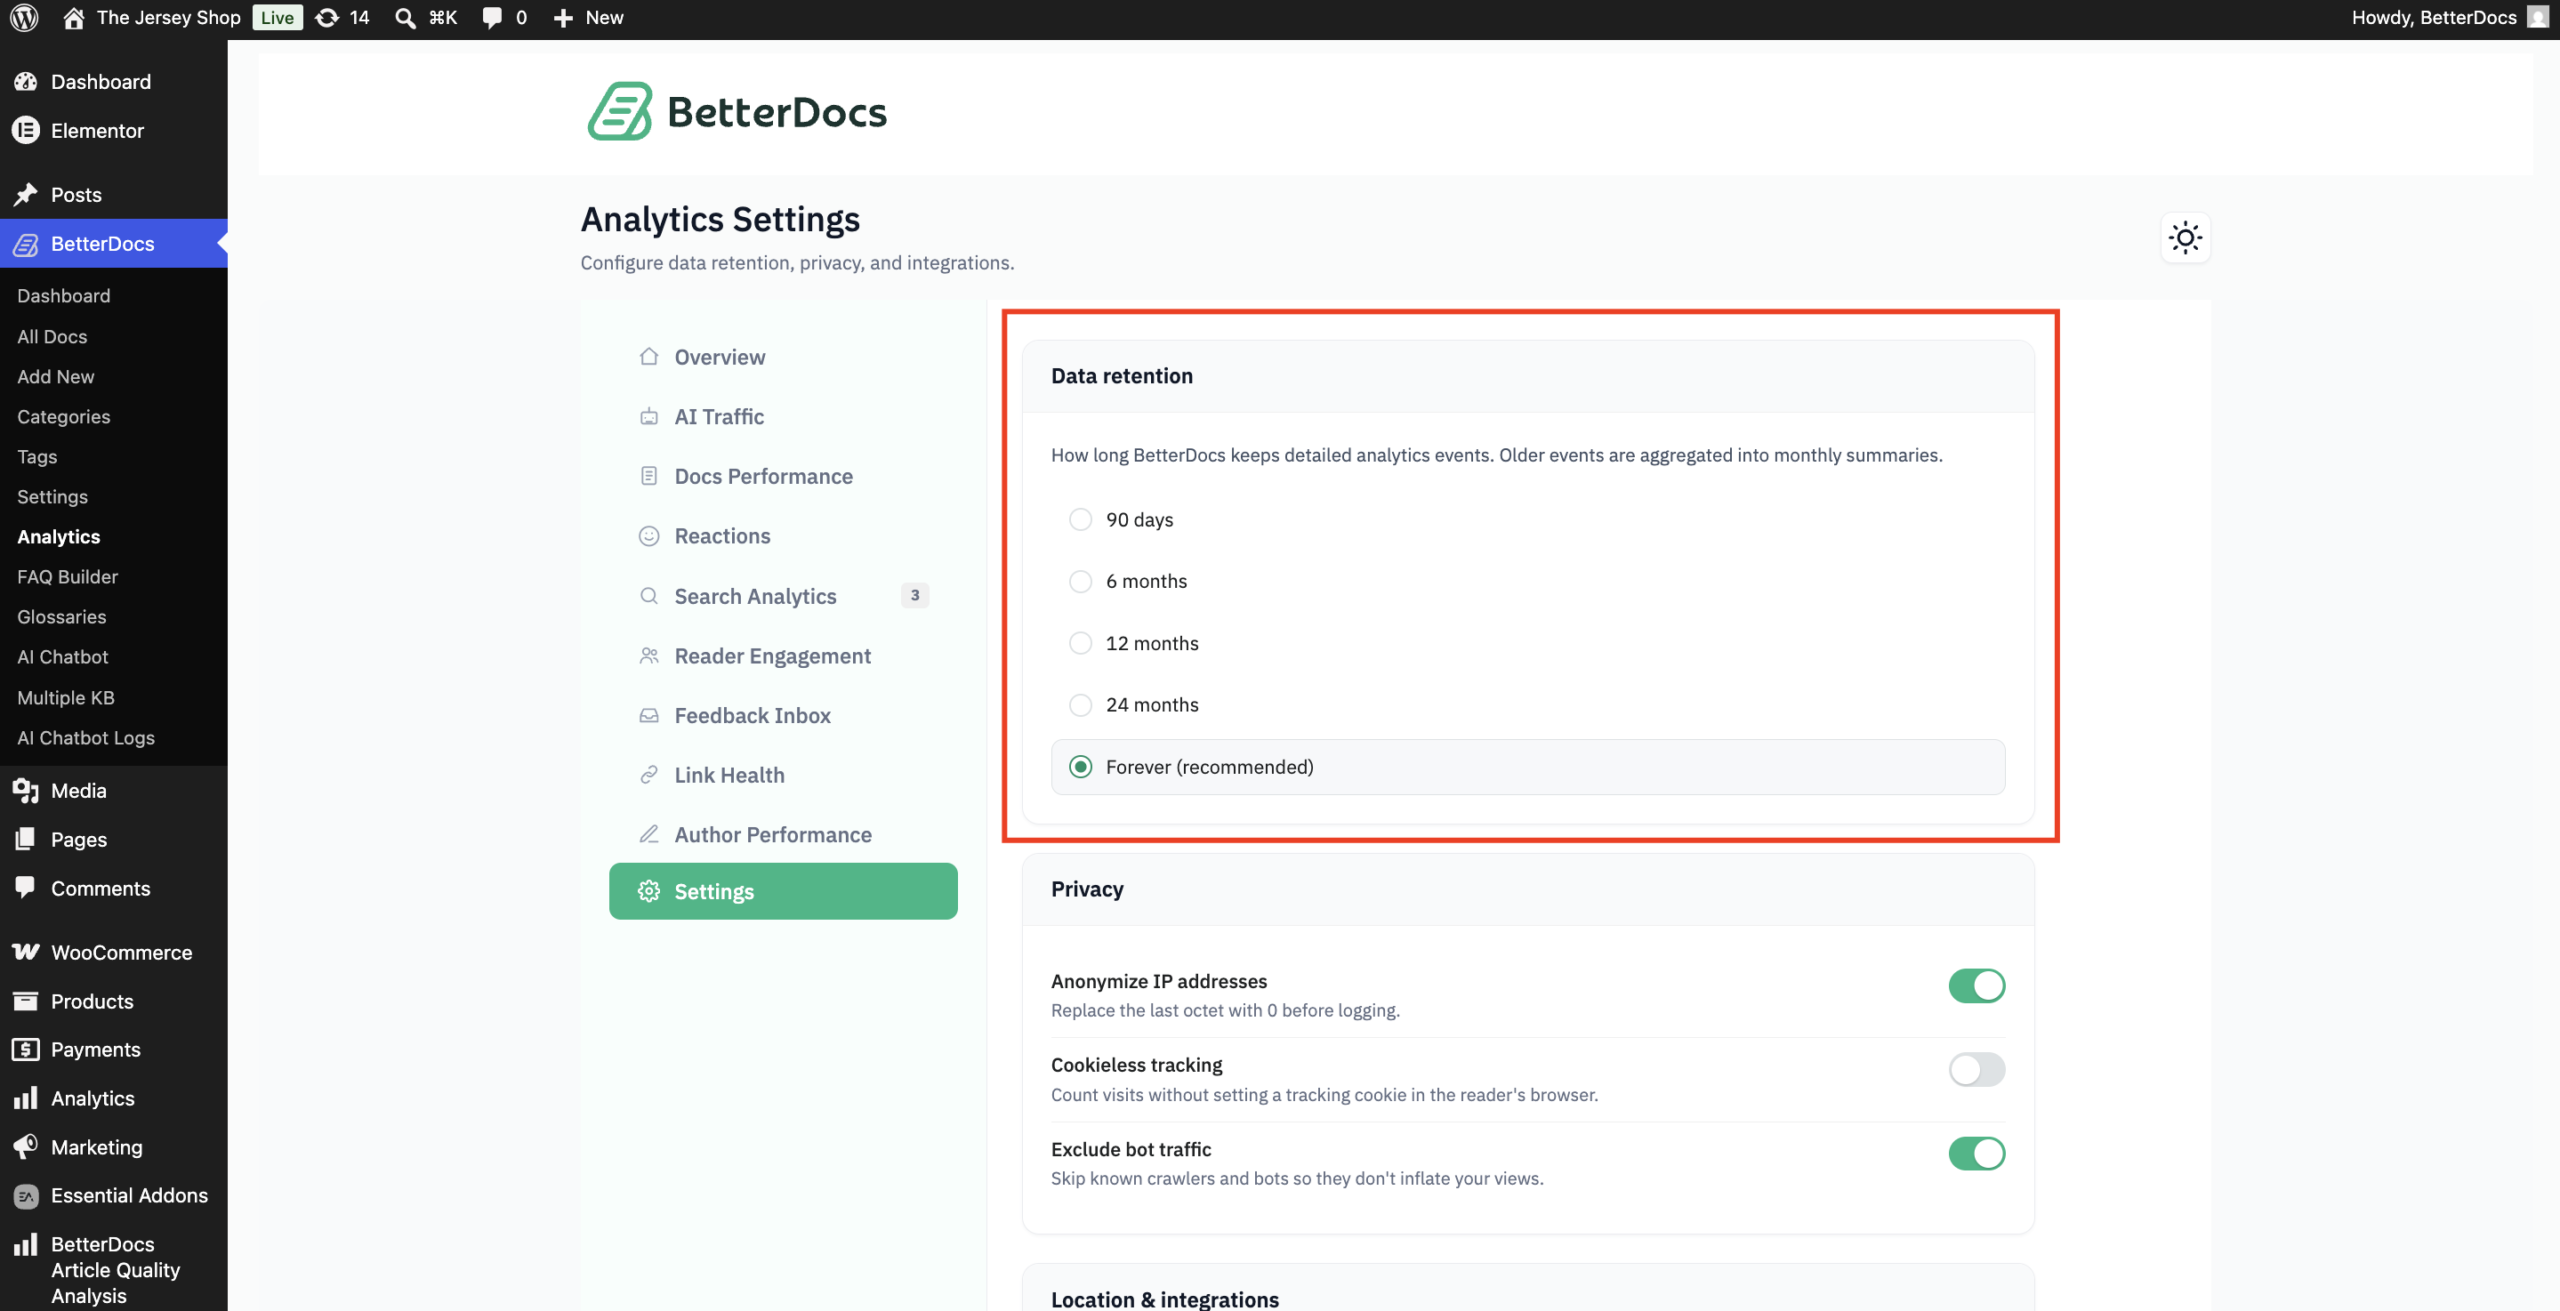
Data Retention: #
Here, you can configure how many days you can keep the analytics and data of your visitors.
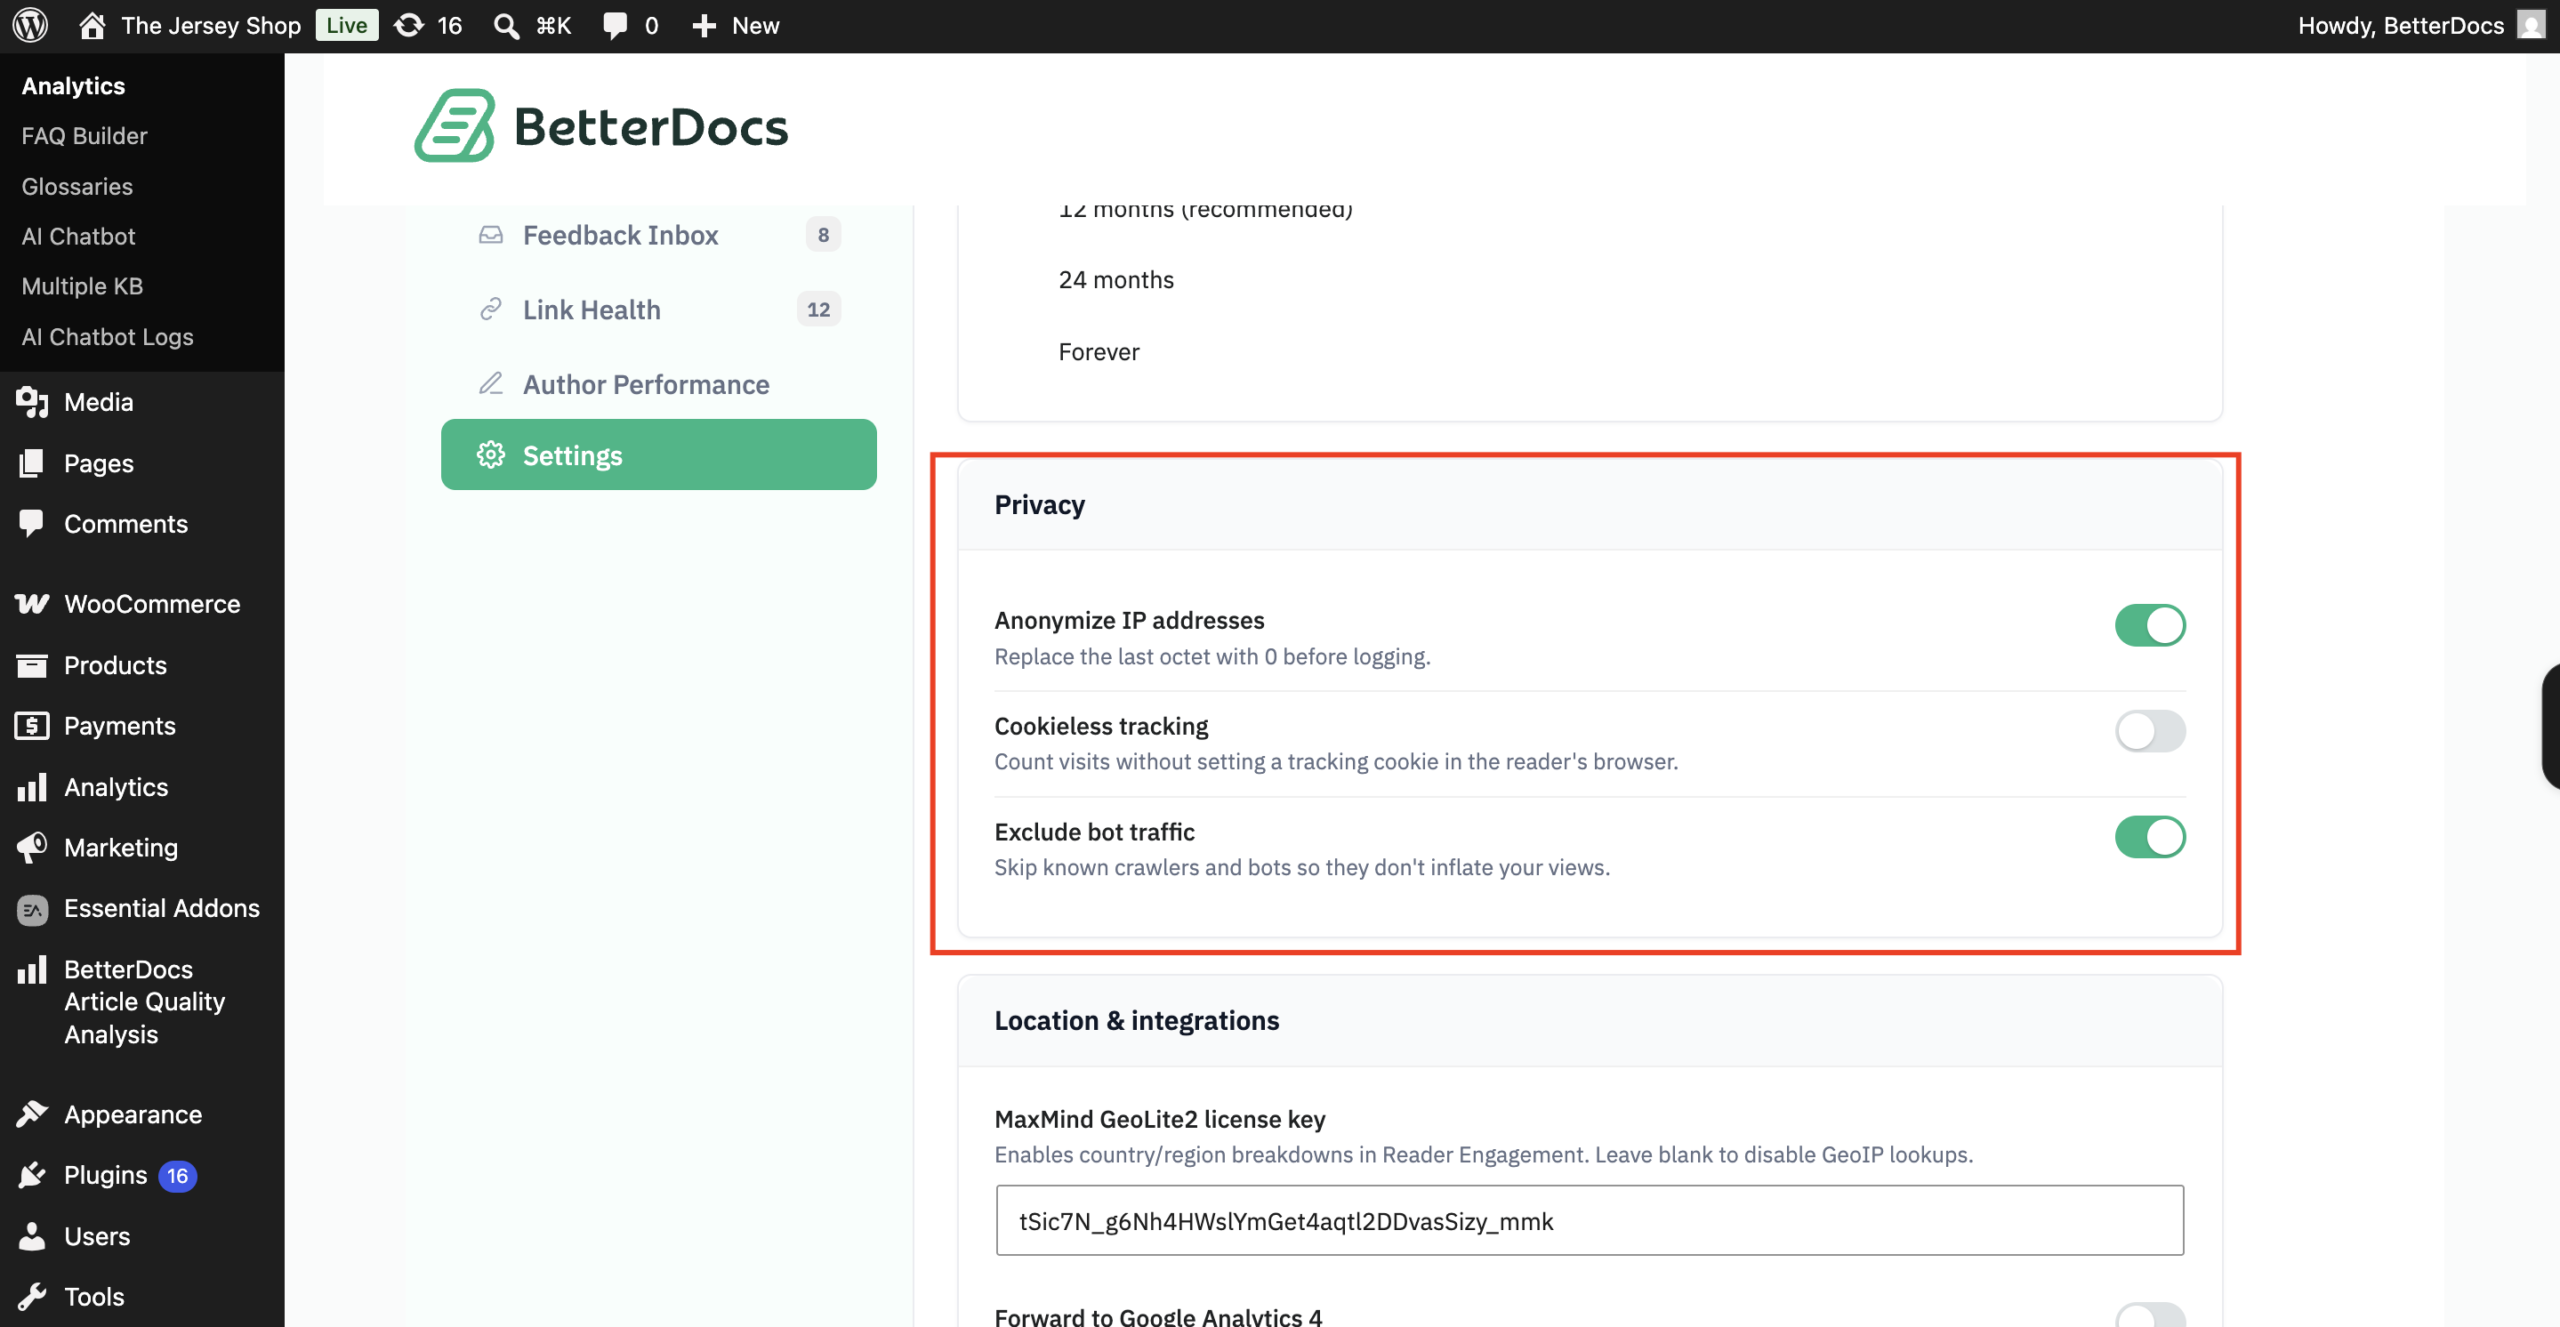
Privacy: #
Here, you can enable or disable some of the privacy settings. For example, here, you can enable or disable the ‘Anonymize IP Address’ to collect the IP from your visitors, count visits without setting a tracking cookie in the reader’s browser, and exclude Bot traffic to skip known crawlers and bots so they don’t inflate your views.
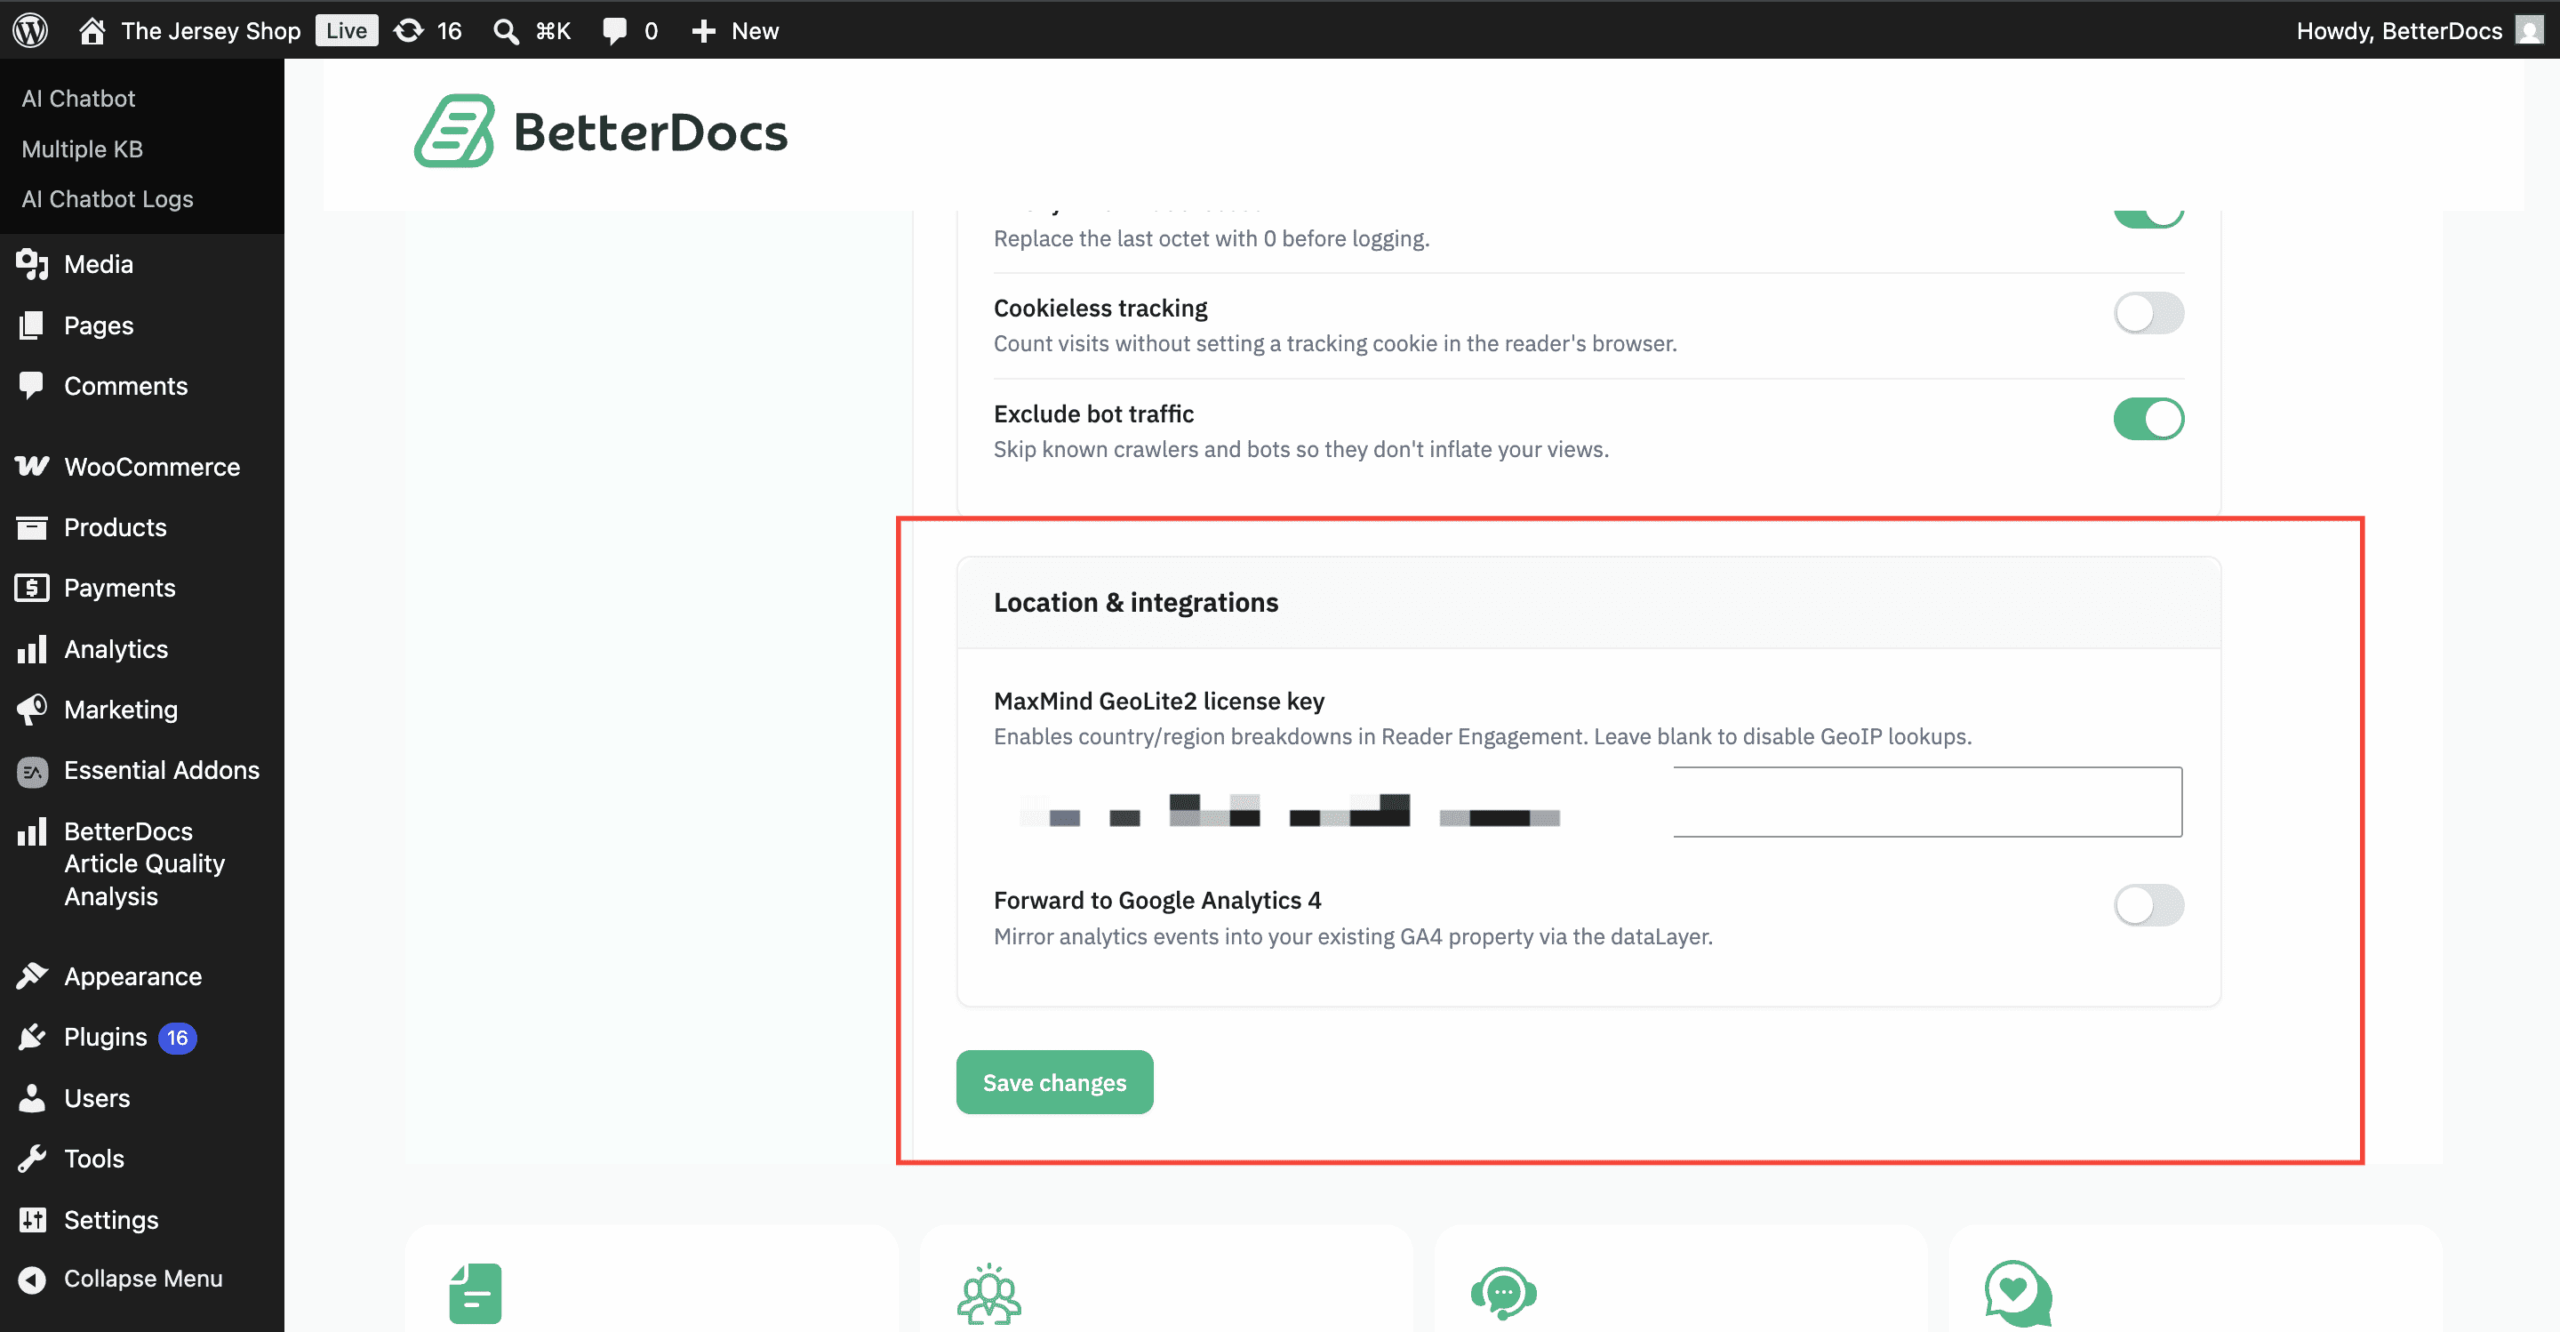
Location & Integrations from MaxMind GeoLite2: #
To identify the location of your visitors, BetterDocs uses a MaxMind GeoLite2 API key. Here is how you can configure it:
- Enable GeoLite2 (free): Sign up at MaxMind (or log in and complete GeoLite2 signup if you already have an account), then accept the GeoLite2 EULA; this “enables” downloads, which a regular account doesn’t have by default.
- Get your Account ID: MaxMind portal → account → copy your numeric Account ID (e.g., 1375198).
- Generate a License Key: Portal → Account → Manage License Keys → Generate new license key, name it (e.g., “BetterDocs GeoIP”), and copy it immediately; it’s shown only once.
- Connect to BetterDocs: Vai a Analytics → Settings → Location & Integrations, paste your License Key, then click Save Changes.
Here, by toggling the button, you can also enable forwarding the data to your Google Analytics 4 account.
This is how easily you can configure BetterDocs ‘Advanced Analytics’ and measure the performance of your knowledge base site visitors.
If you face any difficulties, feel free to contact our team di supporto.