
BetterDocs allows you to enhance your Knowledge base by adding the glossary to help readers understand the frequently used terms. Users can understand the important terms more easily without searching them on Google or Wikipedia. Follow the simple step-by-step guidelines to use the Glossary in BetterDocs.
To find this feature, you will have to go to your WordPress Dashboard and then navigate to wp-admin → BetterDocs.
Nota: Glossary is a premium feature only available with BetterDocs PRO. So, to access Glossary, make sure BetterDocs PRO is installed and activated.
Step 1: Activate Glossary in BetterDocs #
Vai al ‘BetterDocs’ tab from the left sidebar of your WordPress dashboard and click on ‘Settings,’
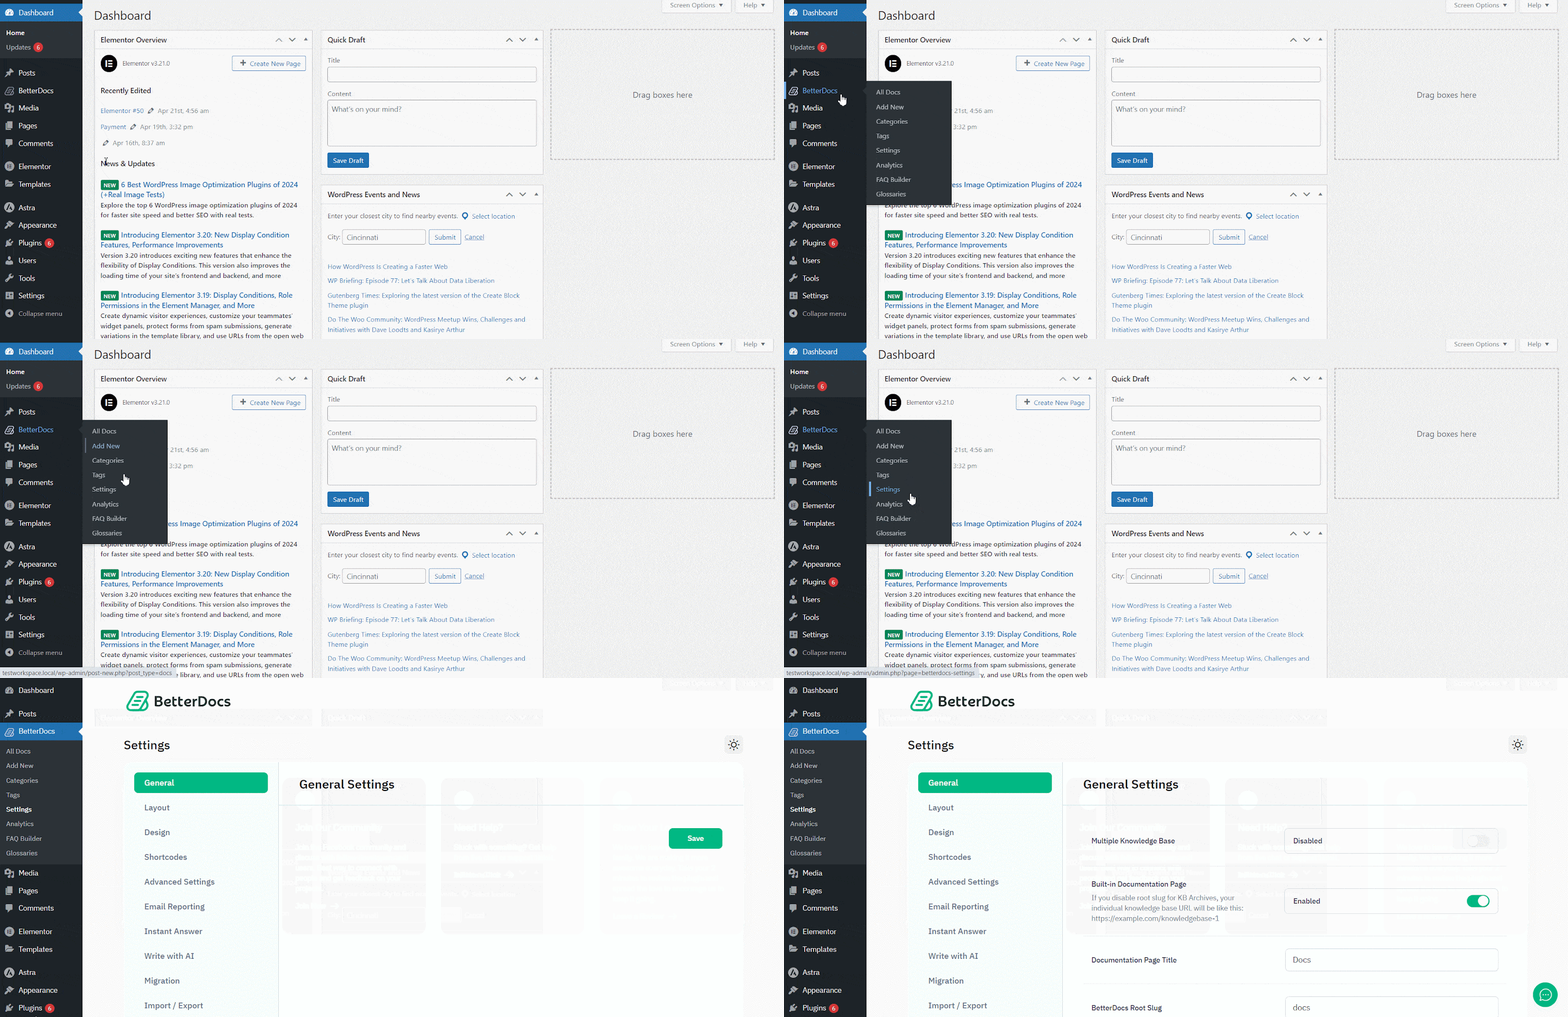
Now, move to the 'Generale' tab and find the‘Show Glossary’ option. After enabling, there will be another option, ‘Show Glossary Suggestions’ pop-up; toggle them on as well. Then, just enable‘Built-in Encyclopedia Page’, select the Encyclopedia source as‘Glossary’ e save the settings.
Nota: Selecting Glossary as an Encyclopedia source will help you to showcase all the Glossaries in one place.
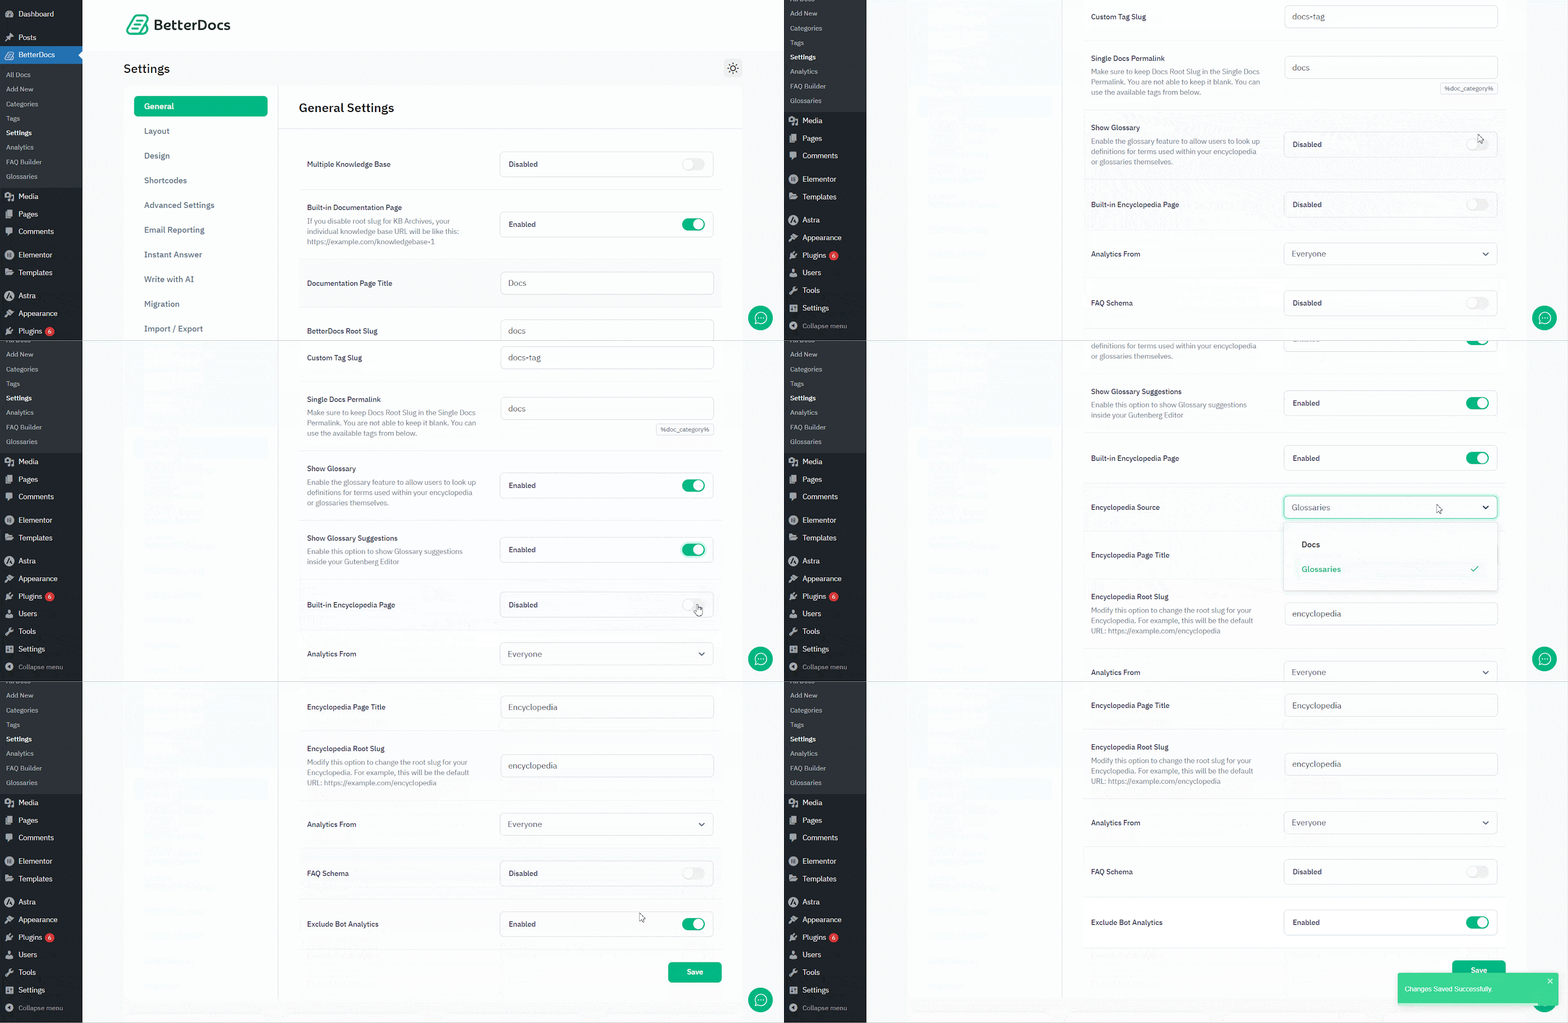
Step 2: Create a Glossary in BetterDocs #
To create a glossary, first go to the left sidebar and click on the ‘Add a New Glossary’ option. Here, you can give a ‘Glossary Term’ e ‘Description’ for that glossary and then press on the ‘Create’ option to create a new glossary for your documentation.
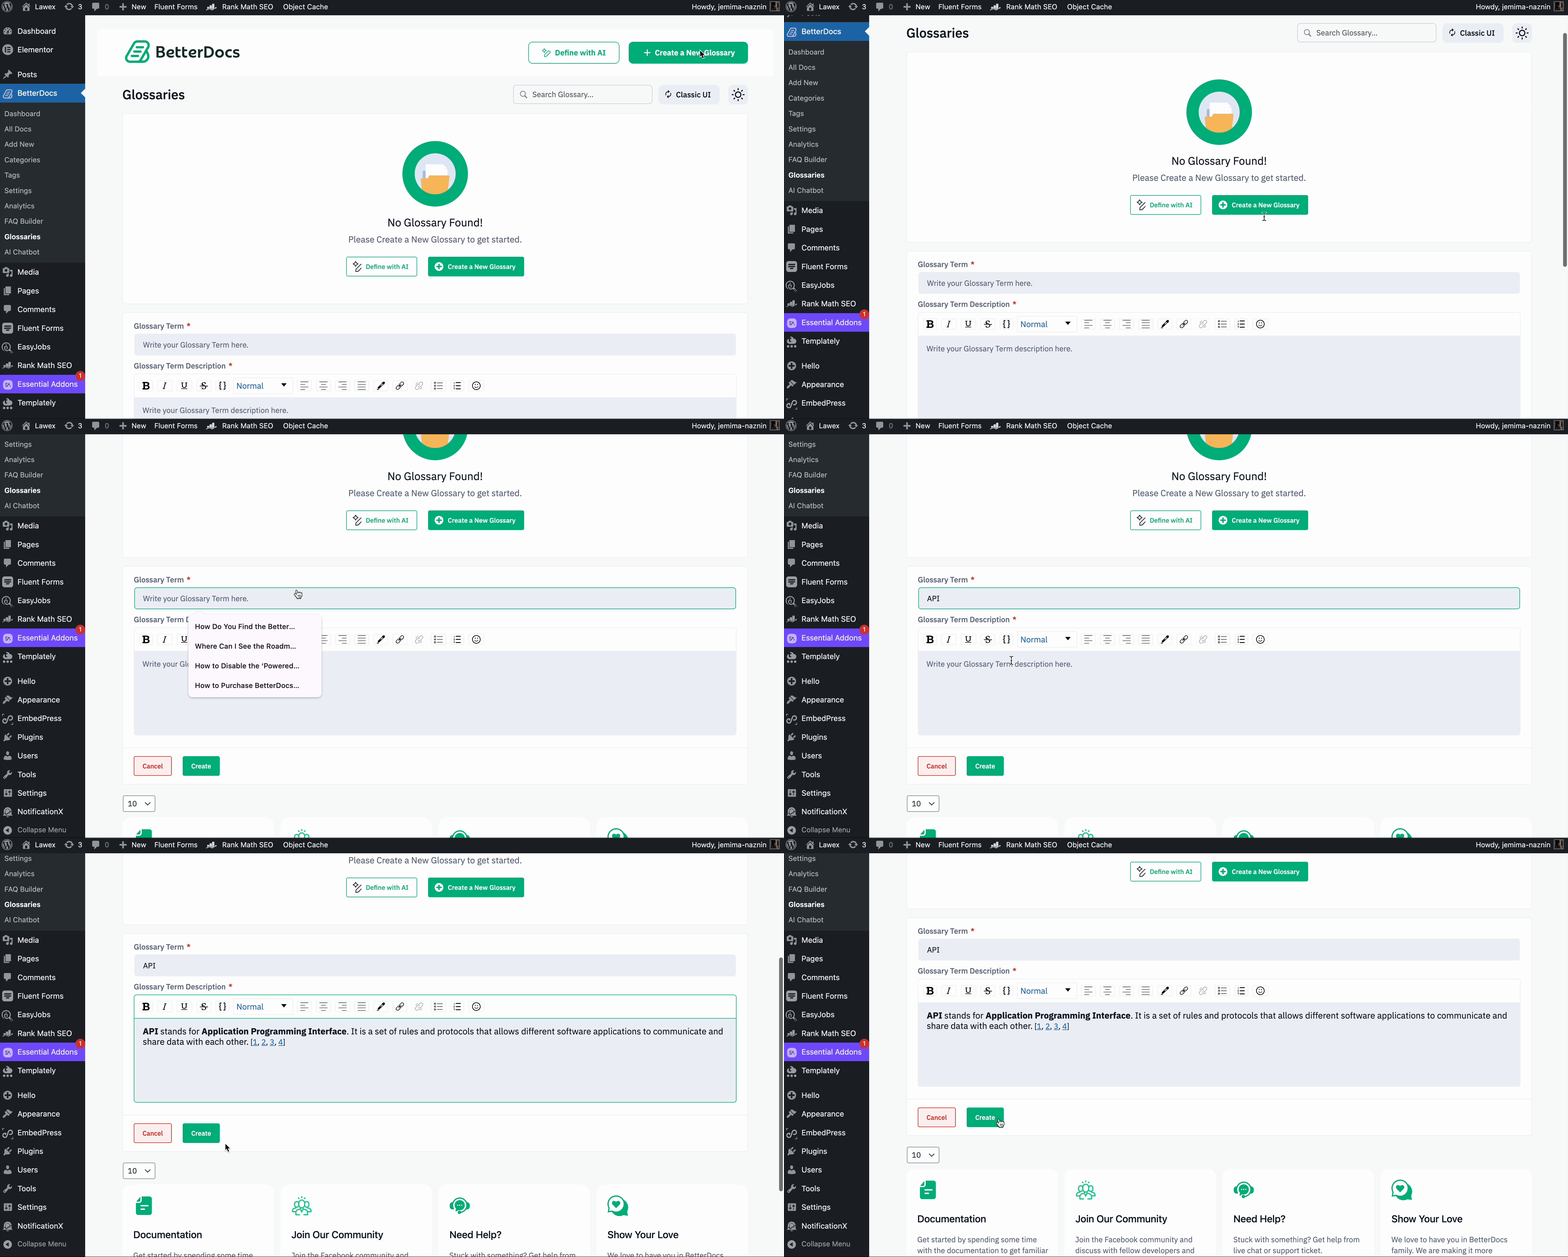
Generate Glossary Terms with AI #
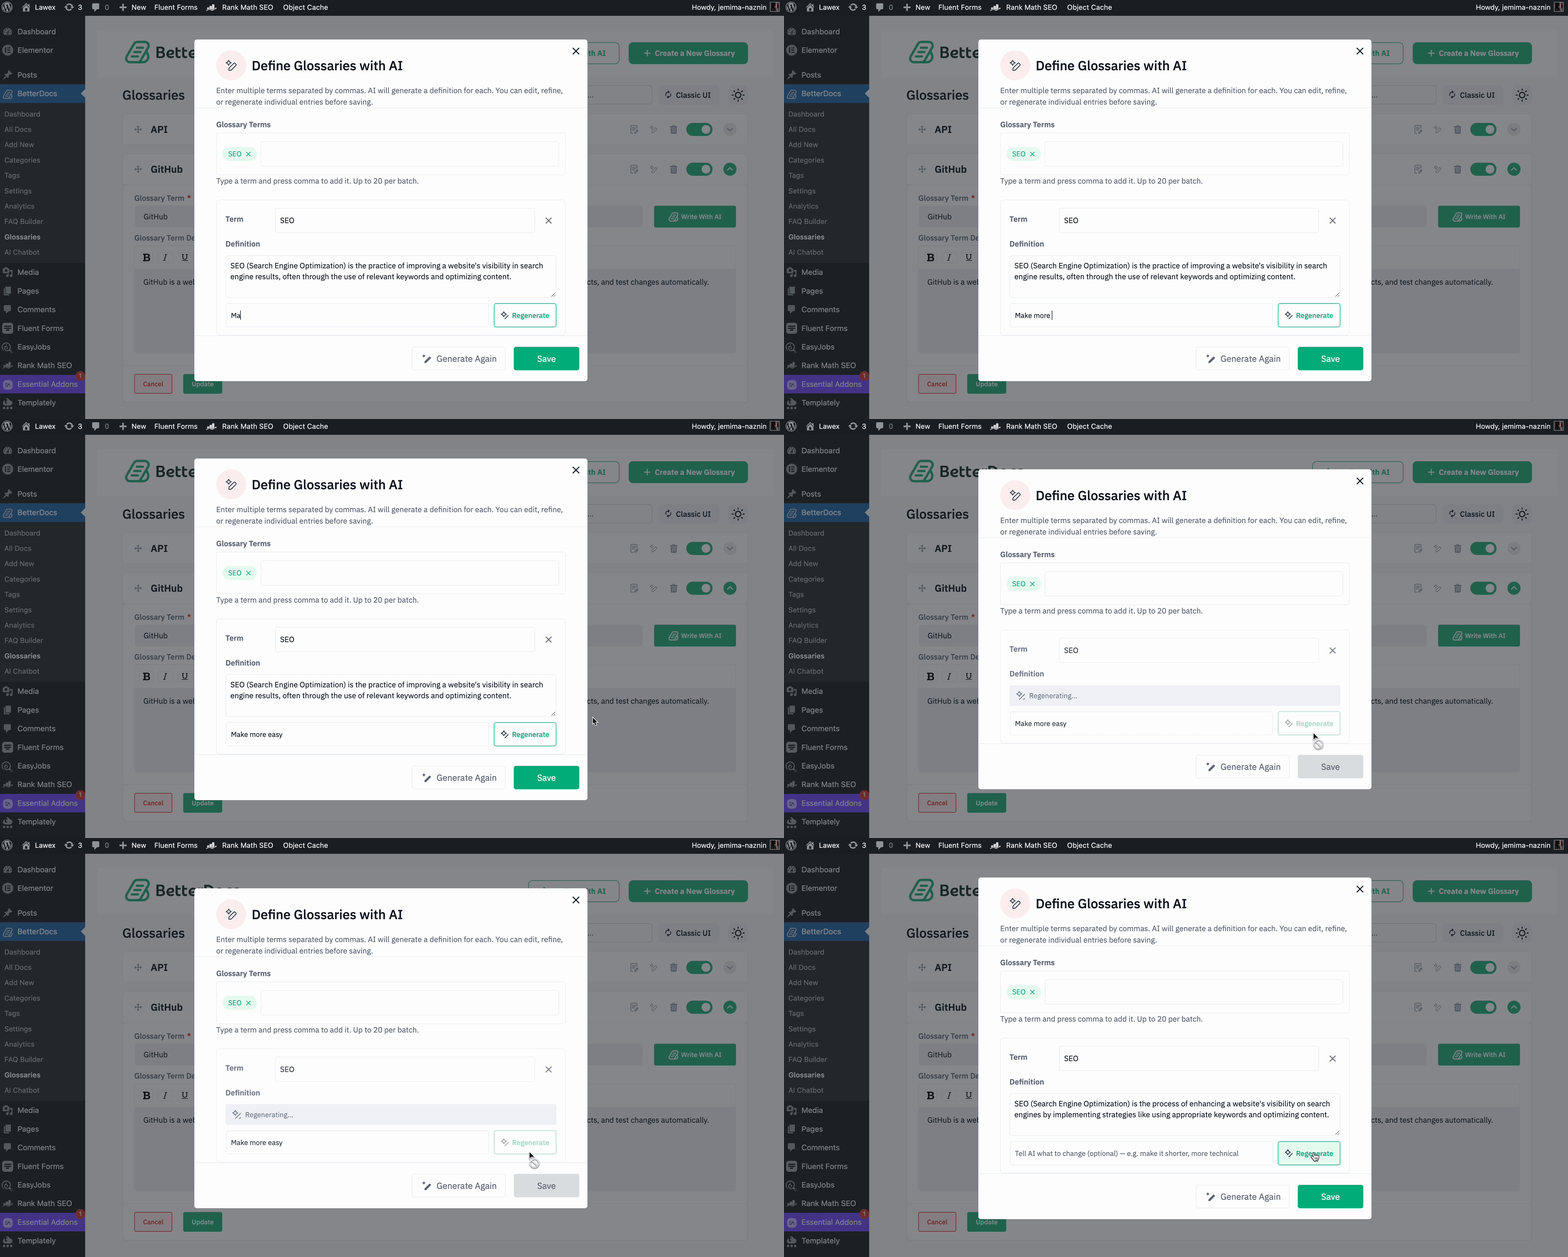
You can add a glossary term and generate a description with AI as well. To generate a term description with AI, click on ‘Define with AI’, add the term, and click on ‘Generate Definitions’.
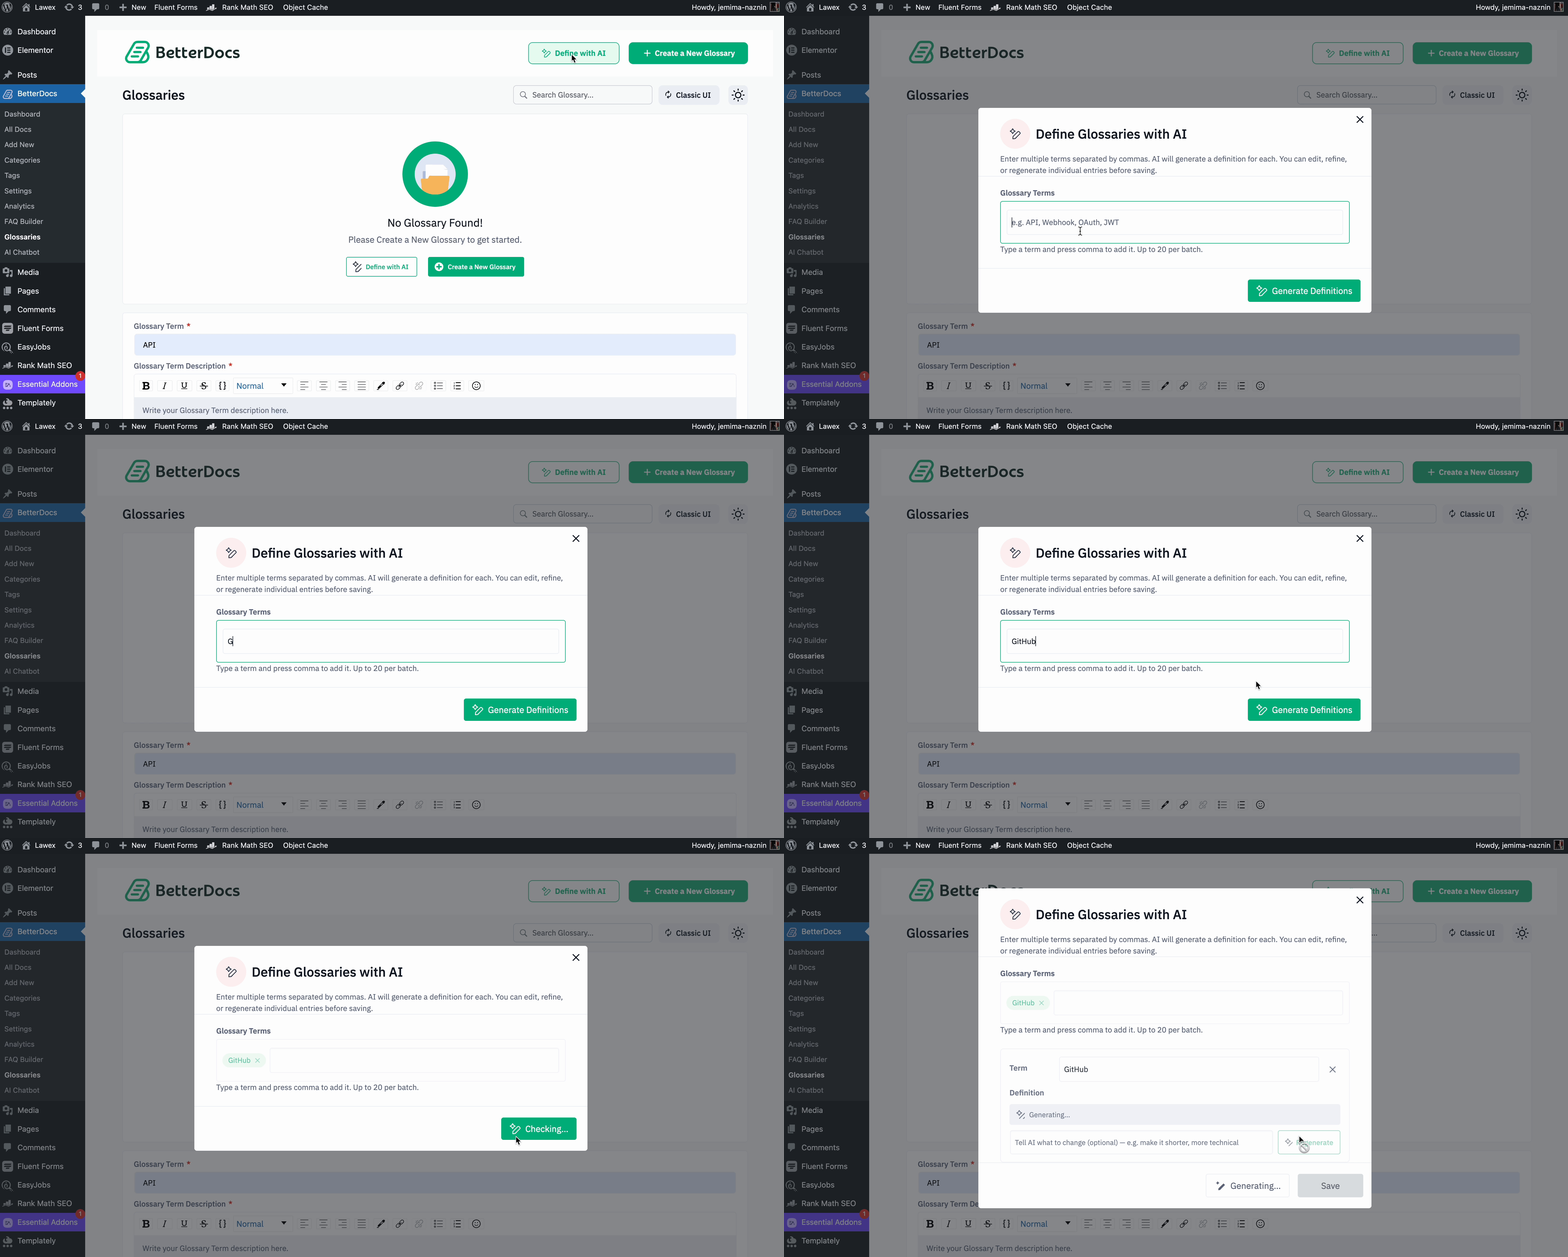
If you do not like the definition or want a different version, then you can regenerate it as well. Simply write what to change in the respective field, click on the ‘Regenerate’ button, and a new description will be generated.
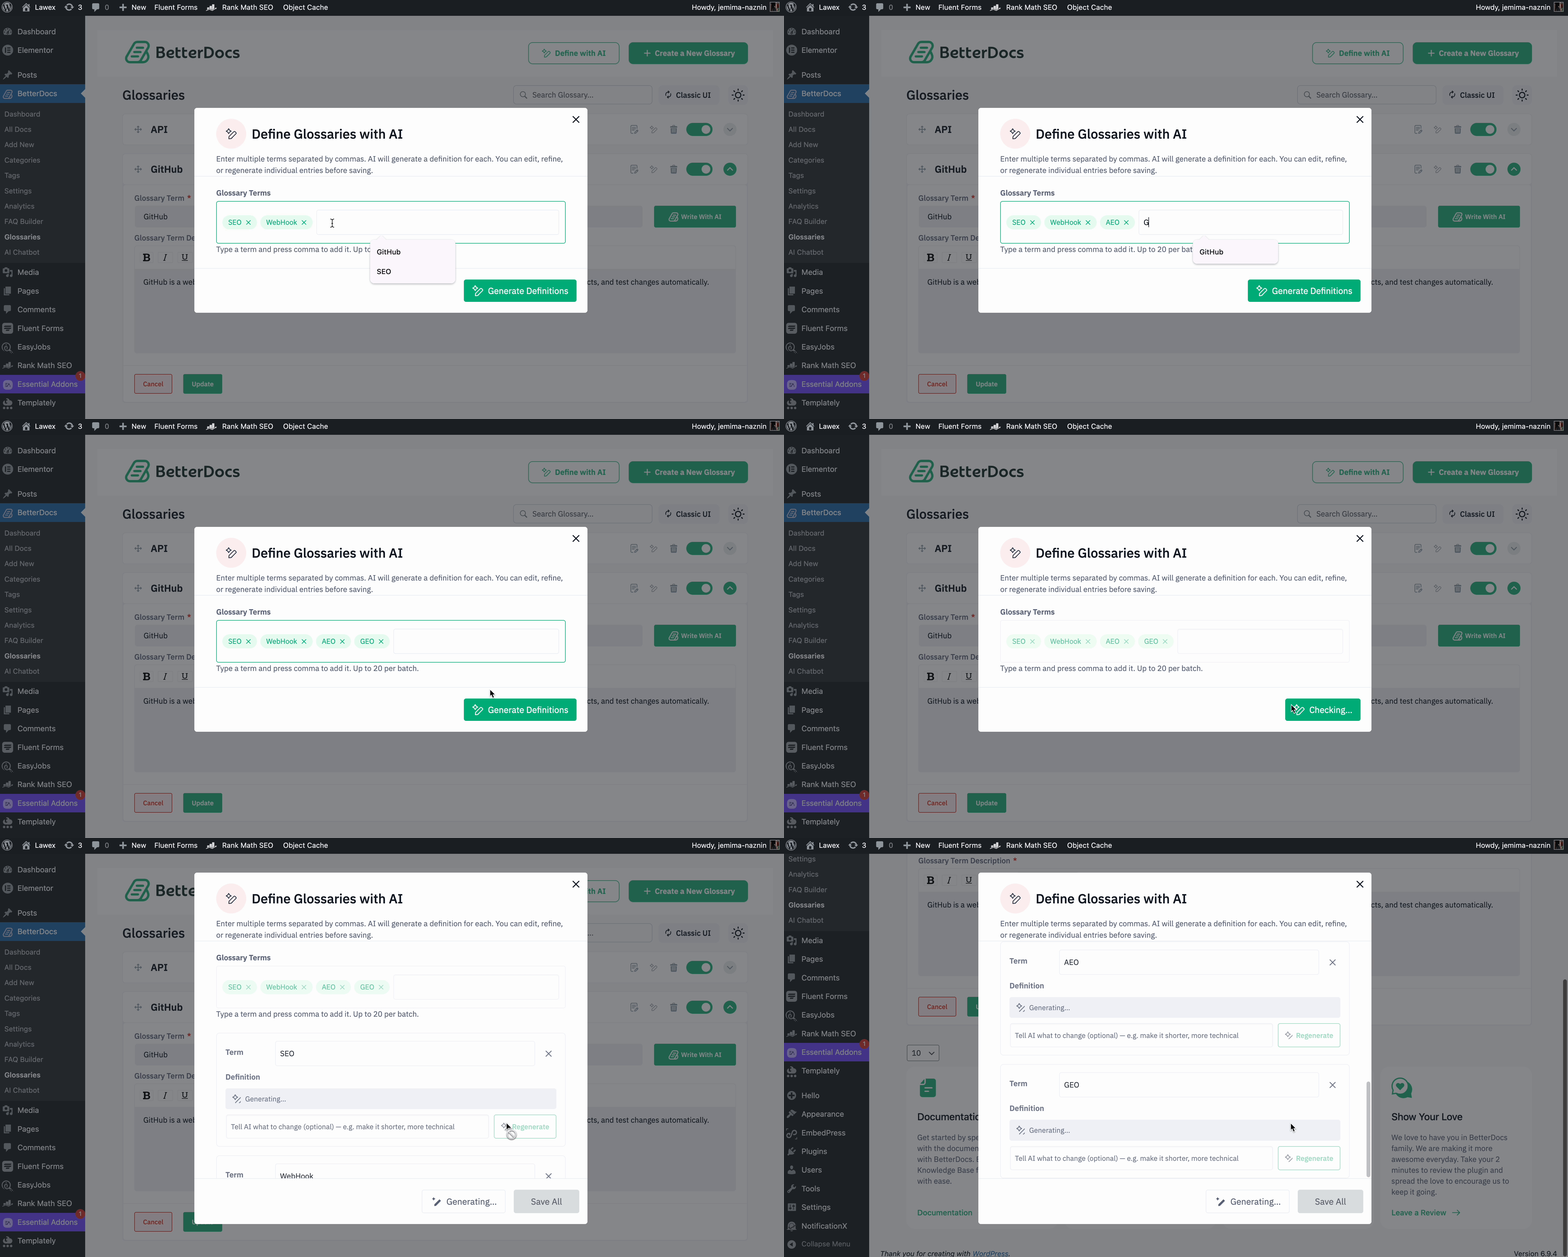
Also, you can generate Glossary Term Description for multiple terms at a time. Place the terms by separating them with commas in the ‘Glossary Terms’ field, click on ‘Generate Definitions’ and all the descriptions will be generated instantly.
Step 3: Customize the Design as Your Preferences #
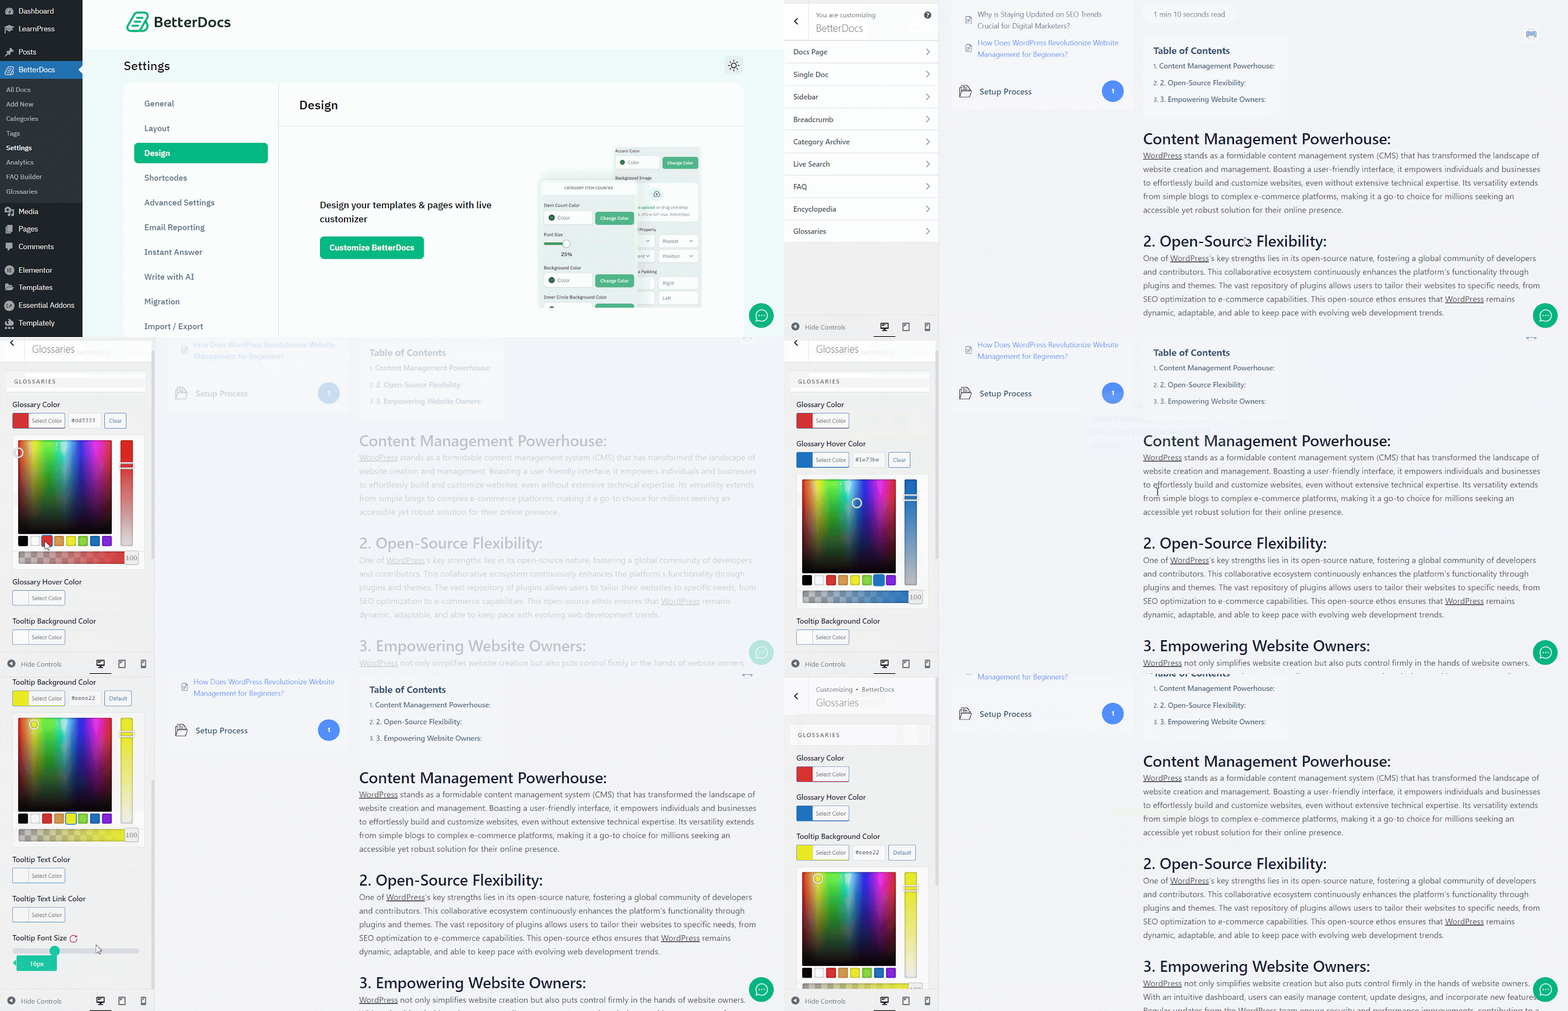
You can customize the designs of your glossaries. To customize, go to the 'Design' tab and select the "Personalizza BetterDocs" option. It will automatically bring you to the WordPress editor panel of BetterDocs. Here, select the ‘Glossaries’ from the menu options and customize the text color, background color, etc as your preferences.
Step 4: Create a New Page to Show Glossary with Encyclopedia #
If you want to show all the glossaries on one page, then you can create a new page and drag and drop the ‘BetterDocs Encyclopedia’ block from the blocks panel. Now you can see that all the created glossaries are showing together in one place. You can adjust the layout and other advanced customizations from here as well.
Nota: For the Elementor users, there is also a ‘BetterDocs Encyclopedia’ widget available.
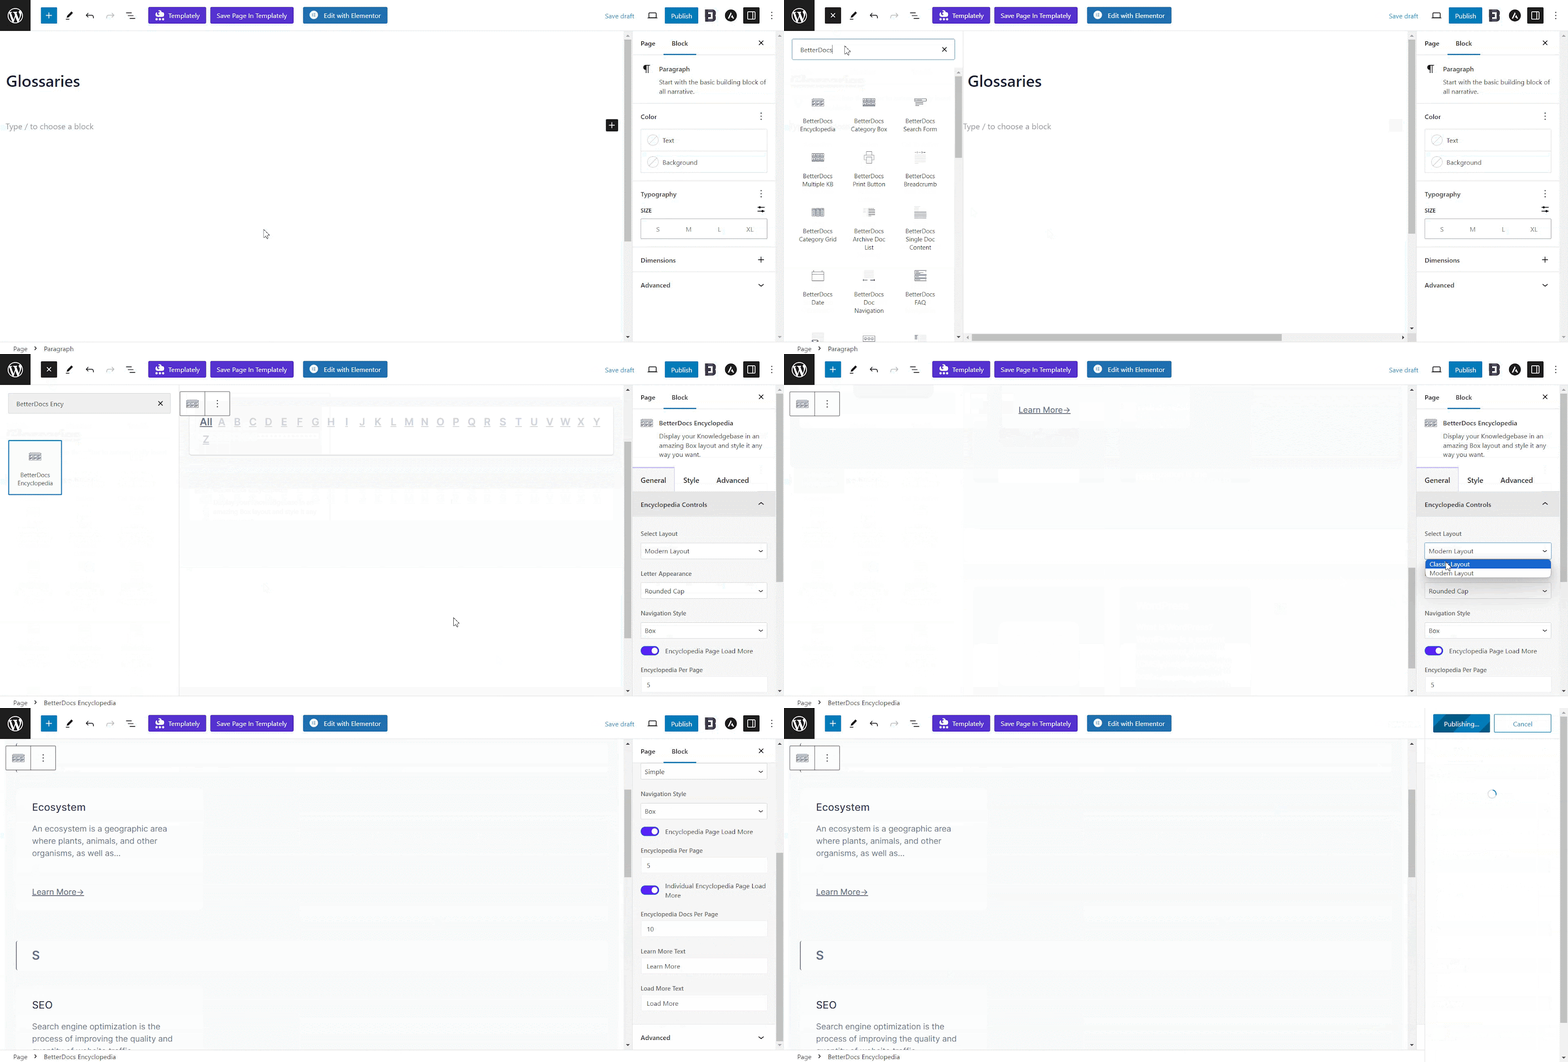
This is how easily and efficiently you can create and showcase your glossaries on your site so that users do not get confused with complex terms.
Display Glossary in BetterDocs Easily #
As you have made the necessary adjustments, now open a doc and see how it looks in your document. If you go to a document and hover on the word that you have created as ‘Glossary Term’, you can see a tooltip with the description of the glossary.
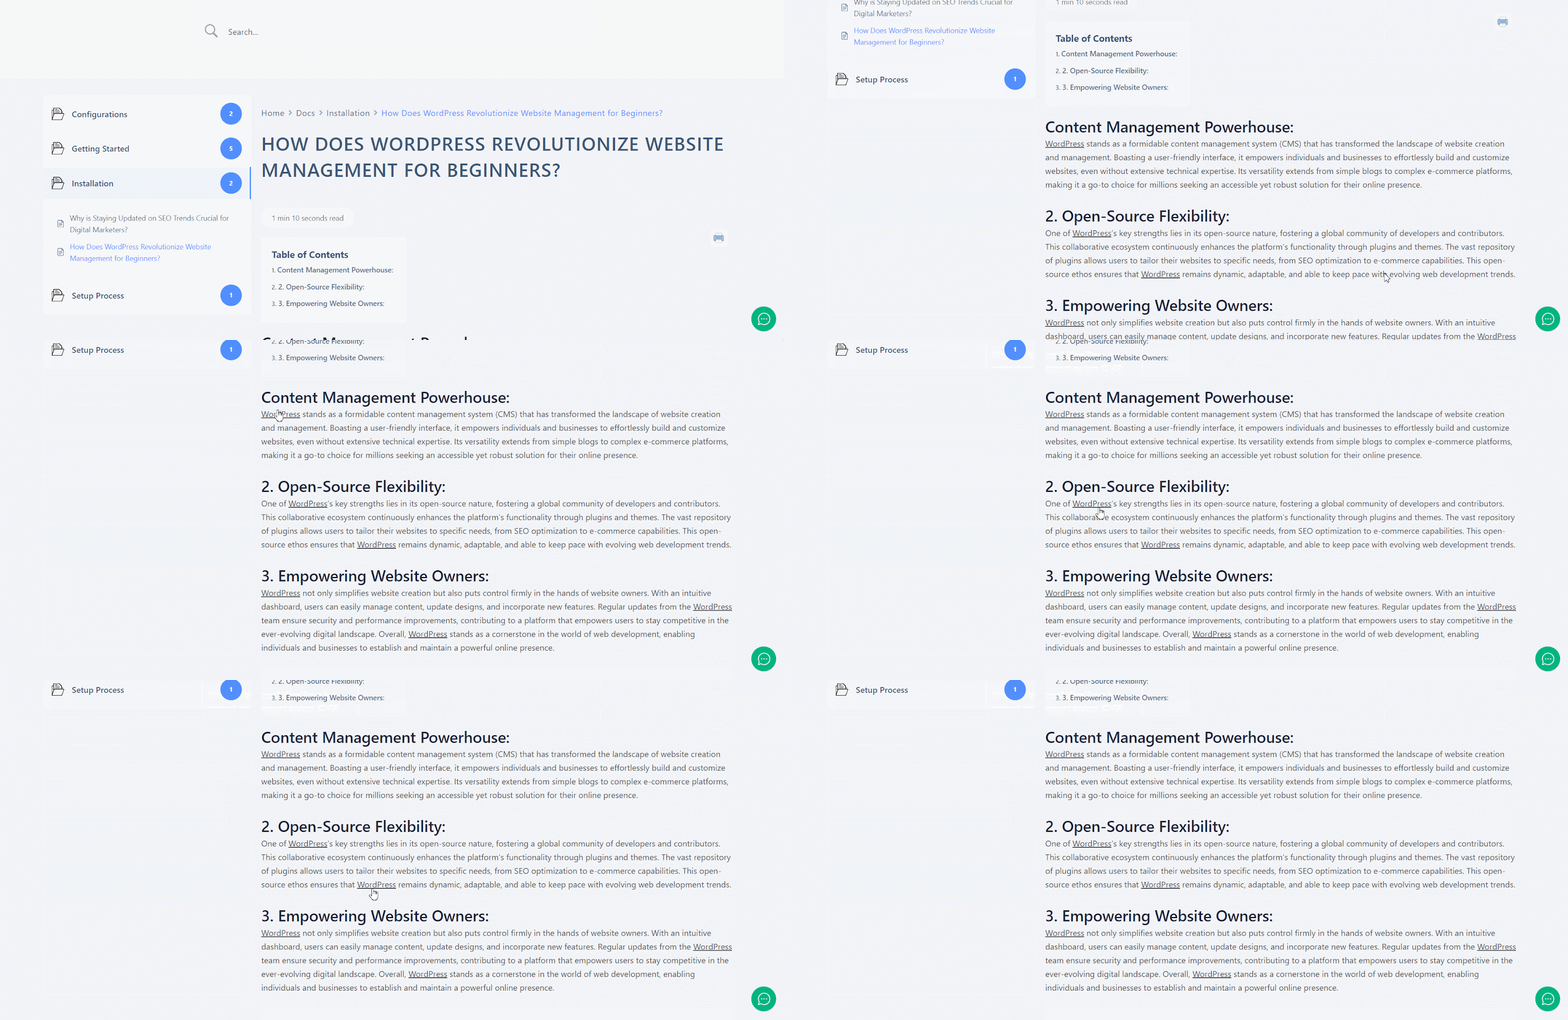
This is how simply you can visualize the Glossaries in the document. If you face any difficulties, feel free to contact our support team.