
BetterDocs API Docs feature lets you import an OpenAPI (Swagger) spec or a Postman Collection and turn it into a fully rendered, browsable API reference inside your knowledge base, complete with code samples, request/response tables, and a live Try it playground.
Instead of hand-writing endpoint documentation and keeping it in sync manually, you upload your spec once and generate API documentation with BetterDocs, which maintains the docs for you, saving hours of repetitive documentation work every time your API changes.
Nota: You will need an OpenAPI spec (JSON or YAML) or a Postman Collection export (JSON) ready to upload before you start.
Step 1: Open the API Docs Screen #
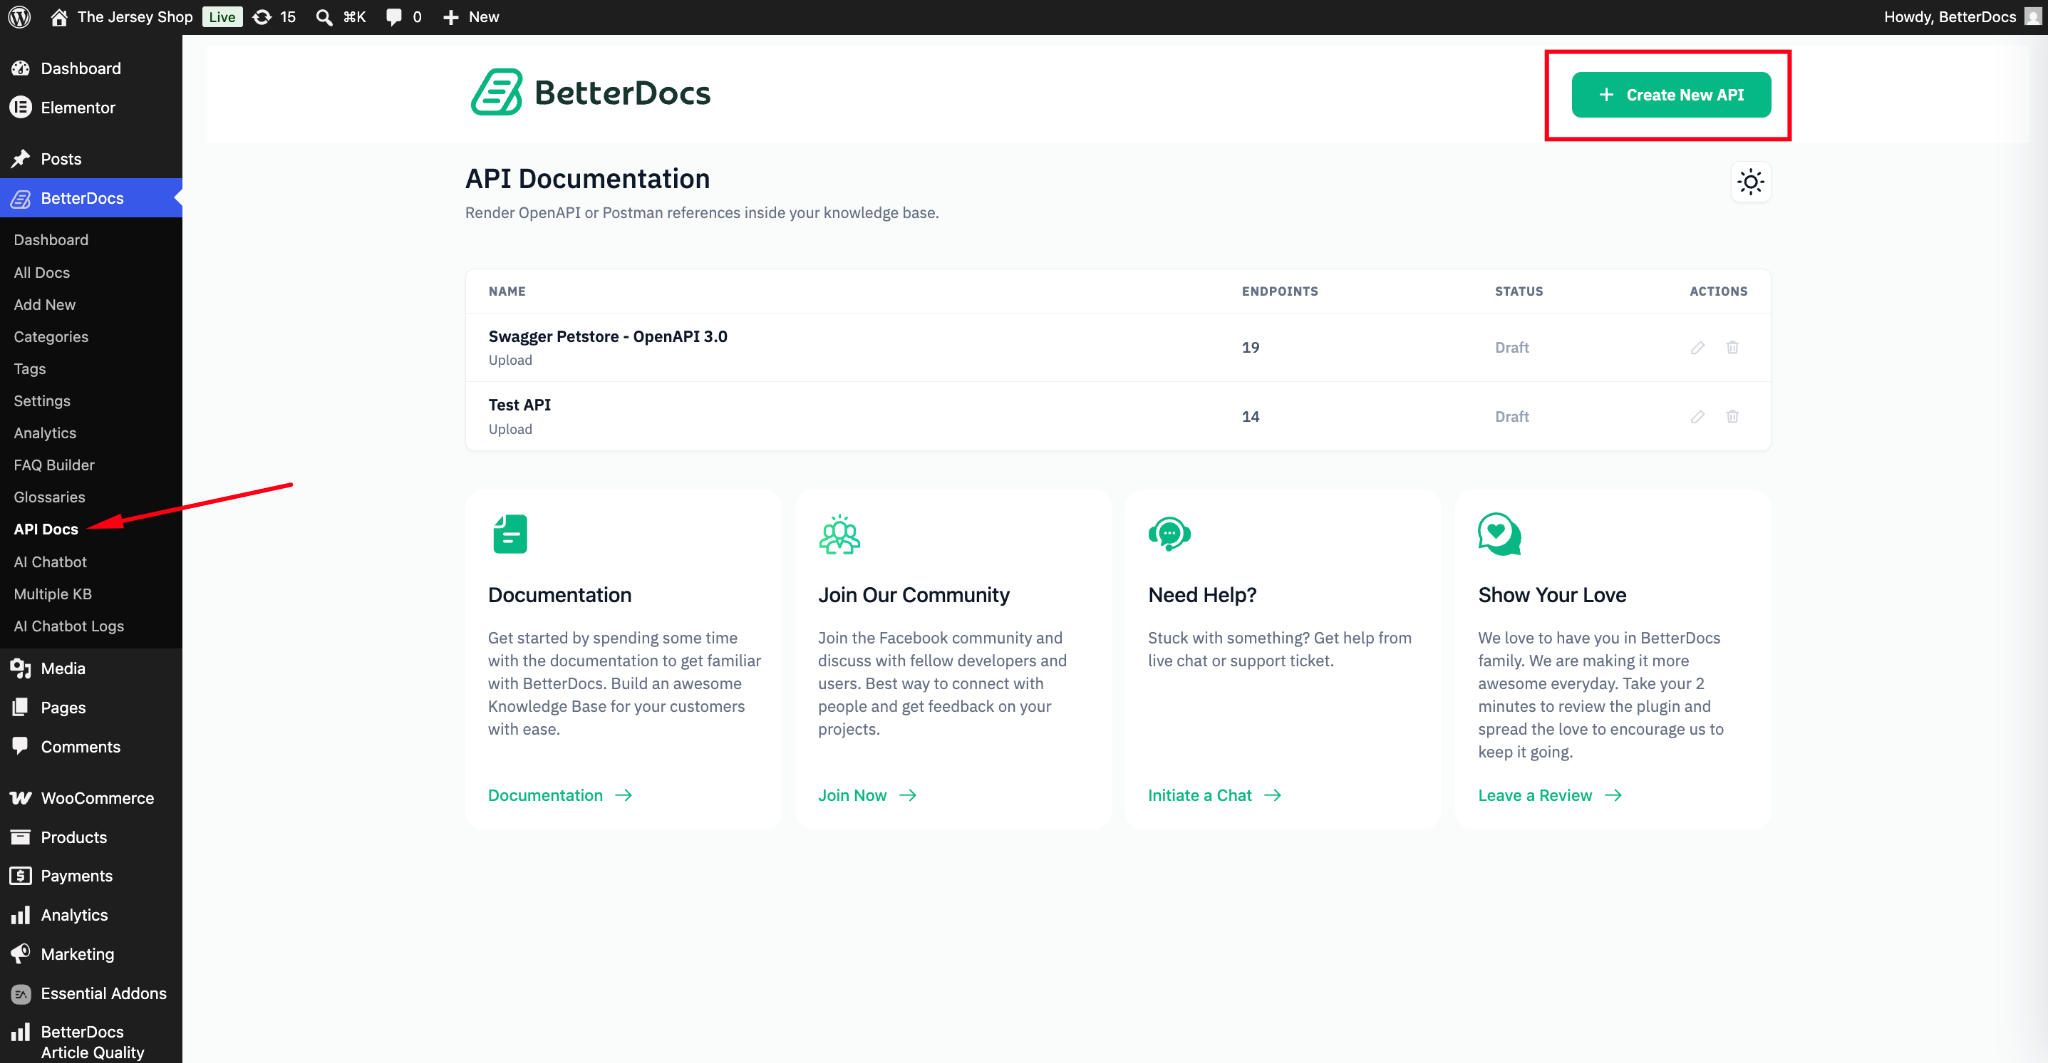
Head to wp-admin → BetterDocs → API Docs. You’ll land on the ‘API Documentation’ screen, which lists any API references you have already created and gives you a ‘Create New API’ button in the top right.
Step 2: Import Your API Spec #
Click ‘Create New API’. In the panel that opens:
- Name: Leave empty to pull the title straight from your spec, or set your own.
- OpenAPI or Postman spec: Choose ‘Upload file’ and select your OpenAPI or Postman spec file. BetterDocs automatically detects which format it is and converts it accordingly.
- Generate endpoint docs: Set to ‘Yes’ so each endpoint becomes its own editable doc, grouped by tag with method badges. Otherwise, you can choose ‘No’.
- Create as: Choose whether the reference lives in ‘Its own Knowledge Base’ or an existing one.
- AI content: You can leave as ‘None’ or select ‘Descriptions’, ‘Examples’, or Both from the dropdown.
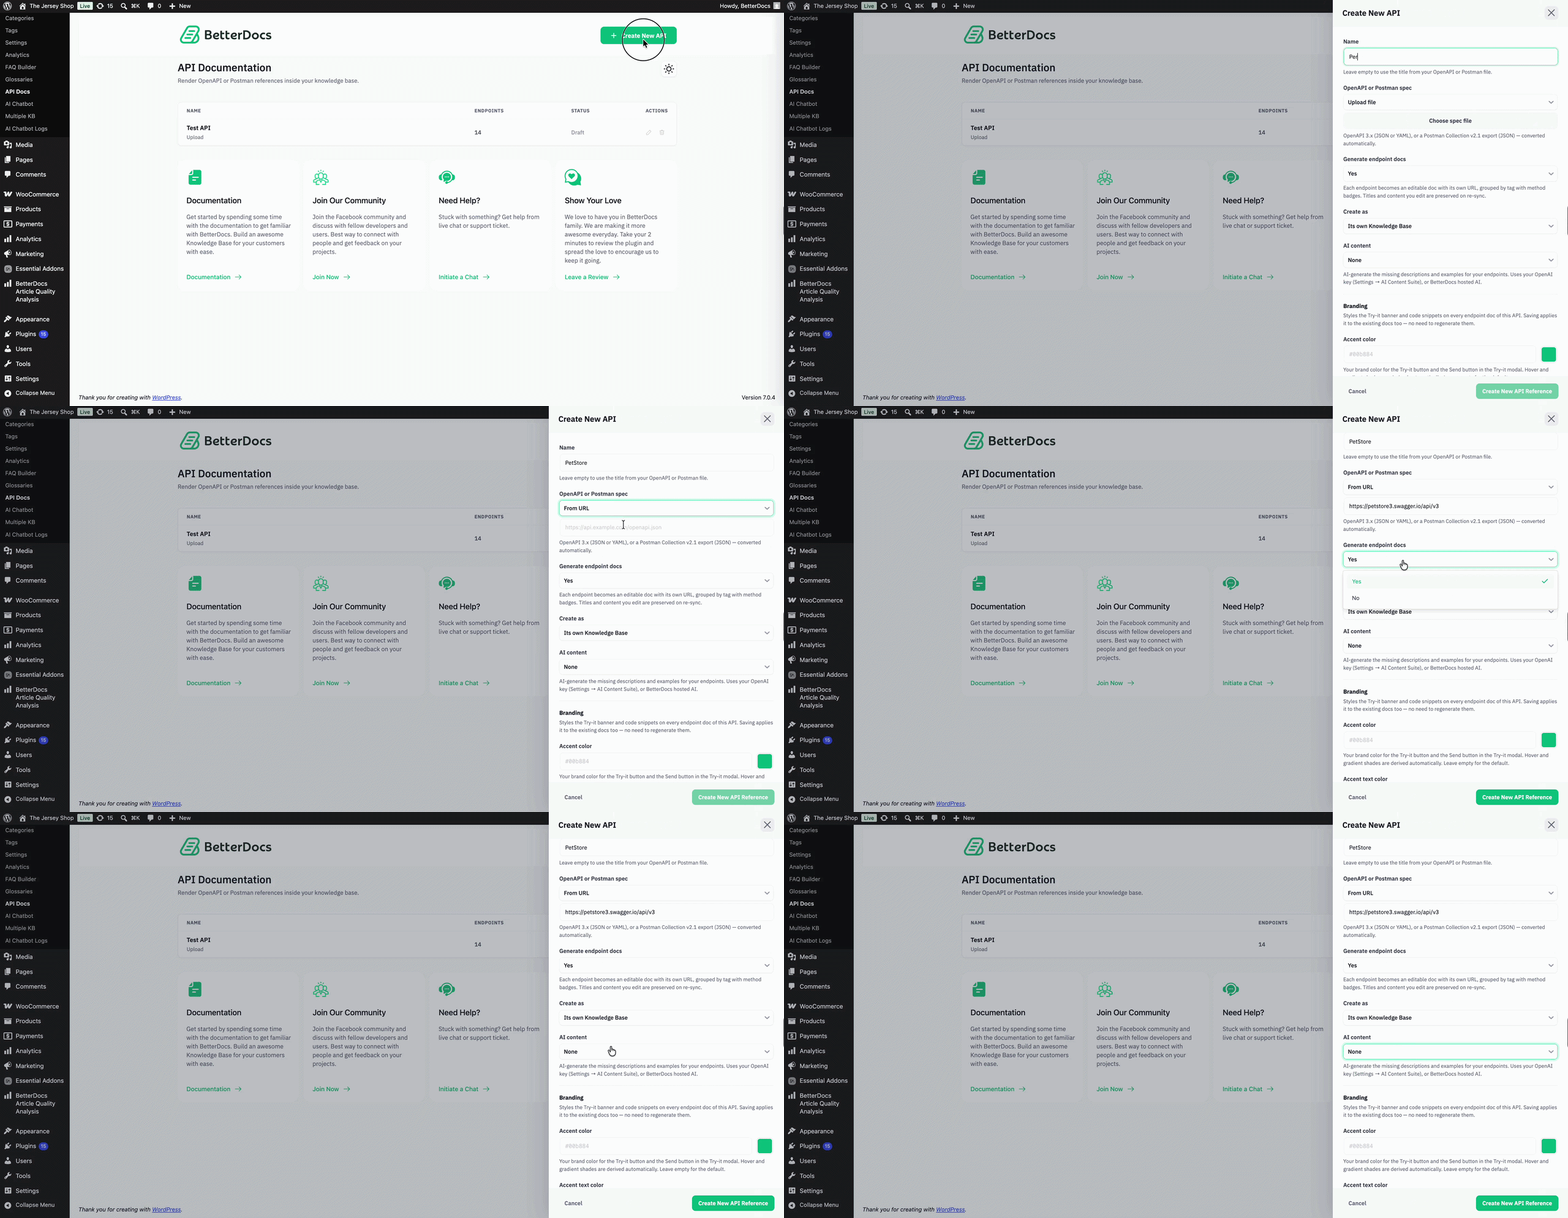
Click ‘Create New API Reference’. BetterDocs shows a summary confirming the detected format, operation count, and spec title once the import finishes.
Nota: When you upload a Postman collection, BetterDocs also builds each endpoint’s request-body field table from an inferred schema based on the example values in your collection. OpenAPI specs already define this schema explicitly, so no inference is needed there.
Step 3: Customize Your Reference’s Appearance And Behavior #
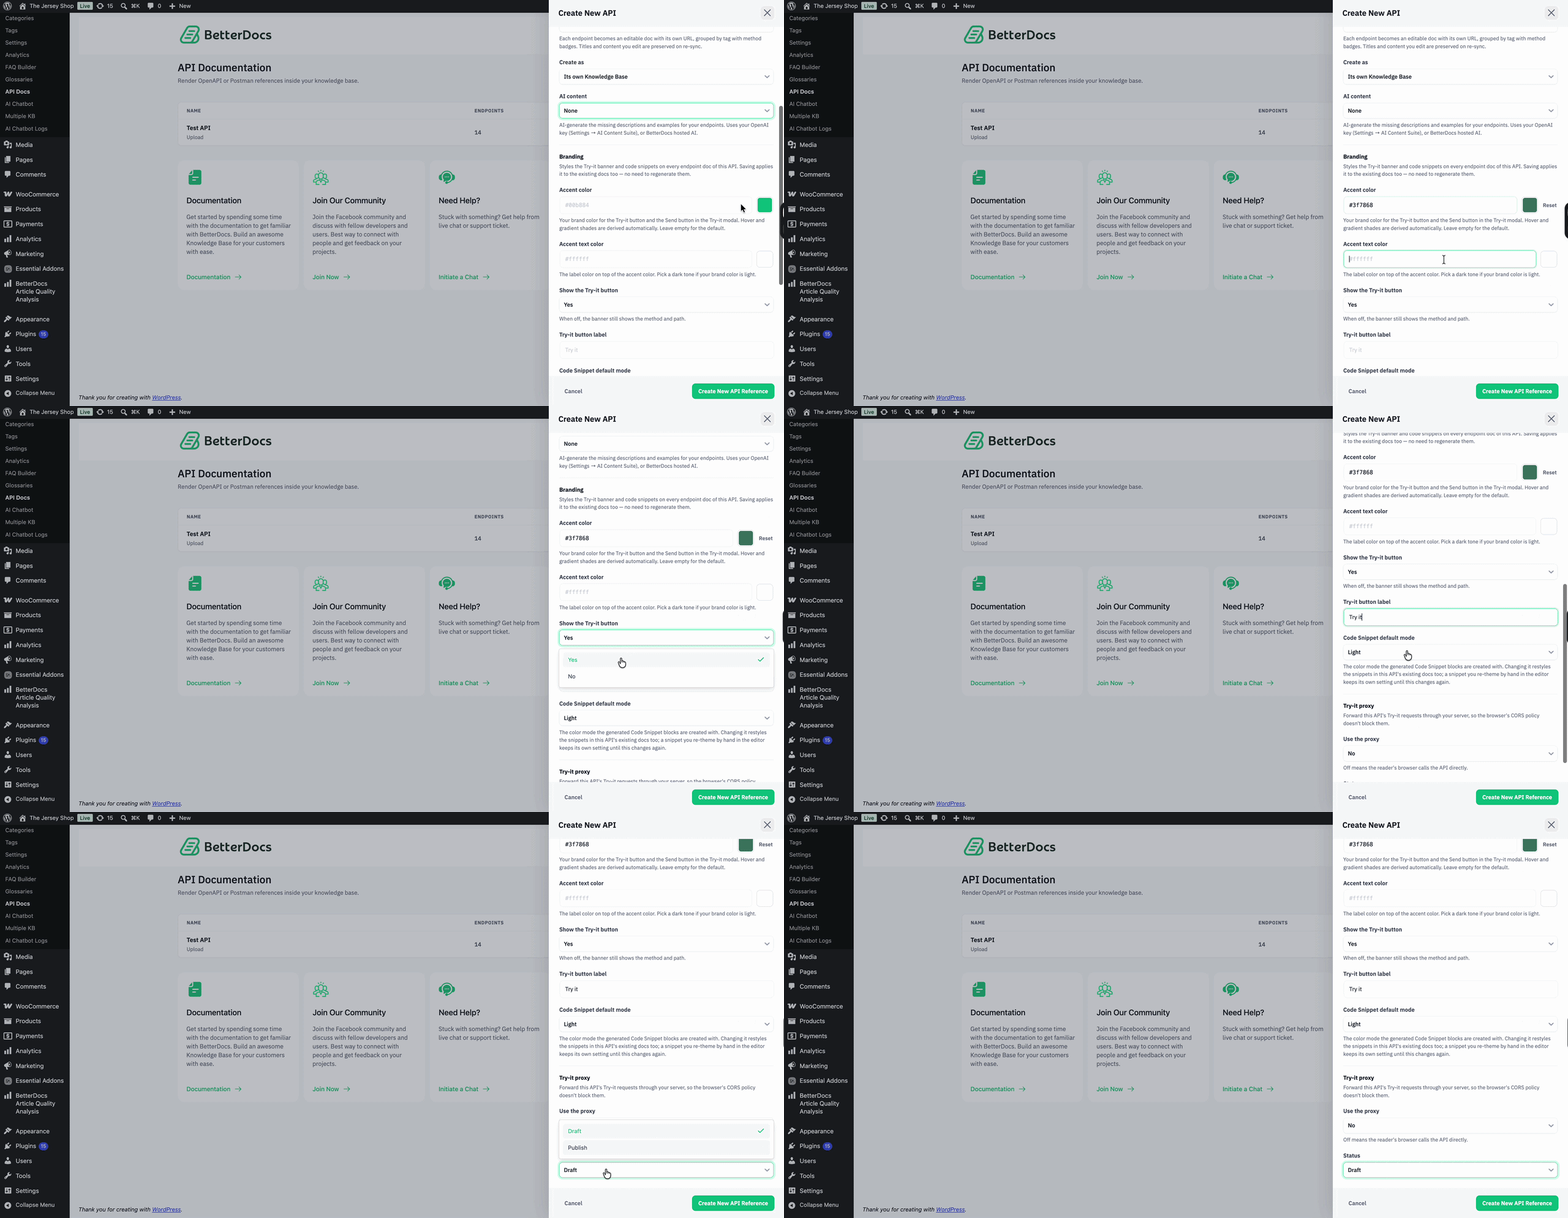
These settings apply the same way regardless of whether you imported an OpenAPI or Postman spec. Scroll down in the same panel to set:
- Accent color / Accent text color: Your brand color for the Try-it banner and Send button; applies to every endpoint doc under this reference.
- Show the Try-it button: Turn it off if you only want the method and path shown, without a live tester.
- Code Snippet default mode: Light or Dark styling for generated code blocks.
- Try-it proxy → Use the proxy: Forwards Try-it requests through your server so the browser’s CORS policy does not block them. You will come back to this in Step 7.
- Status: Draft or Published.
Step 4: Generate Endpoint Docs #
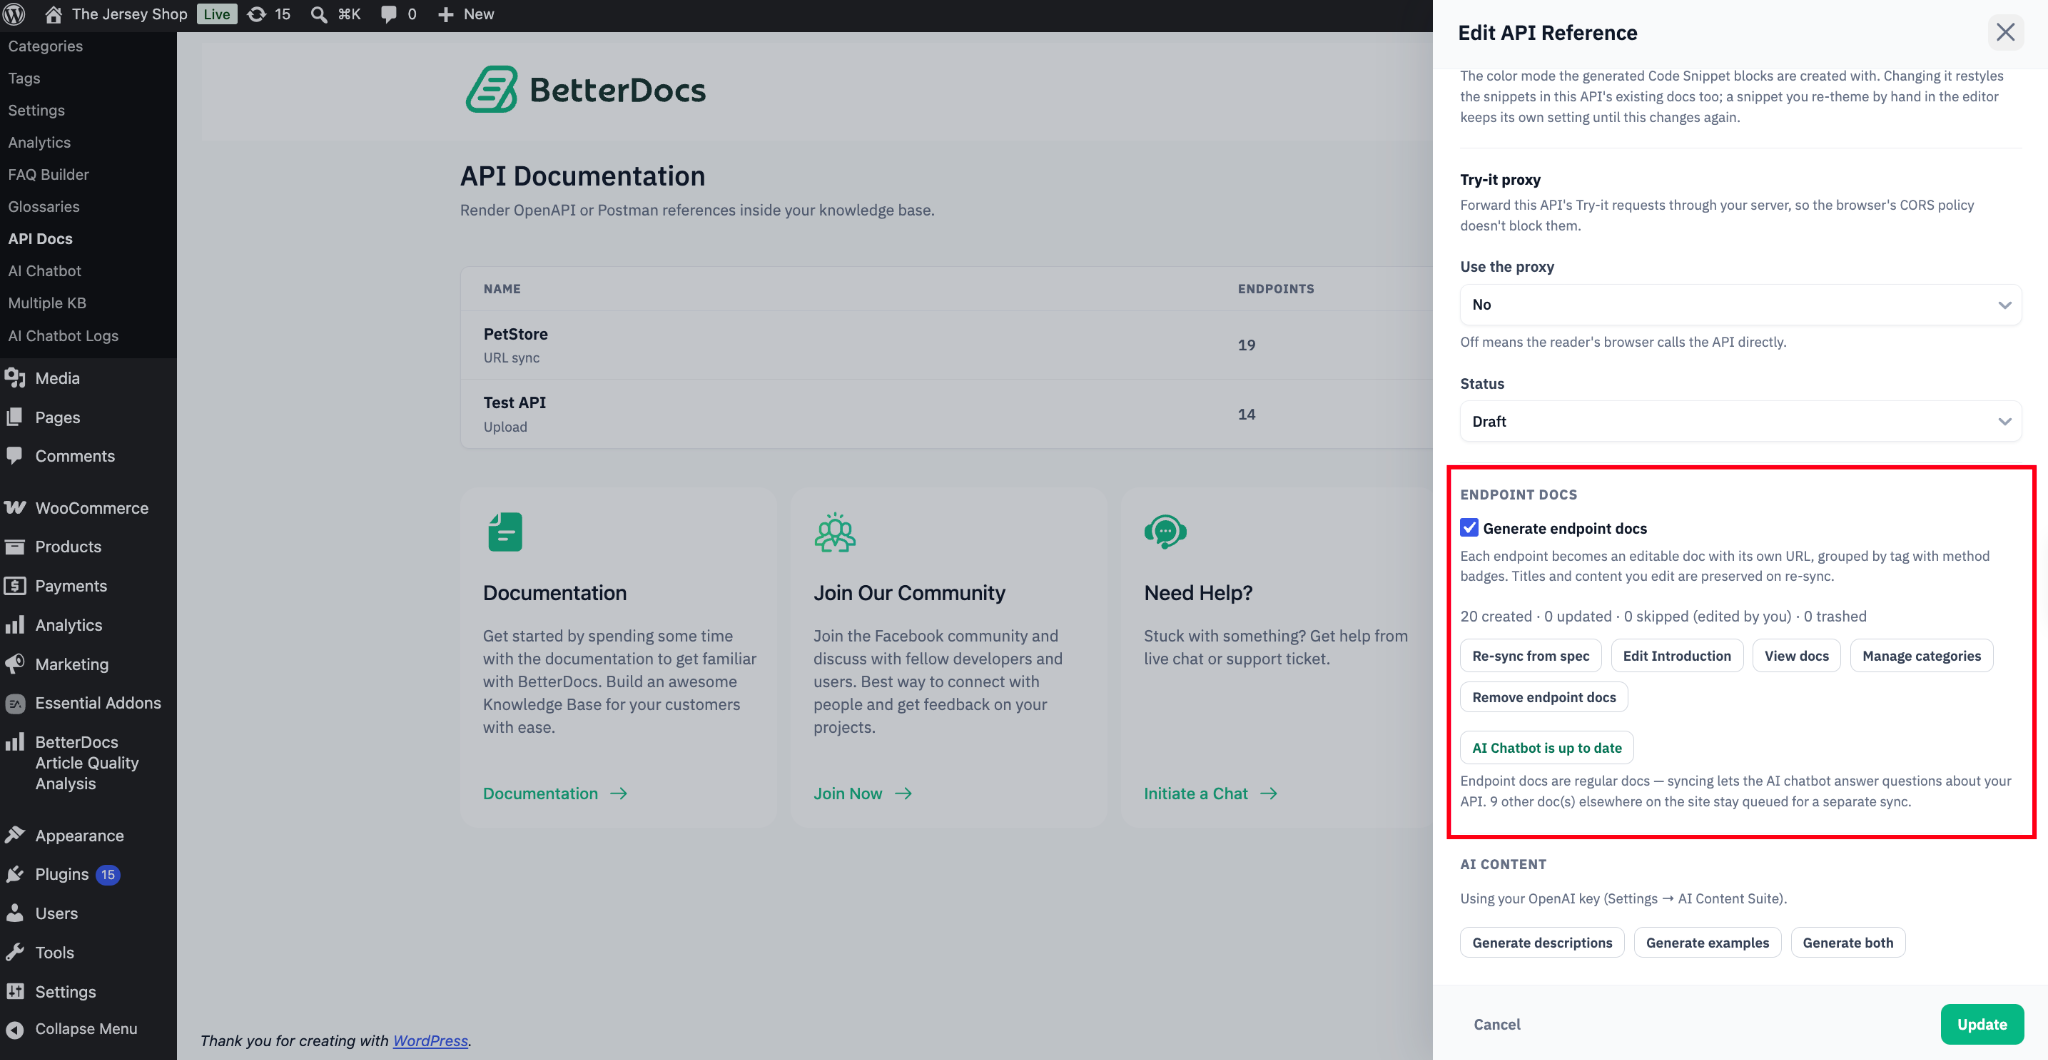
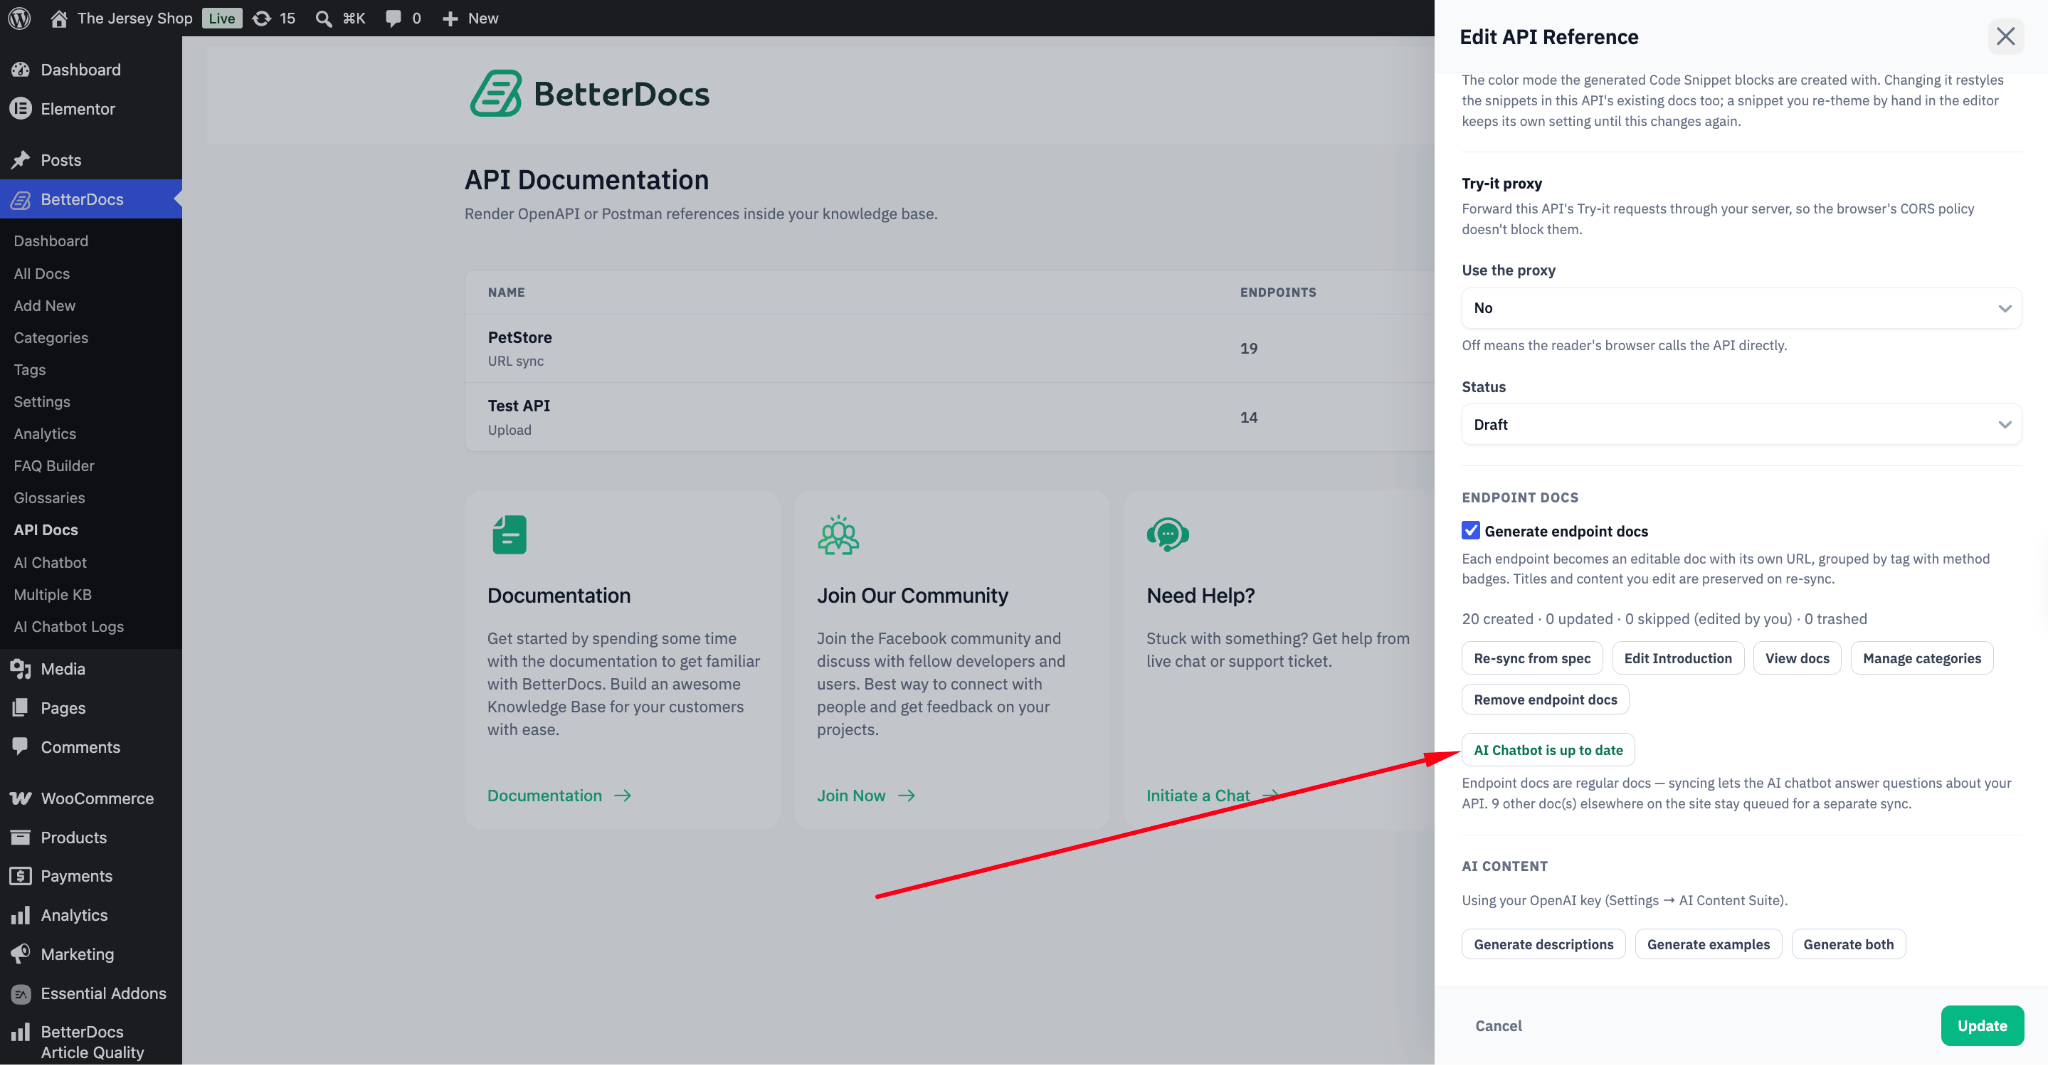
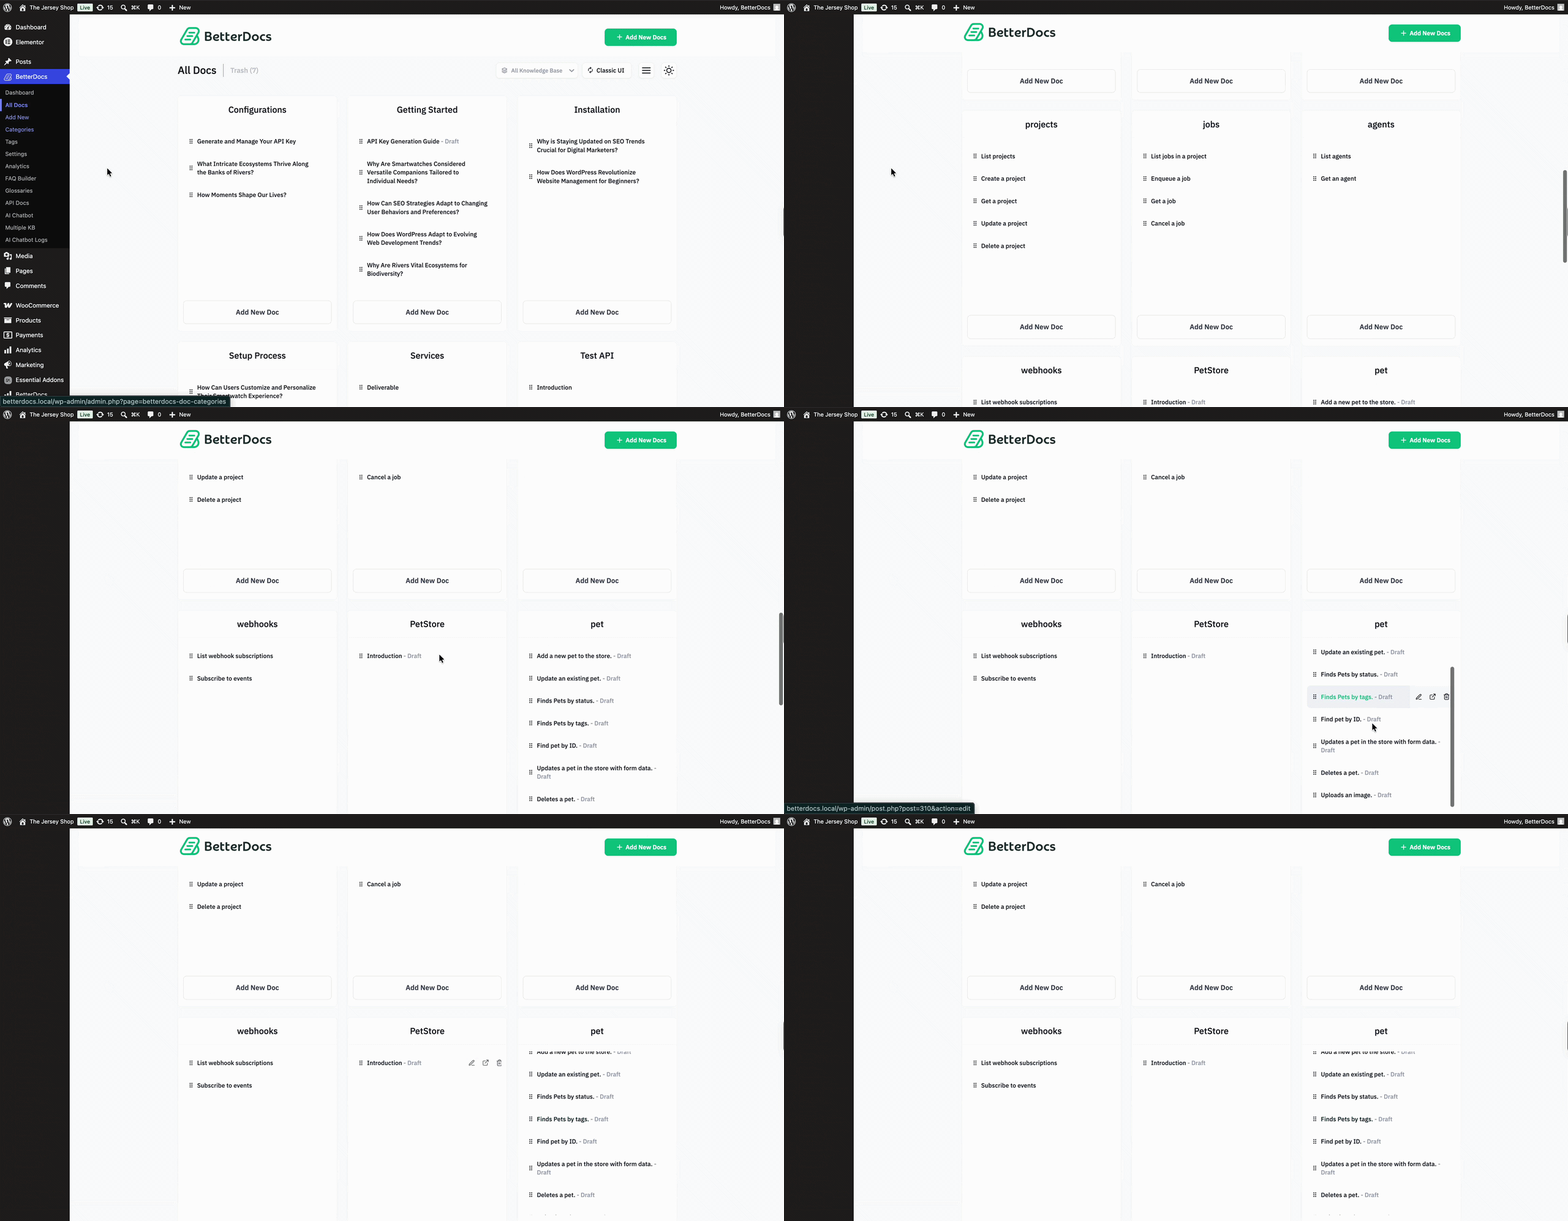
Once your spec is imported, you can ‘Generate Endpoint Doc’ on the reference. Each endpoint becomes an editable doc with its own URL, grouped by tag with method badges. Titles and content you edit are preserved on re-sync. You can also see the sync status with the AI Chatbot.
Step 5: Auto-Generate Missing Descriptions with AI #
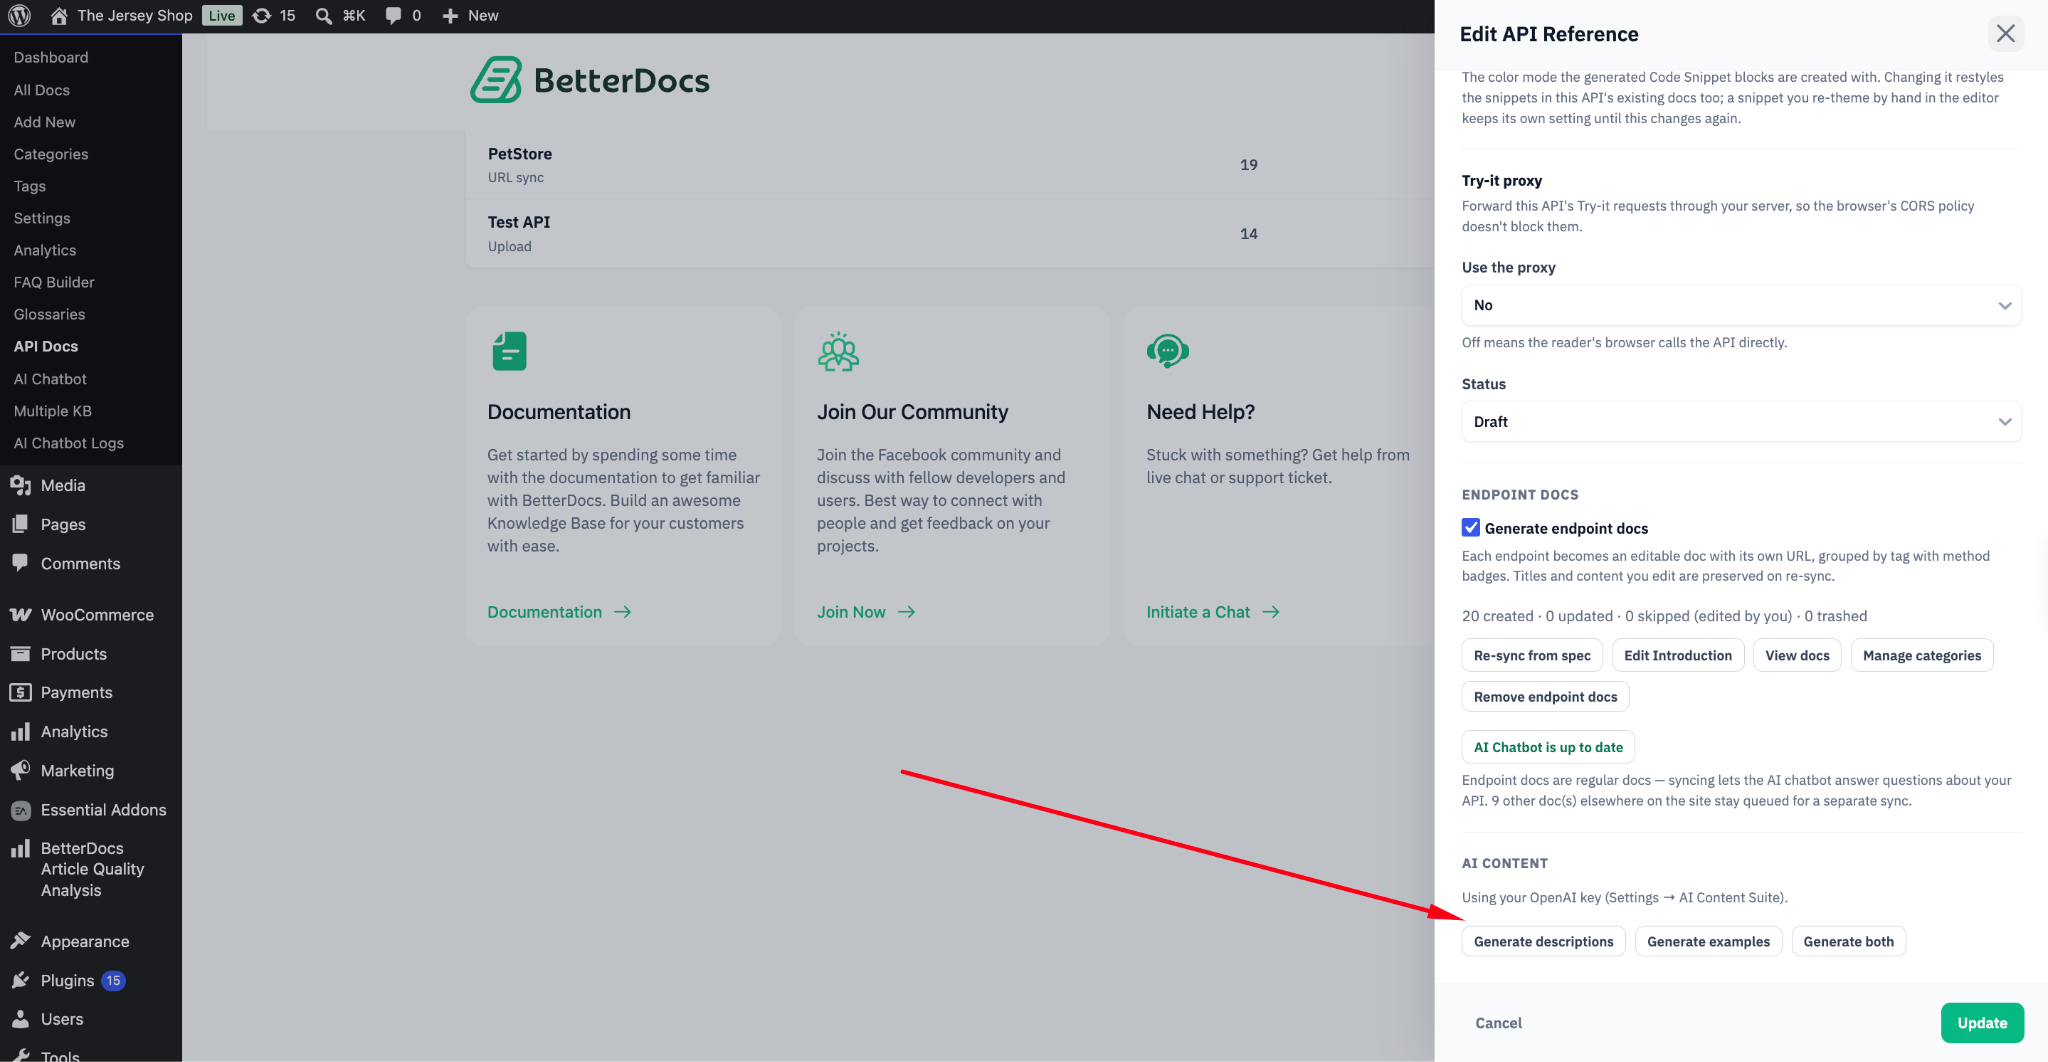
If your spec was imported without descriptions, open the reference and click ‘AI generate’. BetterDocs fills in missing descriptions and examples across the reference and reports the number of fields it generated once complete. If your spec is already fully documented, it tells you there’s nothing to generate.
Step 6: Test Endpoints with the ‘Try-It’ Playground #
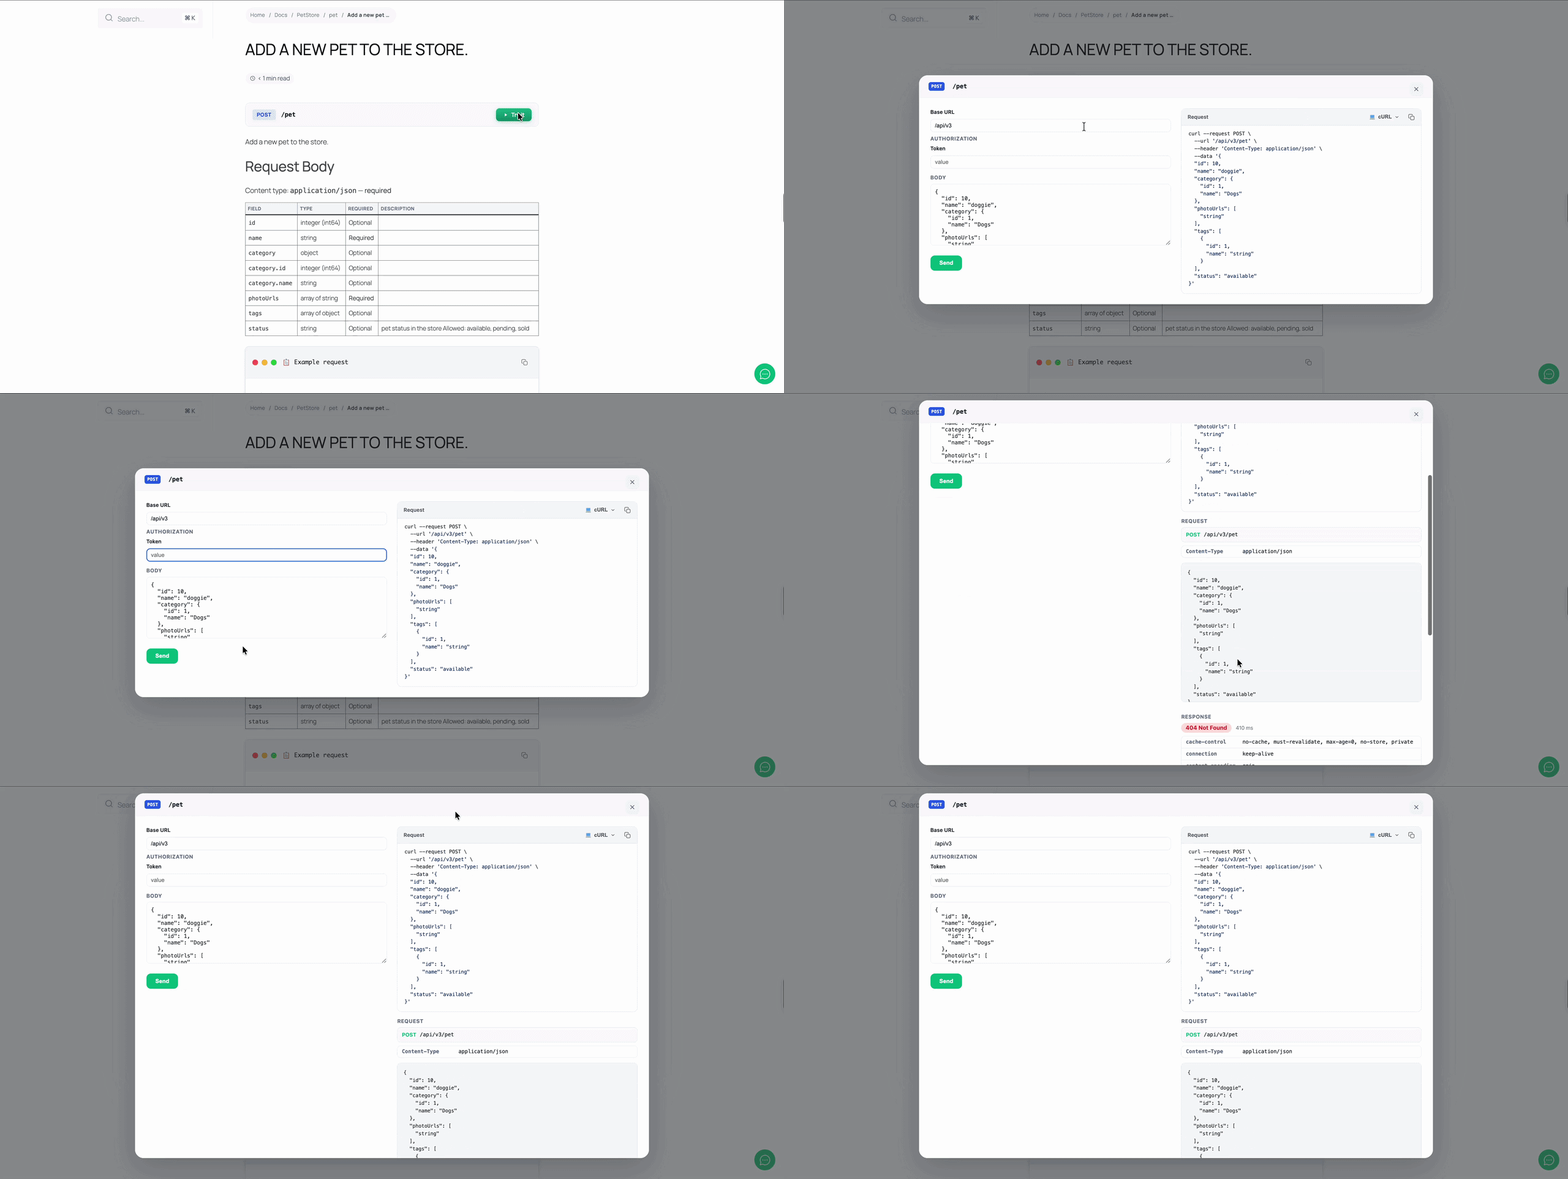
On any endpoint doc, click ‘Try it’ to open the playground drawer. It shows the Base URL, an editable request Body, and a live cURL command that updates as you edit, with a copy button.
Step 7: Restrict Who Can See Your API Docs #
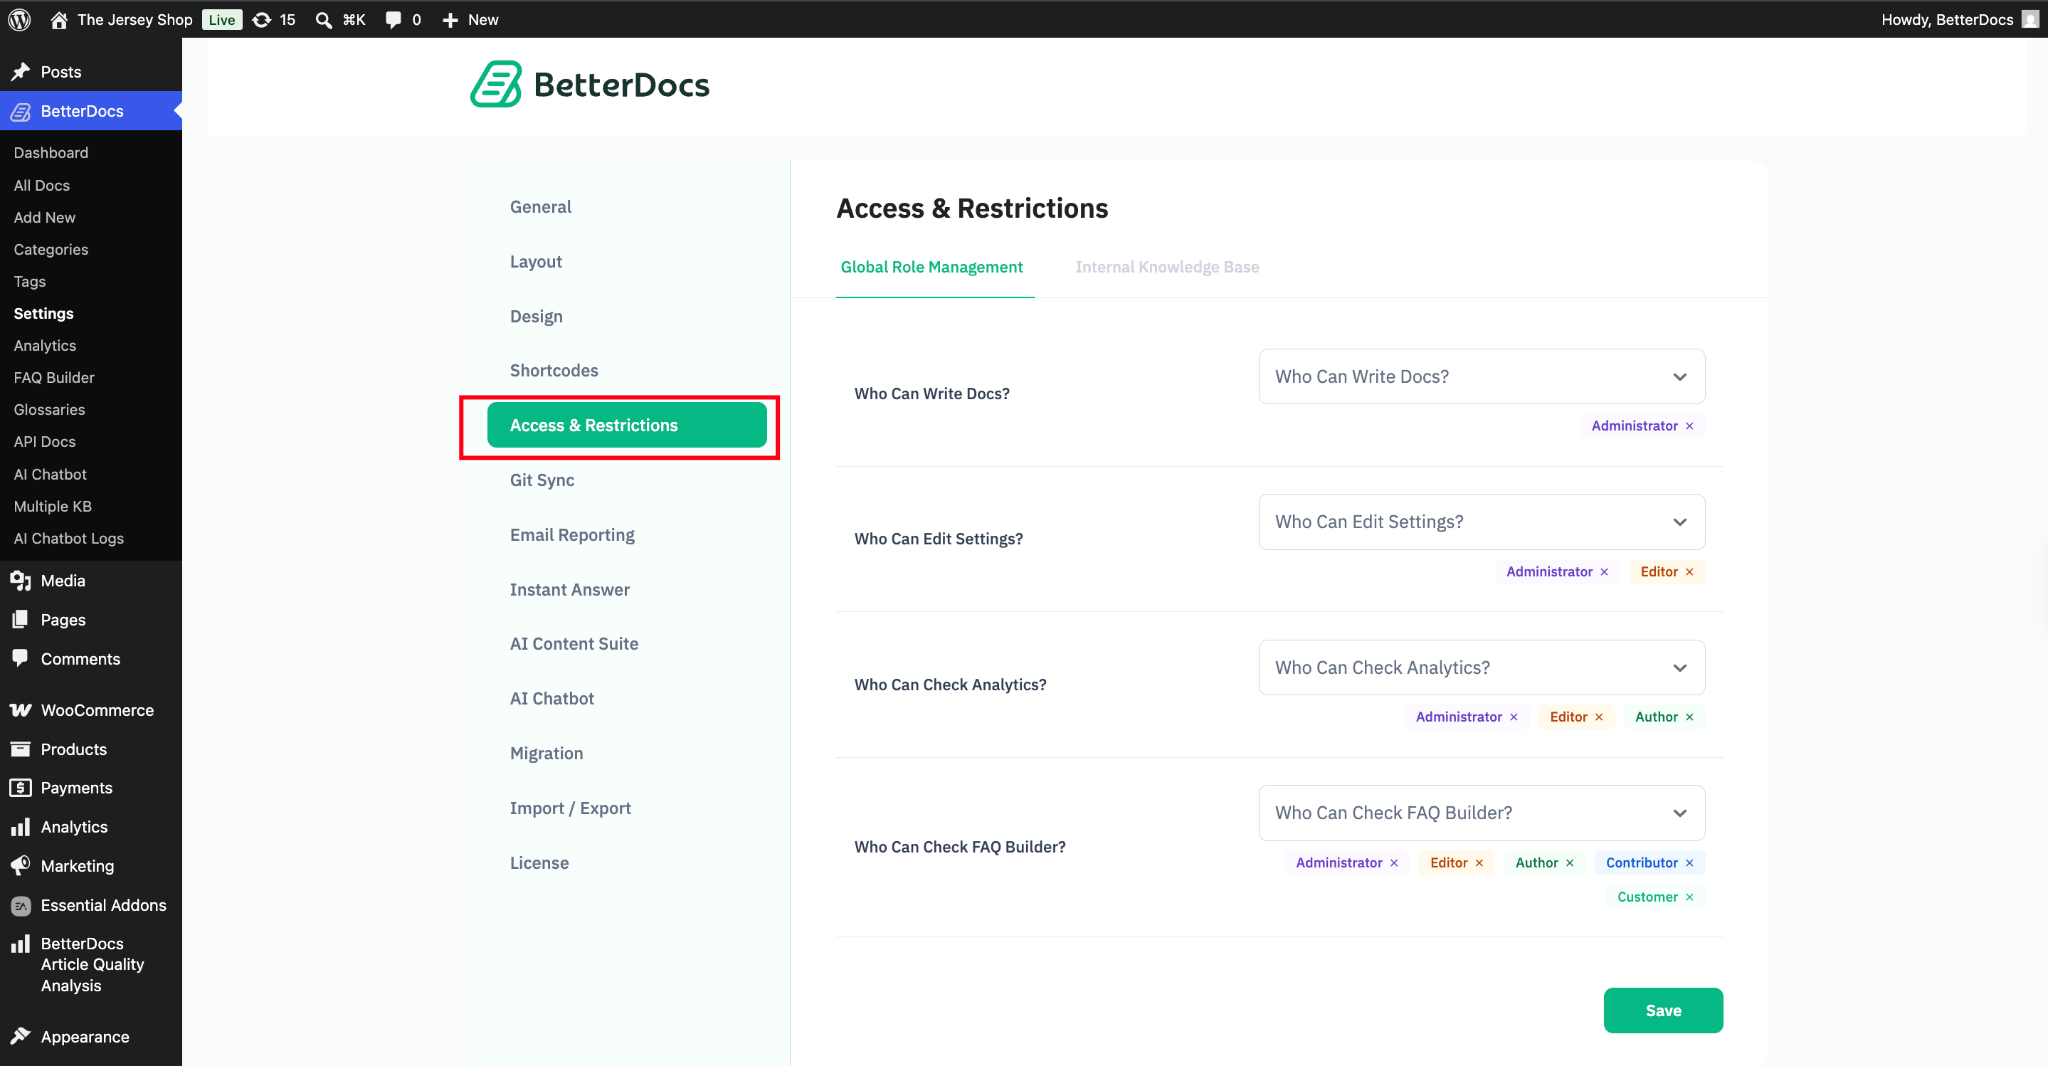
API Docs doesn’t have its own visibility toggle; reference access is controlled at the category level, the same way as any other BetterDocs content. Go to BetterDocs → Access & Restrictions, select the category your endpoint docs live in, and set it to logged-in users only. Open an endpoint doc in a private/incognito window to confirm an anonymous visitor can no longer see it.
Step 8: Sync with AI Chatbot #
You can sync your API documentation with the BetterDocs AI chatbot. This way, your chatbot can directly answer from the documentation created from the API.
Step 8: Show with Code Snippet #
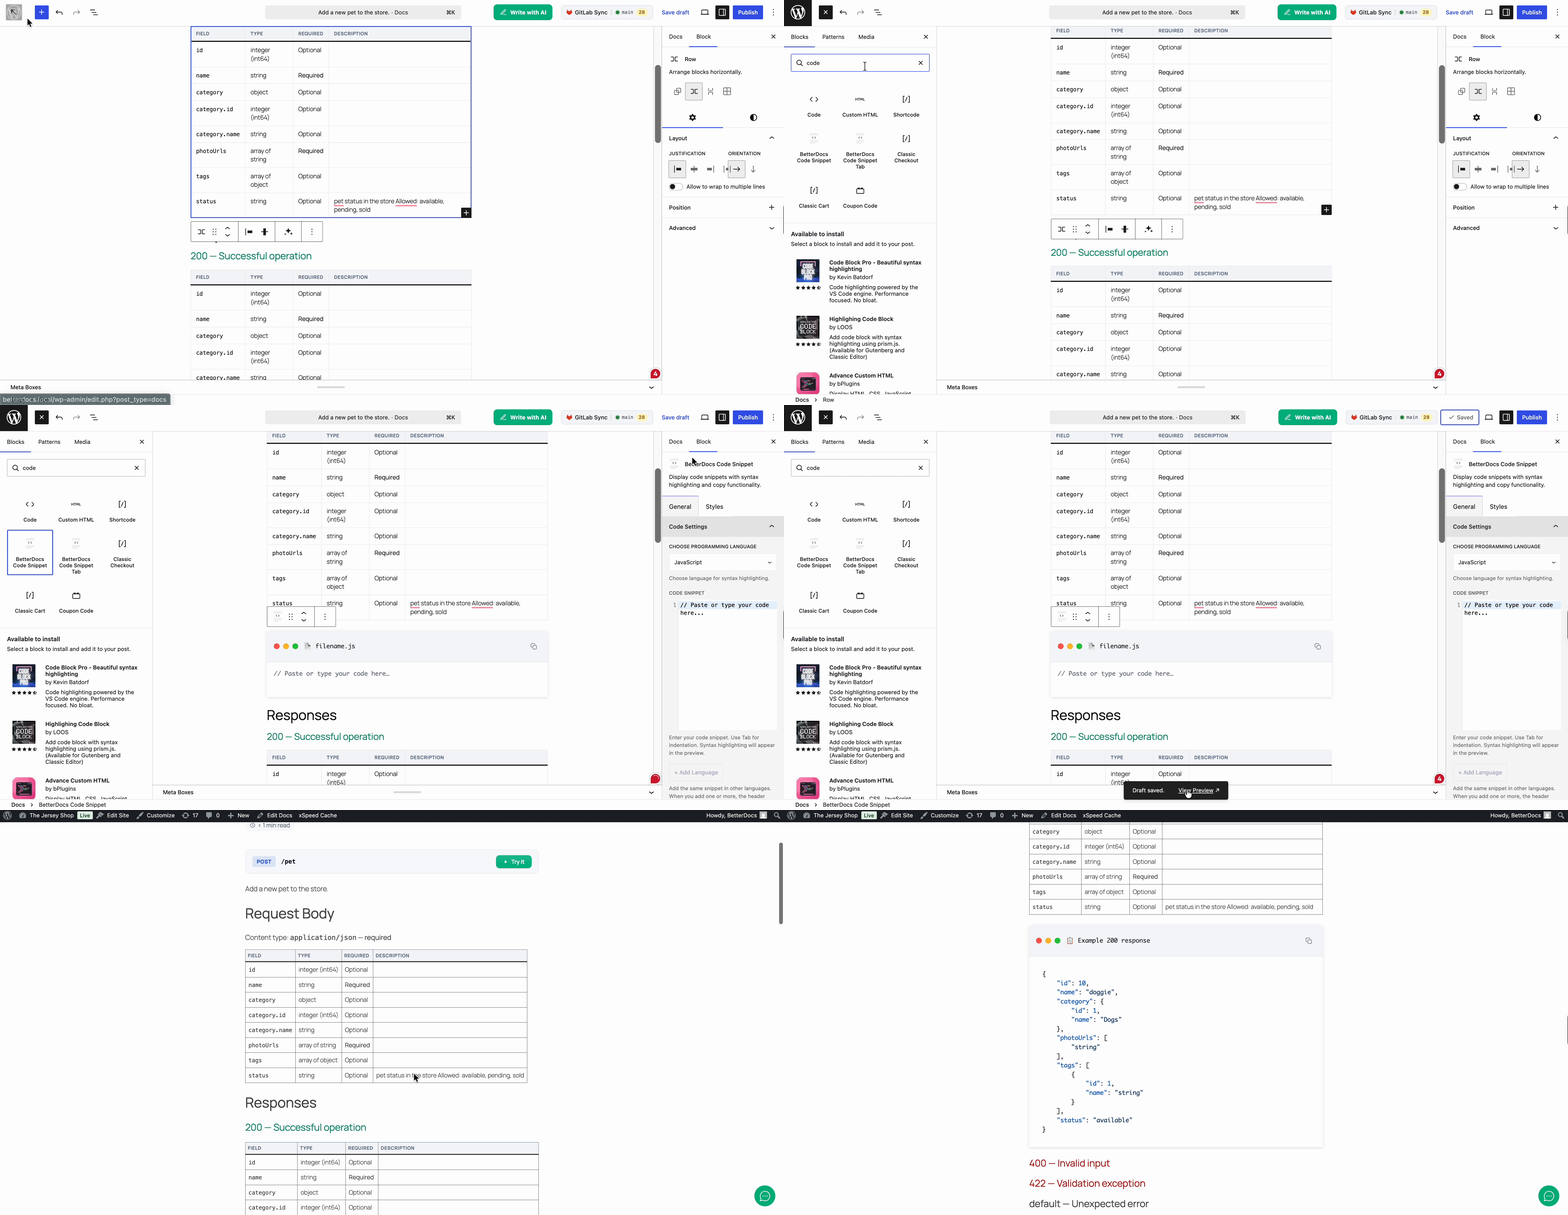
To show the test of your API documentation, you can add the ‘Code Snippet’ block for a Gutenberg website and the ‘Code Snippet’ element for an Elementor website. With this, the code will be automatically showcased in your API documentation.
Esito finale #
Your OpenAPI or Postman spec is now a live, browsable API reference inside your knowledge base, with code samples, request/response tables, and a working Try-it playground your readers can test directly.
This is how, with the help of BetterDocs’ API Docs feature, you can turn any OpenAPI or Postman spec into fully rendered, always-in-sync API documentation without writing it by hand.
Essere bloccati? Sentiti libero di contattare il nostro Team di supporto dedicato.