
BetterDocs PRO lets you add a fantastic "Risposta immediata" toolbar to your website so that users can easily find the article they are searching for. You can place this on any page and reduce the pressure on your support queries. With its feedback form, users can even leave messages and contact you. Follow the below guidelines to configure the Instant Answer feature of BetterDocs:
Step 1: Activate BetterDocs Instant Answer #
Prima di tutto, assicurati di abilitare "Risposta immediata" opzione da BetterDocs Impostazioni. Per farlo, vai a wp-admin -> BetterDocs -> Impostazioni. Afterwards, switch to the "Risposta immediata" scheda e abilitarlo.
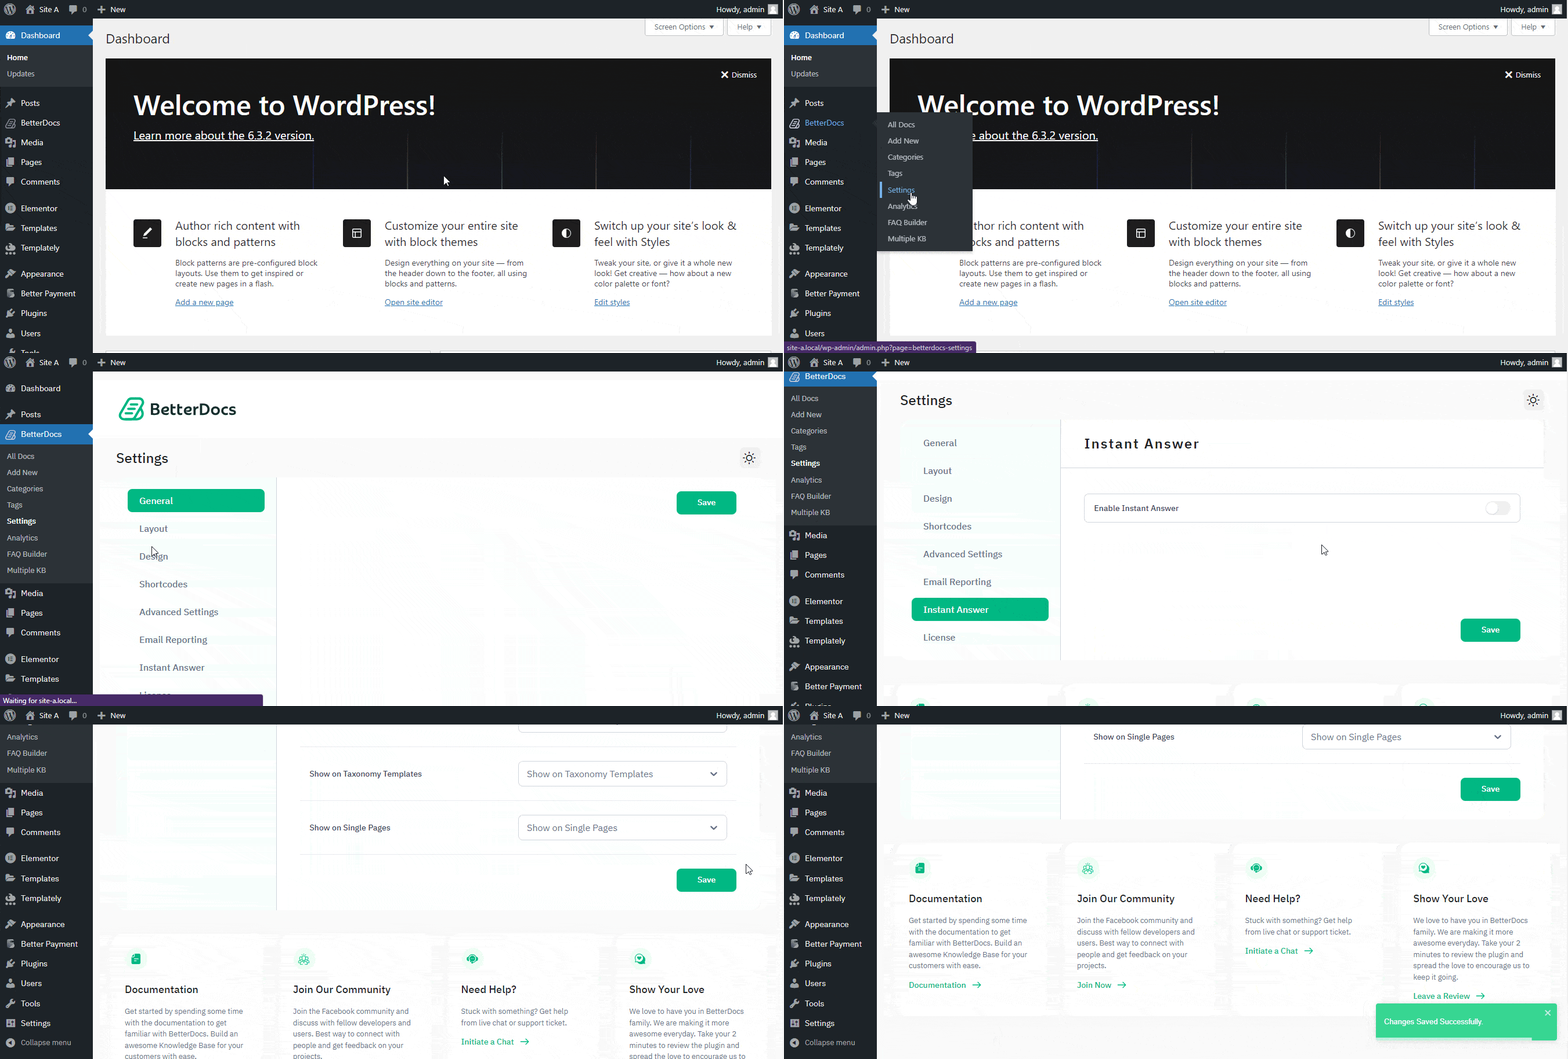
You can even ‘Enable IA Live Preview’ to view the real-time changes you have made to your overall Instant Answer settings.
Step 2: Configure Initial Content Settings #
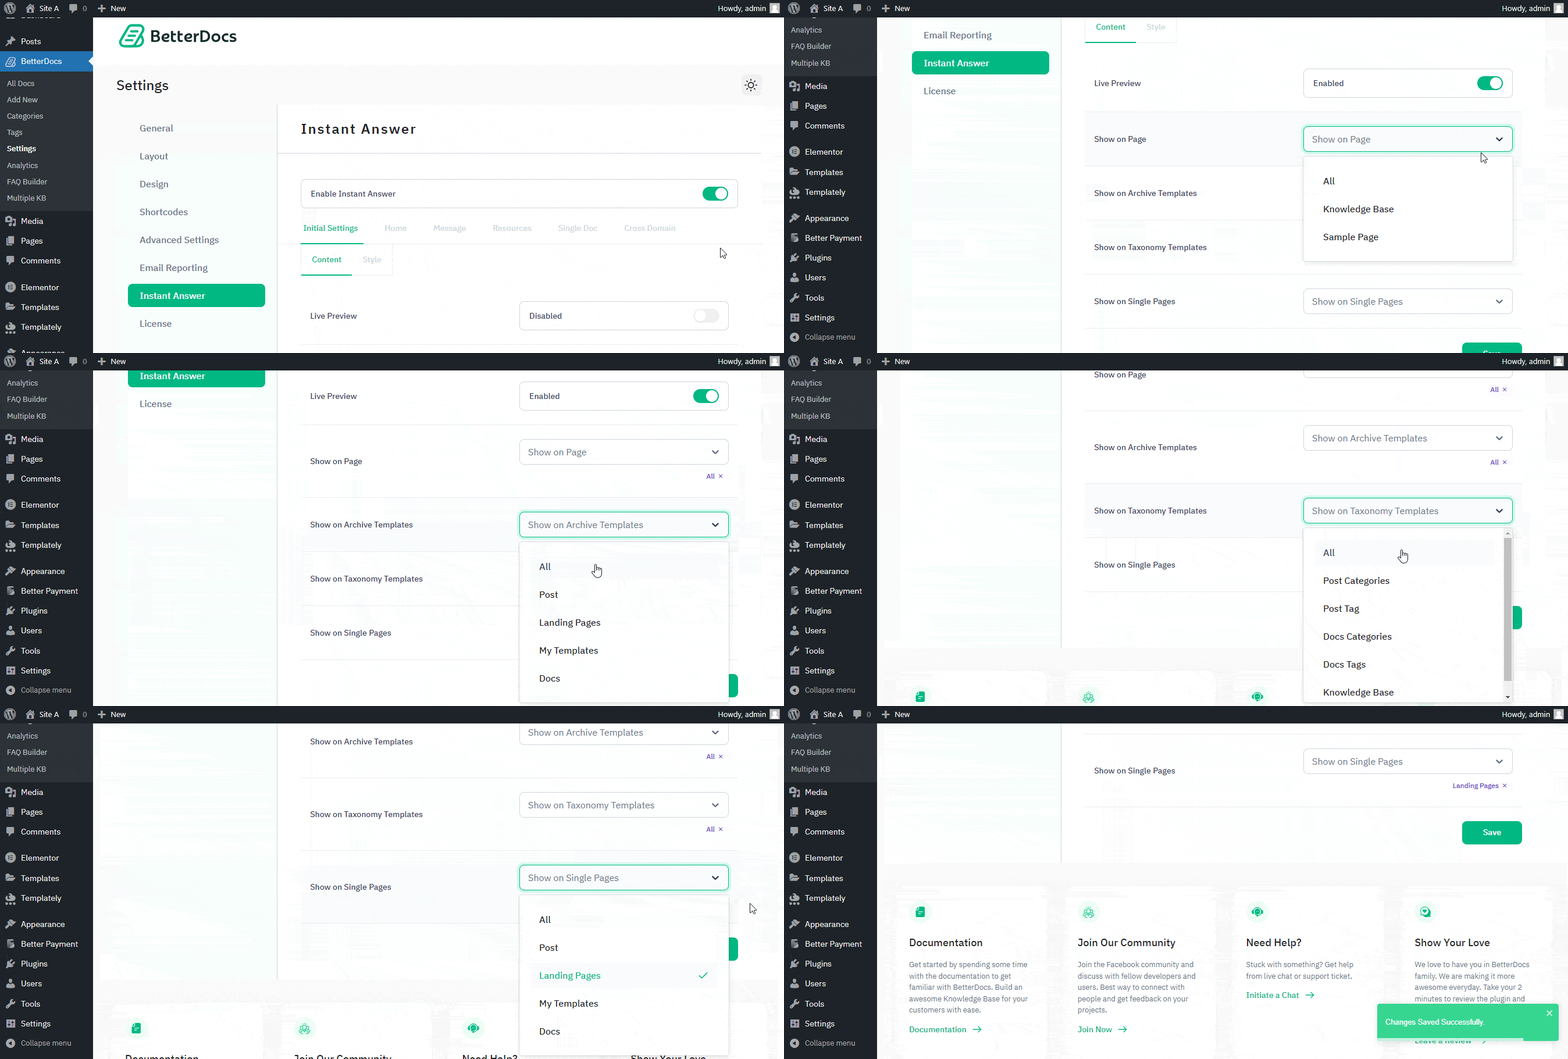
Dal ‘Initial Content Settings’, you can choose options to display content on particular pages in the ‘Content’ tab and customize them with styling options in the ‘Style’ tab. You can specify on which pages you want to show your ‘Risposta istantanea’ toolbar. There are options like Documentation Page, Archived Templates, Taxonomy Templates, and Single Page on the ‘Content’ tab to display IA with BetterDocs.
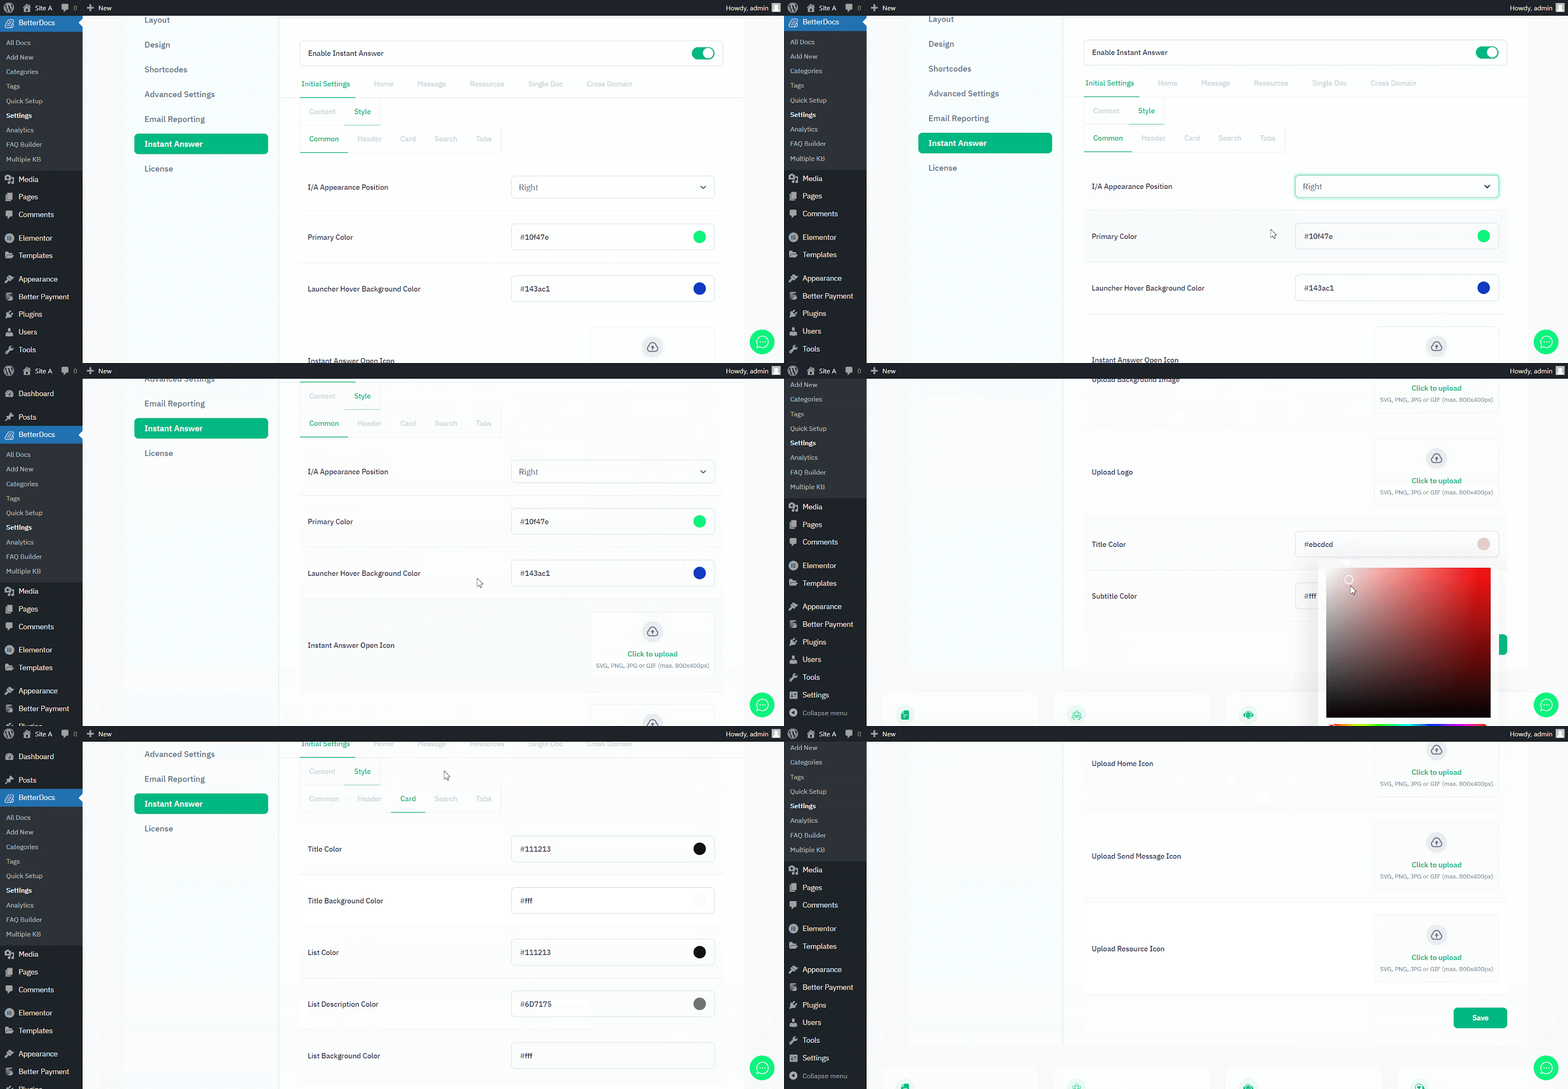
On the other hand, the ‘Style’ tab has options to set the IA toolbar position, pick primary and hover background colours, and add open and close icons for the ‘Common’ tab. Additionally, you can add images, logos, colours, and more from Header, Cards, Search, and Tabs to customize your preference.
Step 3: Customize Home Settings #
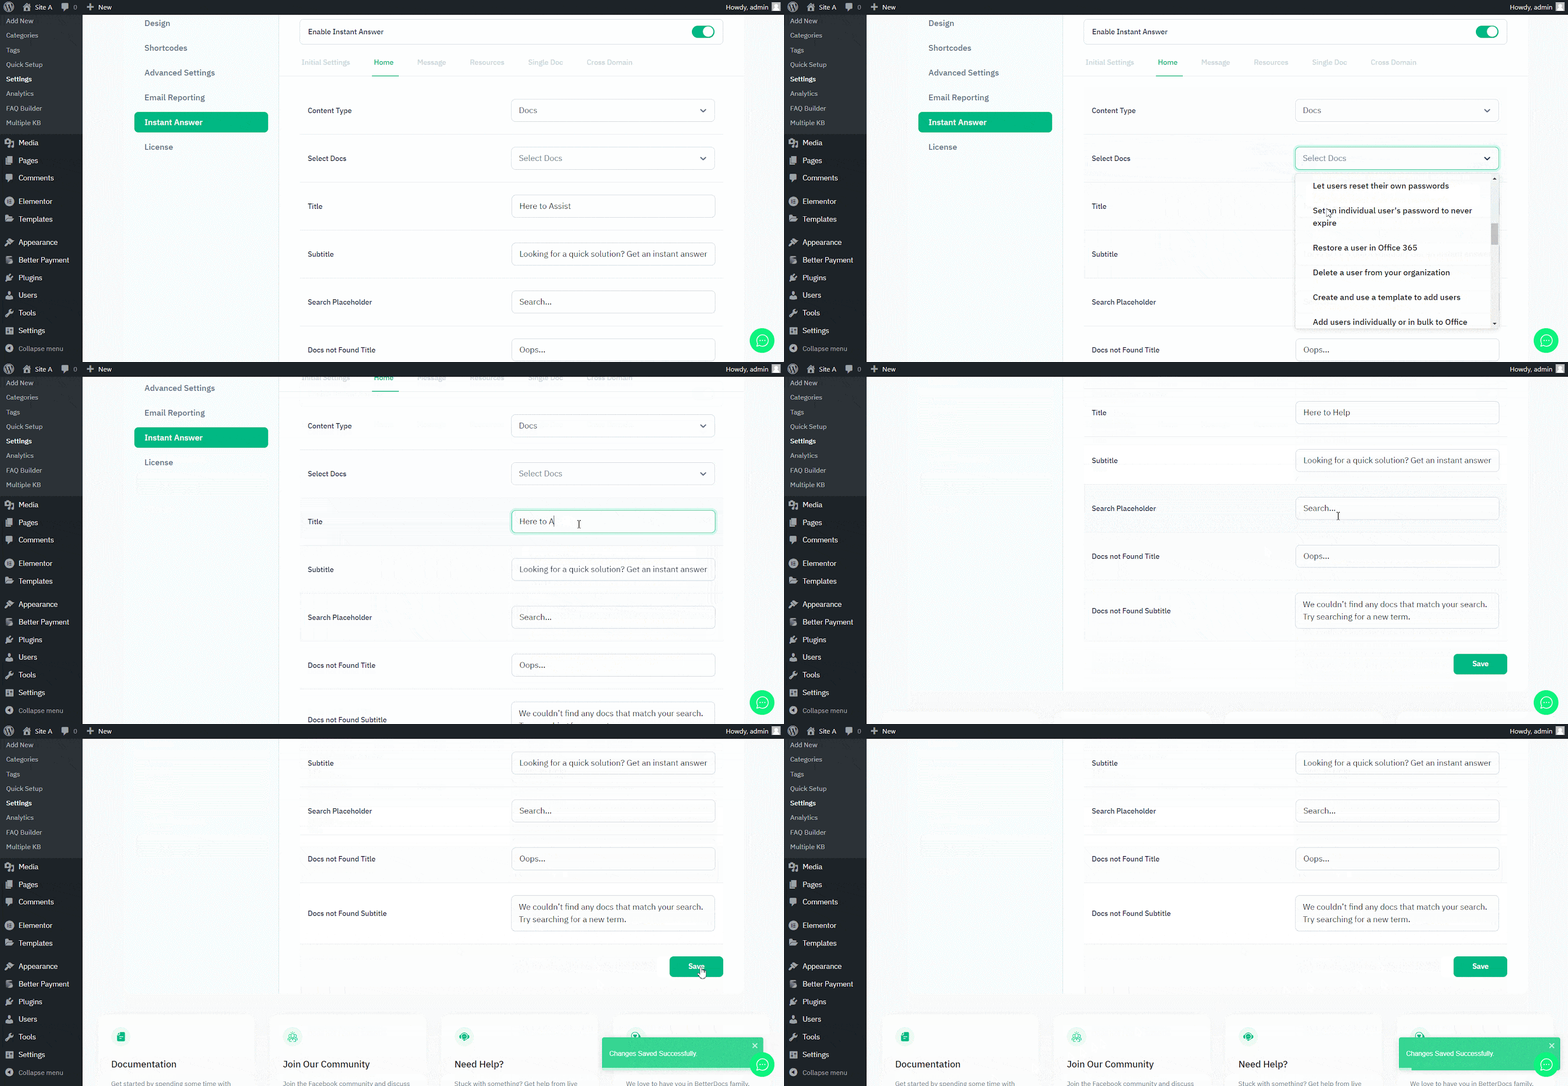
On the ‘Casa’ tab, you can choose all docs or docs categories to display from the ‘Content Type’ option. Additionally, you can ‘Select Docs’ to display specific docs, or it will display all docs by default. There are options to change the Title, Subtitle, Placeholder Text, Docs not Found Title, Docs Not Found Subtitle, and more here.
Step 4: Customize Message Settings #
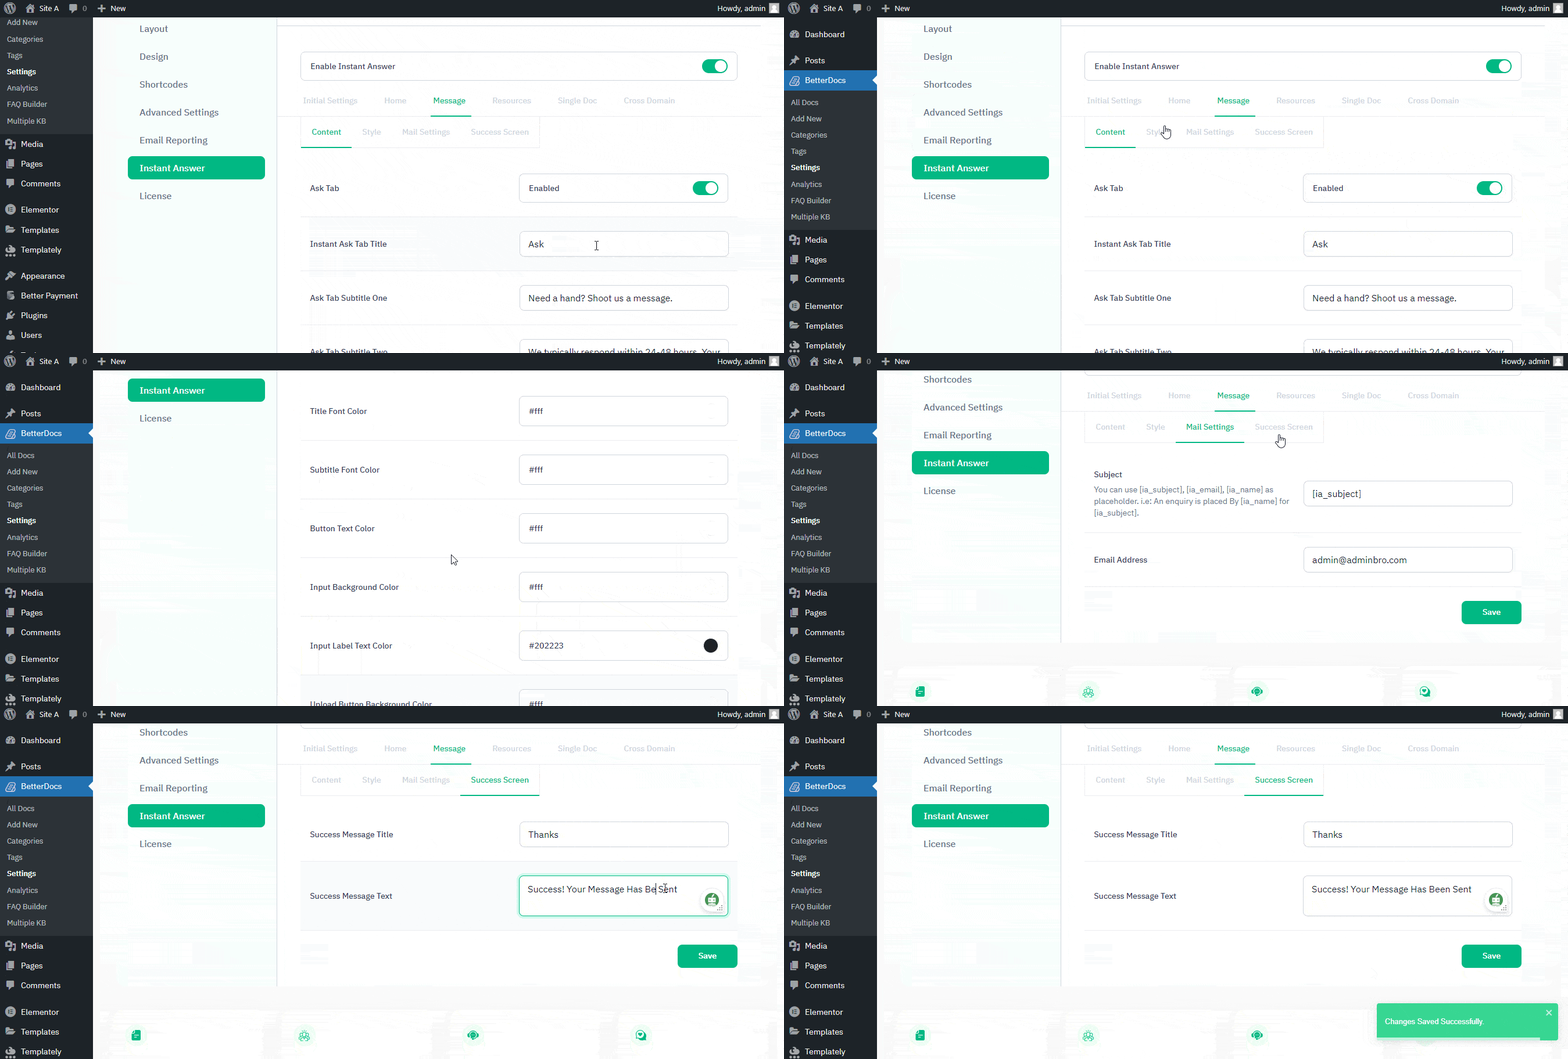
Dal ‘Message’ section, you can enable/disable and customize the ‘Ask’ tab with the title and subtitle on the Content options. You can customize colours for titles, subtitles, buttons, labels, etc., from the Style options. You can add a custom subject and email address from the ‘Mail Settings’ tab and customize the success message title and text on the ‘Success Screen’ tab.
Step 5: Customize Instant Answer Resources #
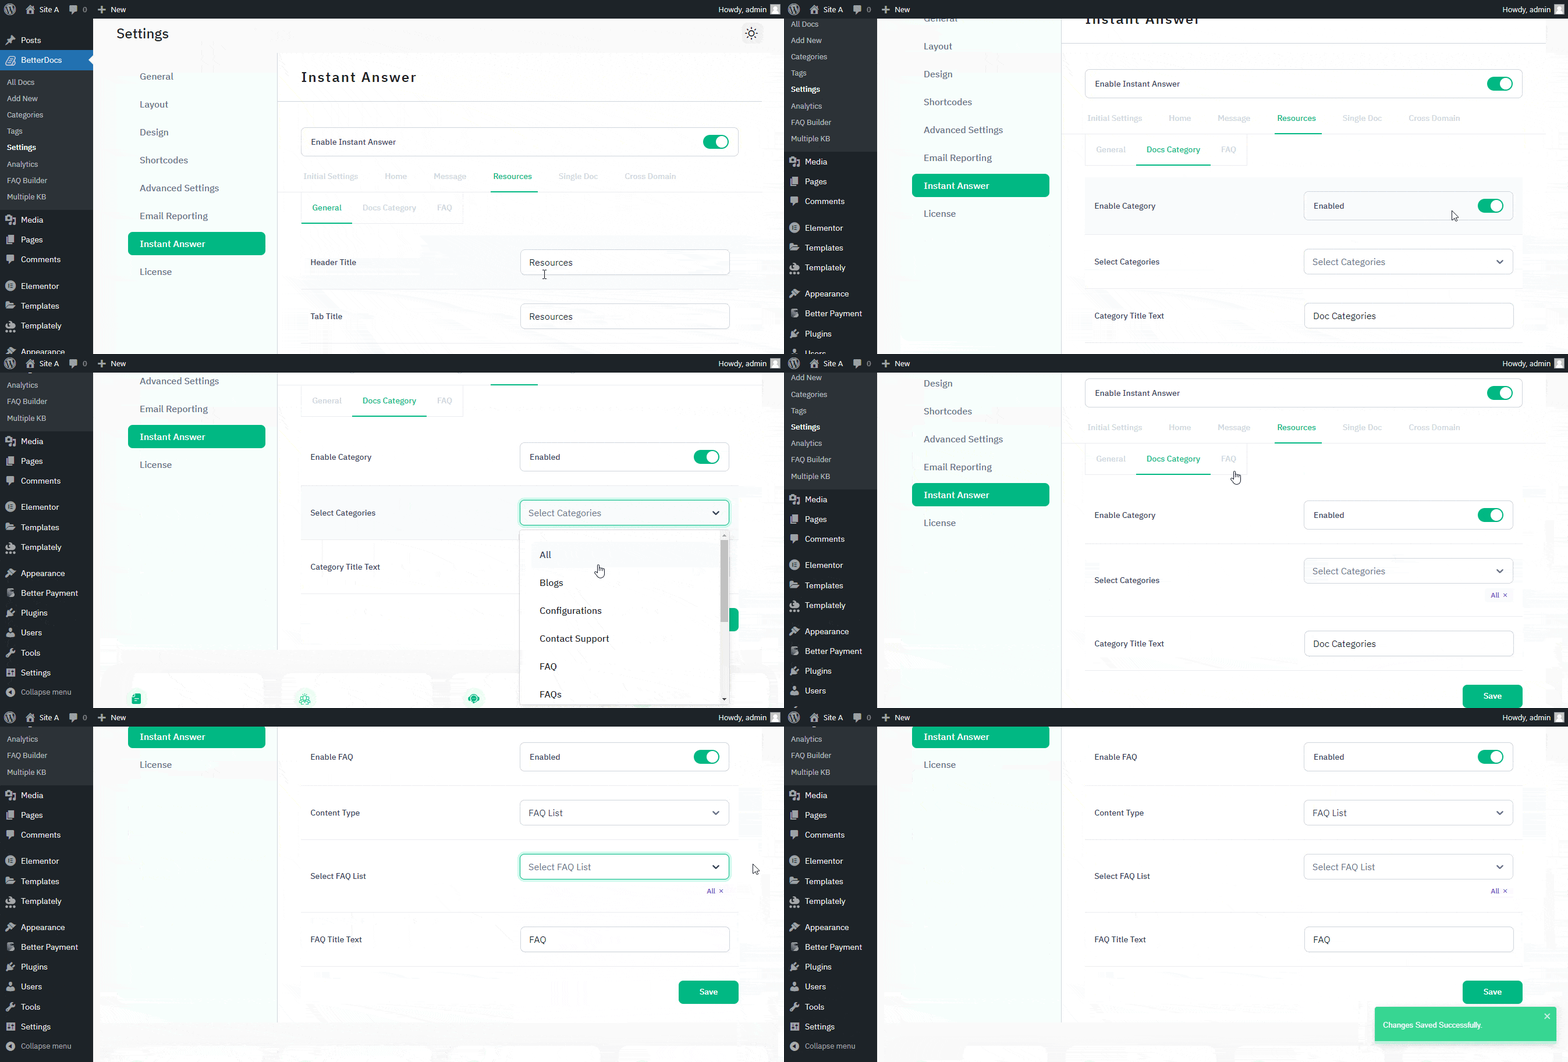
From the ‘Resources’ tab, you can customize the header title and tab title in General sections. Additionally, you can choose docs category, and FAQ Content, and customize them with the number of docs, selections etc.
Step 6: Set Up Instant Answer Single Doc #
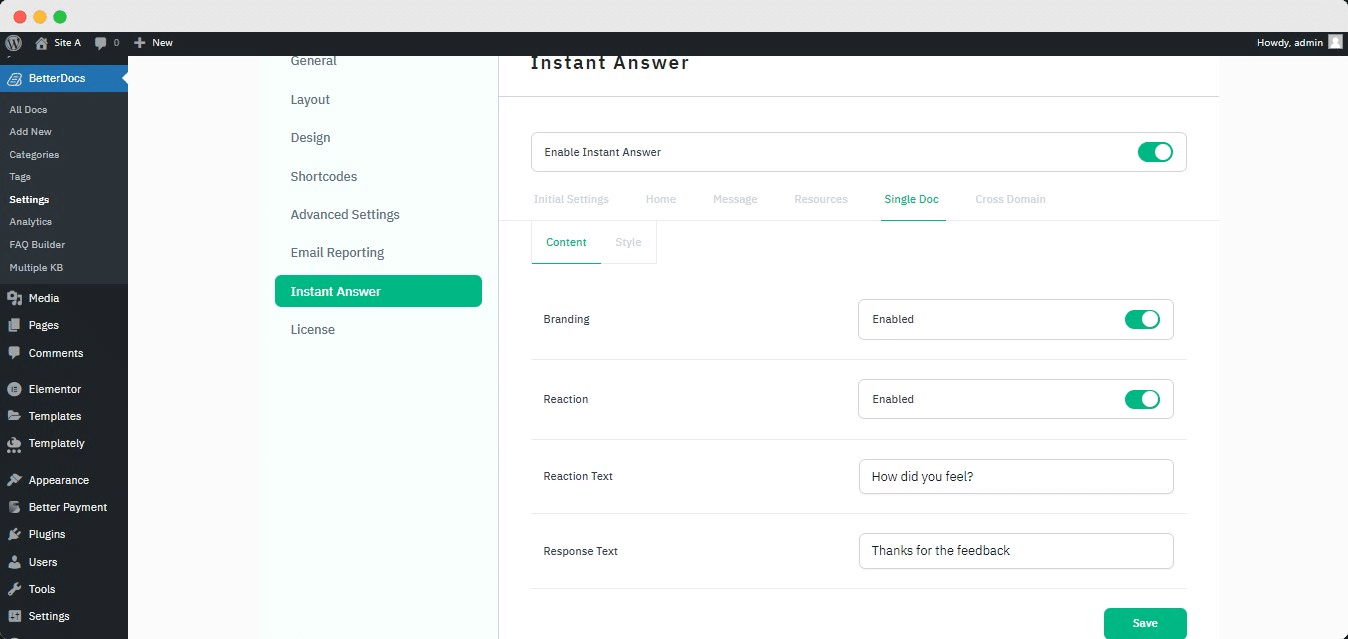
On the ‘Doc. Singolo’ tab, you can disable Branding e Reaction with a toggle button. Additionally, you can customize Reaction Text e Response Text to make your single docs appear visually engaging.
Step 7: Cross Domain To Show On Another Website #
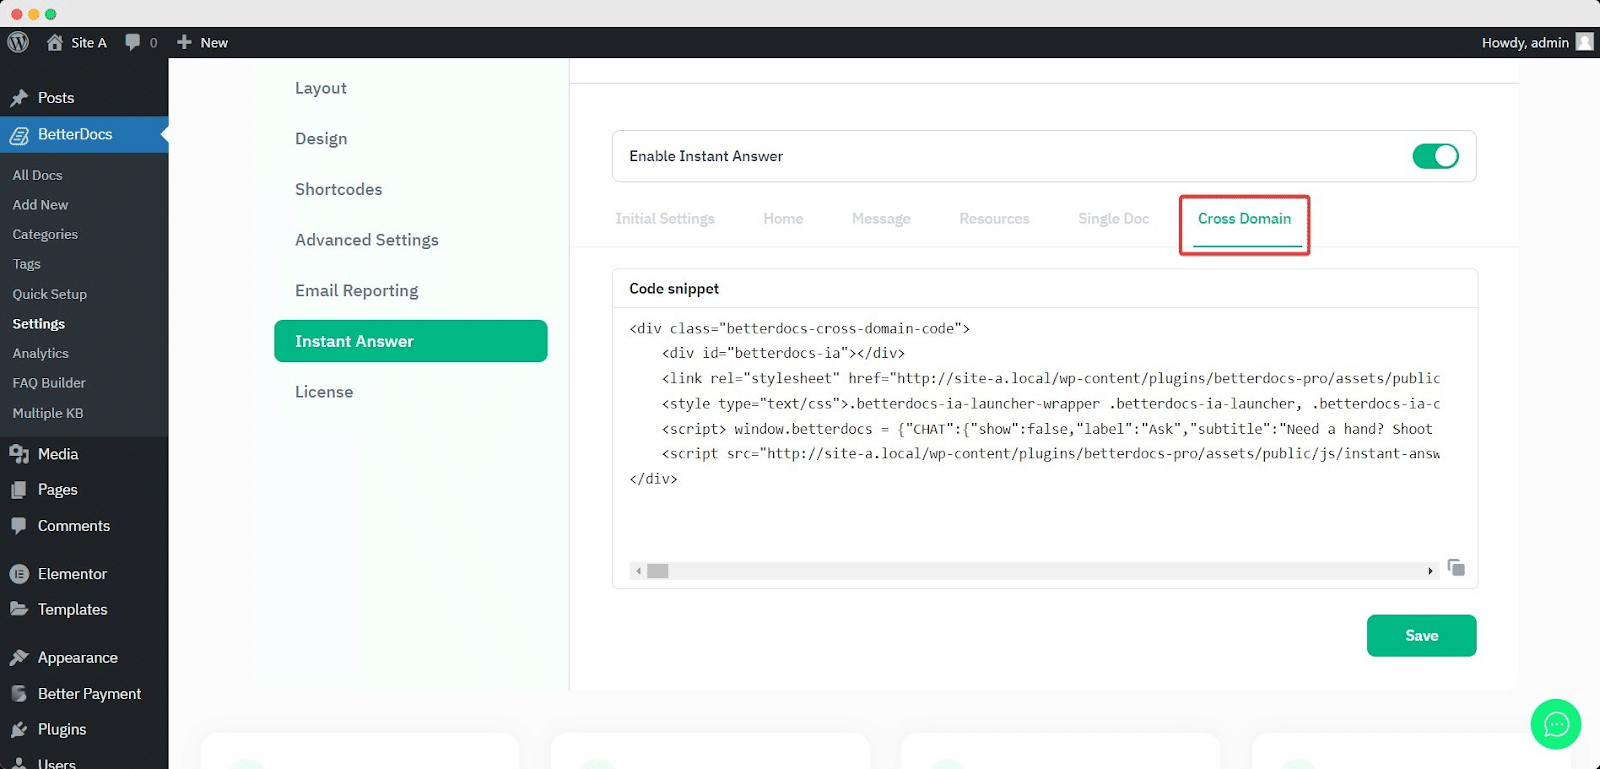
If you want, you can use the ‘Risposta istantanea’ tool on the non-WordPress site by configuring its cross-domain integration. You just have to copy the code snippet and paste it on your website, and Instant Answer will be automatically embedded on that site.
Vai al wp-admin -> BetterDocs -> Instant Answer -> Cross Domain. Simply by copying and pasting the code snippet, you will be able to use BetterDocs on an external website.
Esito finale #
By following all the simple steps above, you will be able to configure and display ‘Risposta istantanea’ on your website using BetterDocs for WordPress.
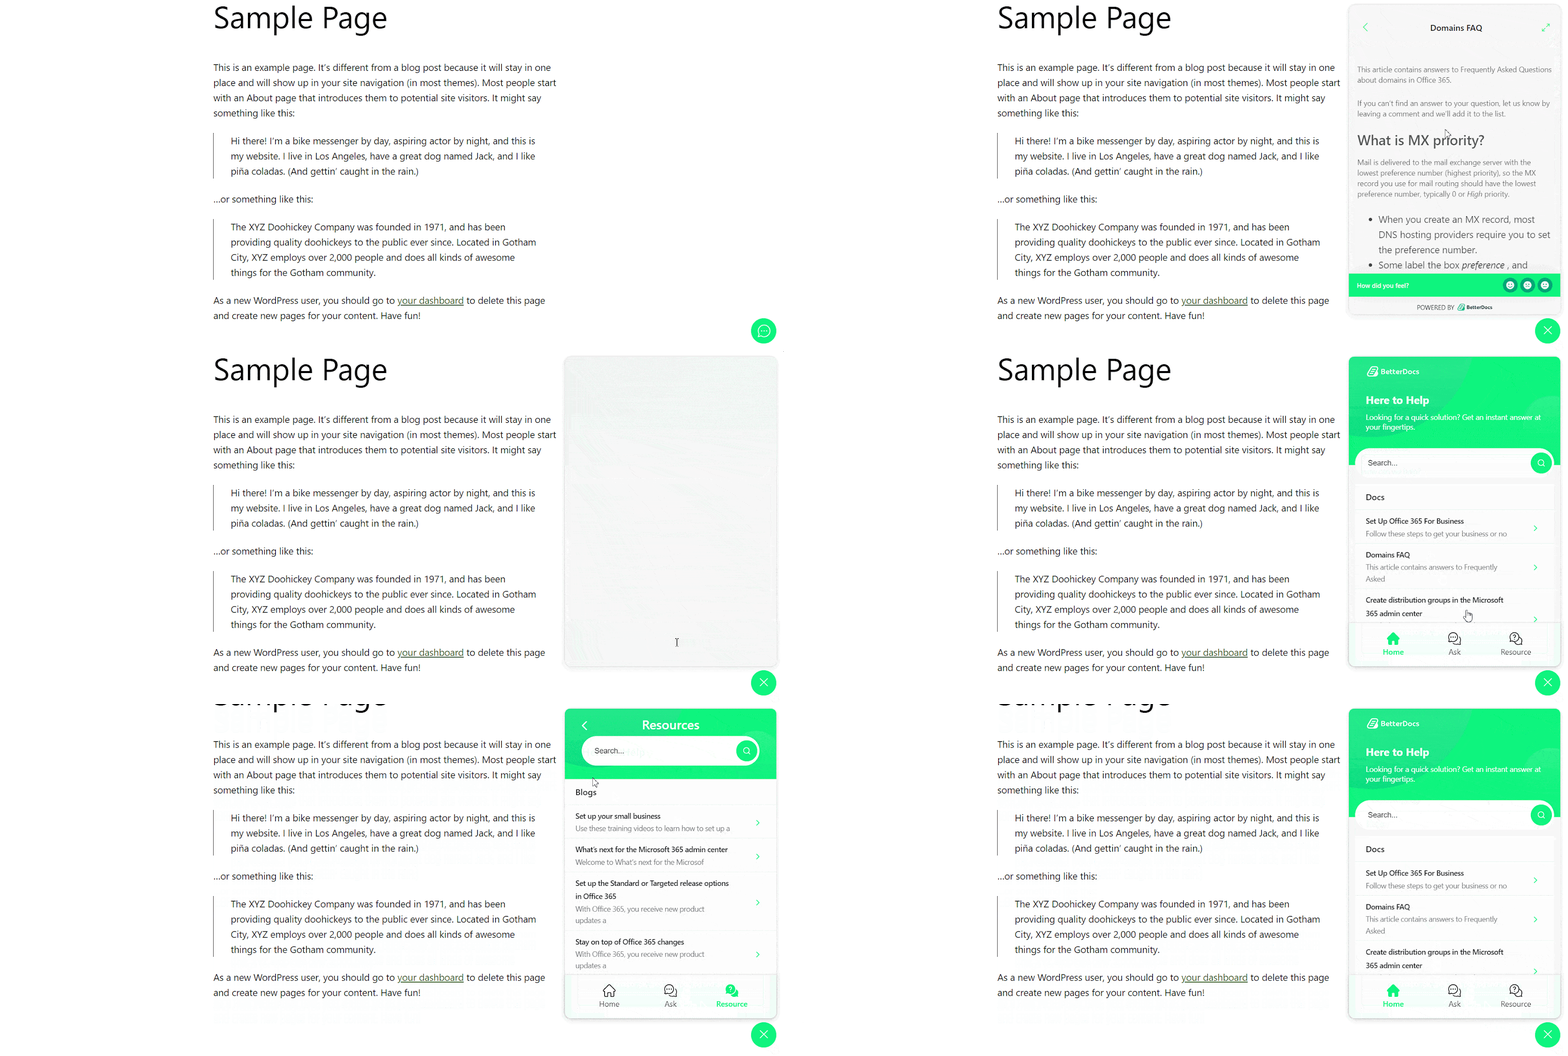
This is how you can configure Instant Answer with BetterDocs to reduce support pressure on your website and help your users get instant help through your knowledge base.
Getting stuck? Feel free to Contact Our Support for further assistance.