Attachments in documentation facilitate cooperation and backup, improving communication and workflow efficiency. They also offer clarity, context, and reference resources. With BetterDocs PRO, you can easily add attachments to docs with a few clicks and add more resources to your knowledge base readers. Follow this guide below to learn how to add attachments to docs with BetterDocs.
How To Add Attachments To Docs In BetterDocs? #
With a few simple steps, you can add attachments to your single documentation using BetterDocs. Follow this step-by-step guide below to learn how to add attachments to docs with BetterDocs.
[Note: Since adding attachments with docs is a premium feature introduced by BetterDocs, you need to install and activate BetterDocs PRO to use it.]
Step 1: Enable Show Attachment In BetterDocs #
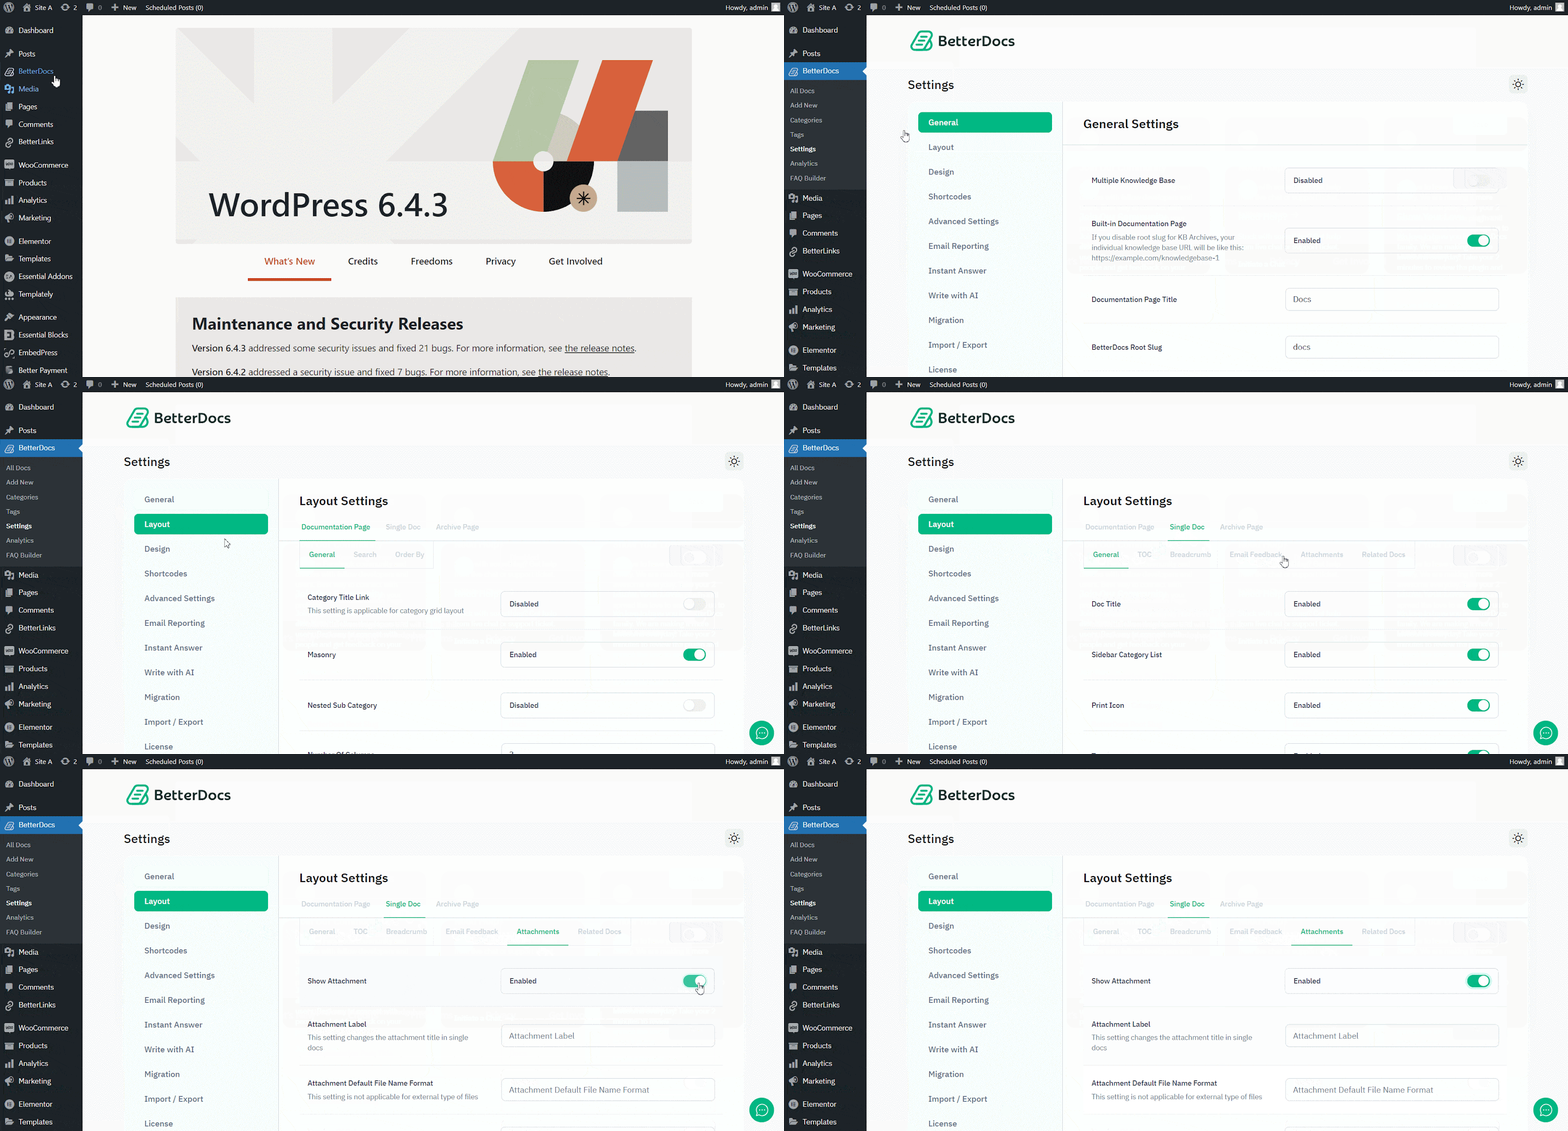
Before getting started, you need to enable the ‘Show Attachment’ option from BetterDocs. To do that, navigate to BetterDocs → Settings → Layout → Single Doc. Now, go to the ‘Attachment’ tab and enable the ‘Show Attachment’ button.
Step 2: Configure Attachment Settings #
Now, you need to configure a few settings, including label text, default file name, show size, icon, and if you want to open attachments in a new tab.
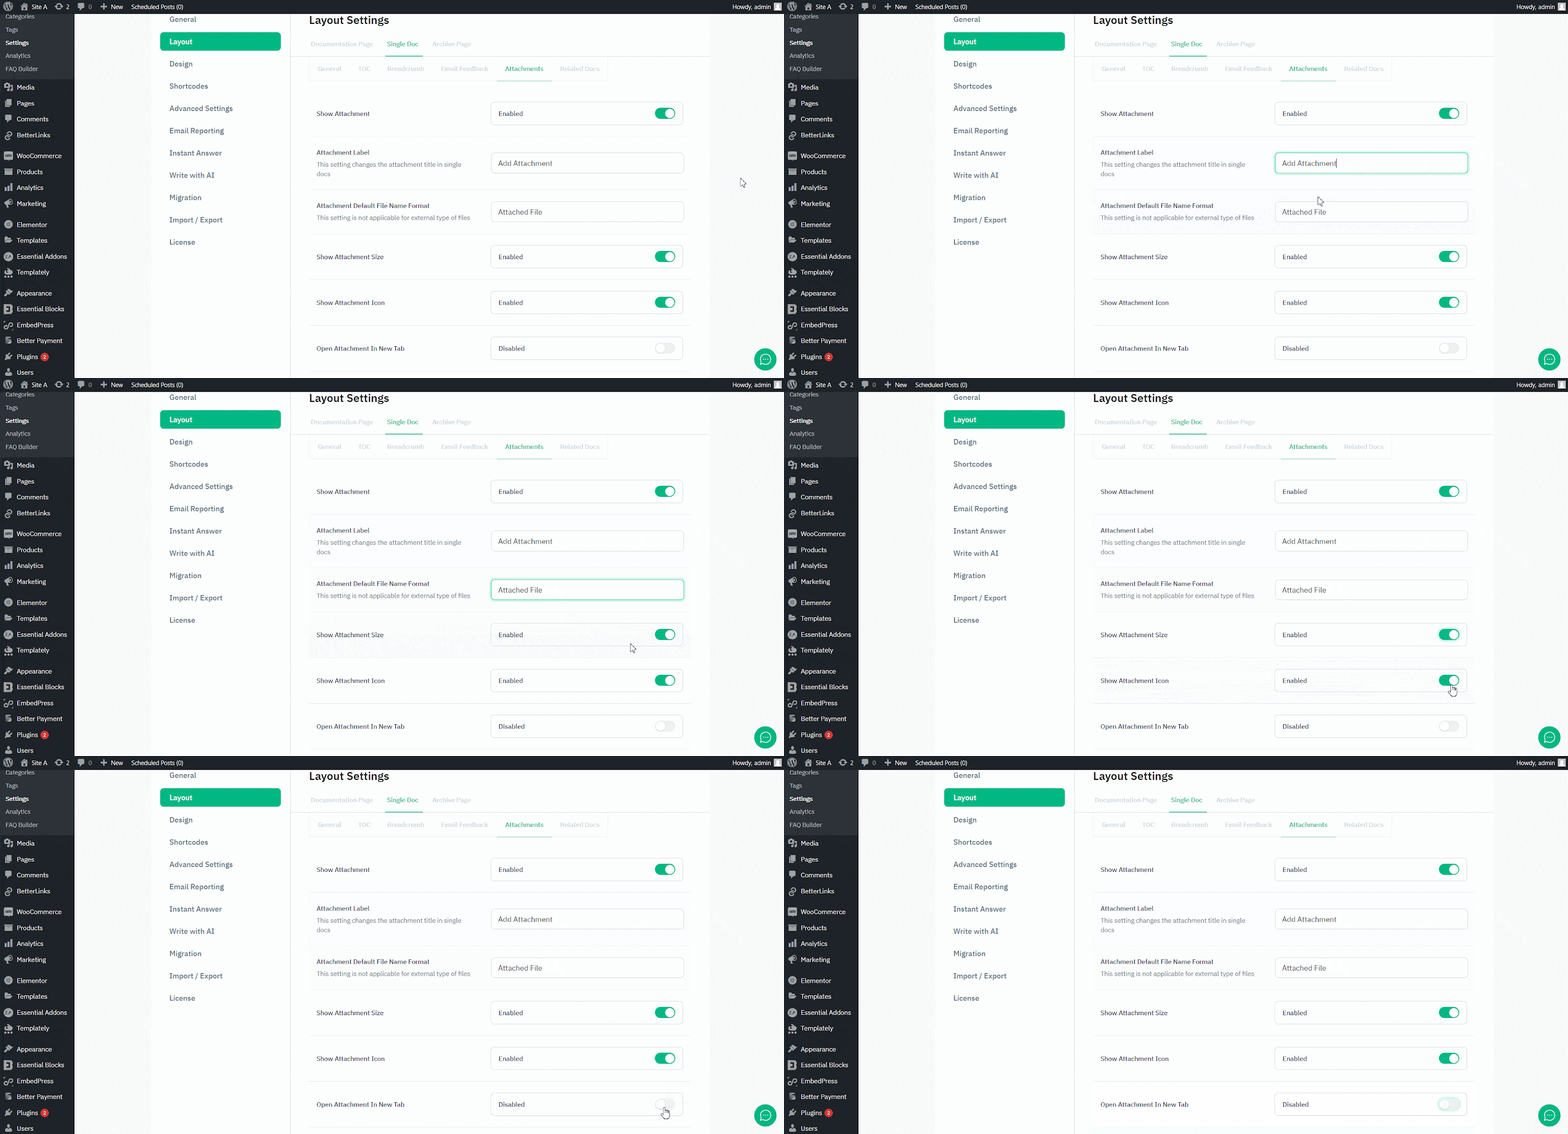
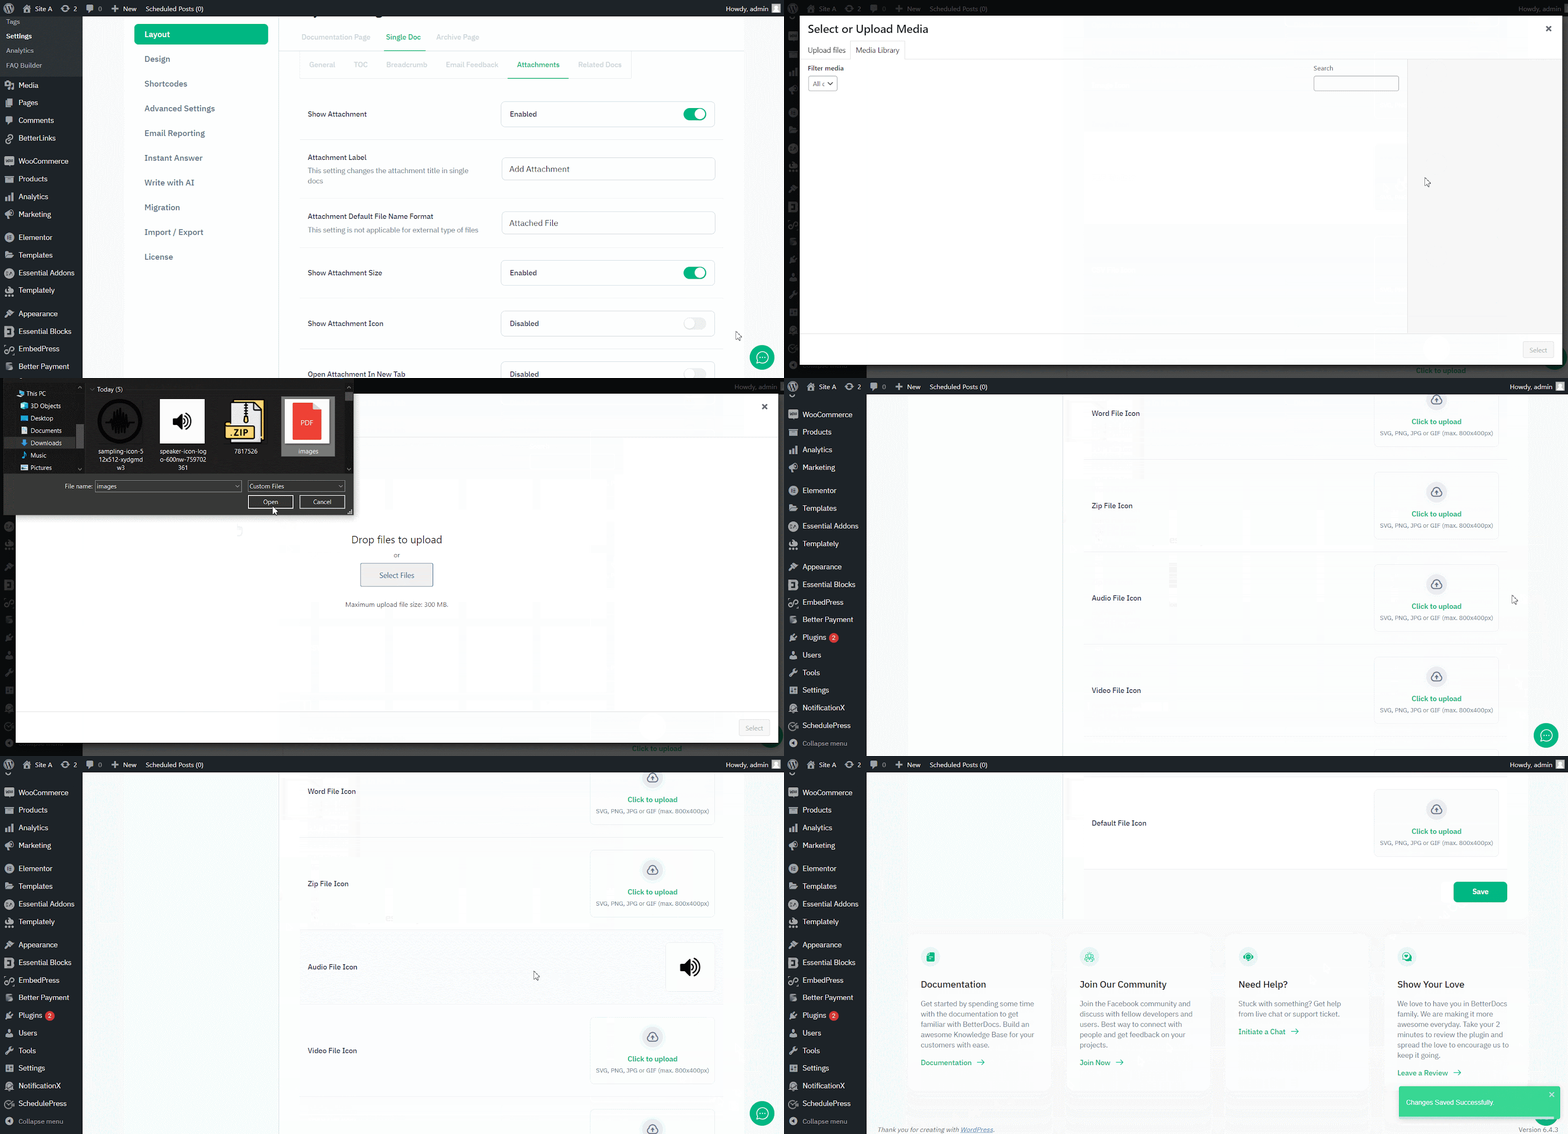
If you enable ‘Show Attachment Icon’, there will be options to upload icons for different file categories, including image, pdf, audio, CSV, zip, video, text, etc. You can upload yours as preferred. Once done with all the configurations, hit the ‘Save’ button at the bottom to save the changes.
Step 3: Add Attachments To Your Docs #
Once you are done configuring the Attachments options, it is time to add attachments to your single docs. Add a new doc or open an existing one from BetterDocs, and you will find the ‘Add Attachments’ option at the bottom.
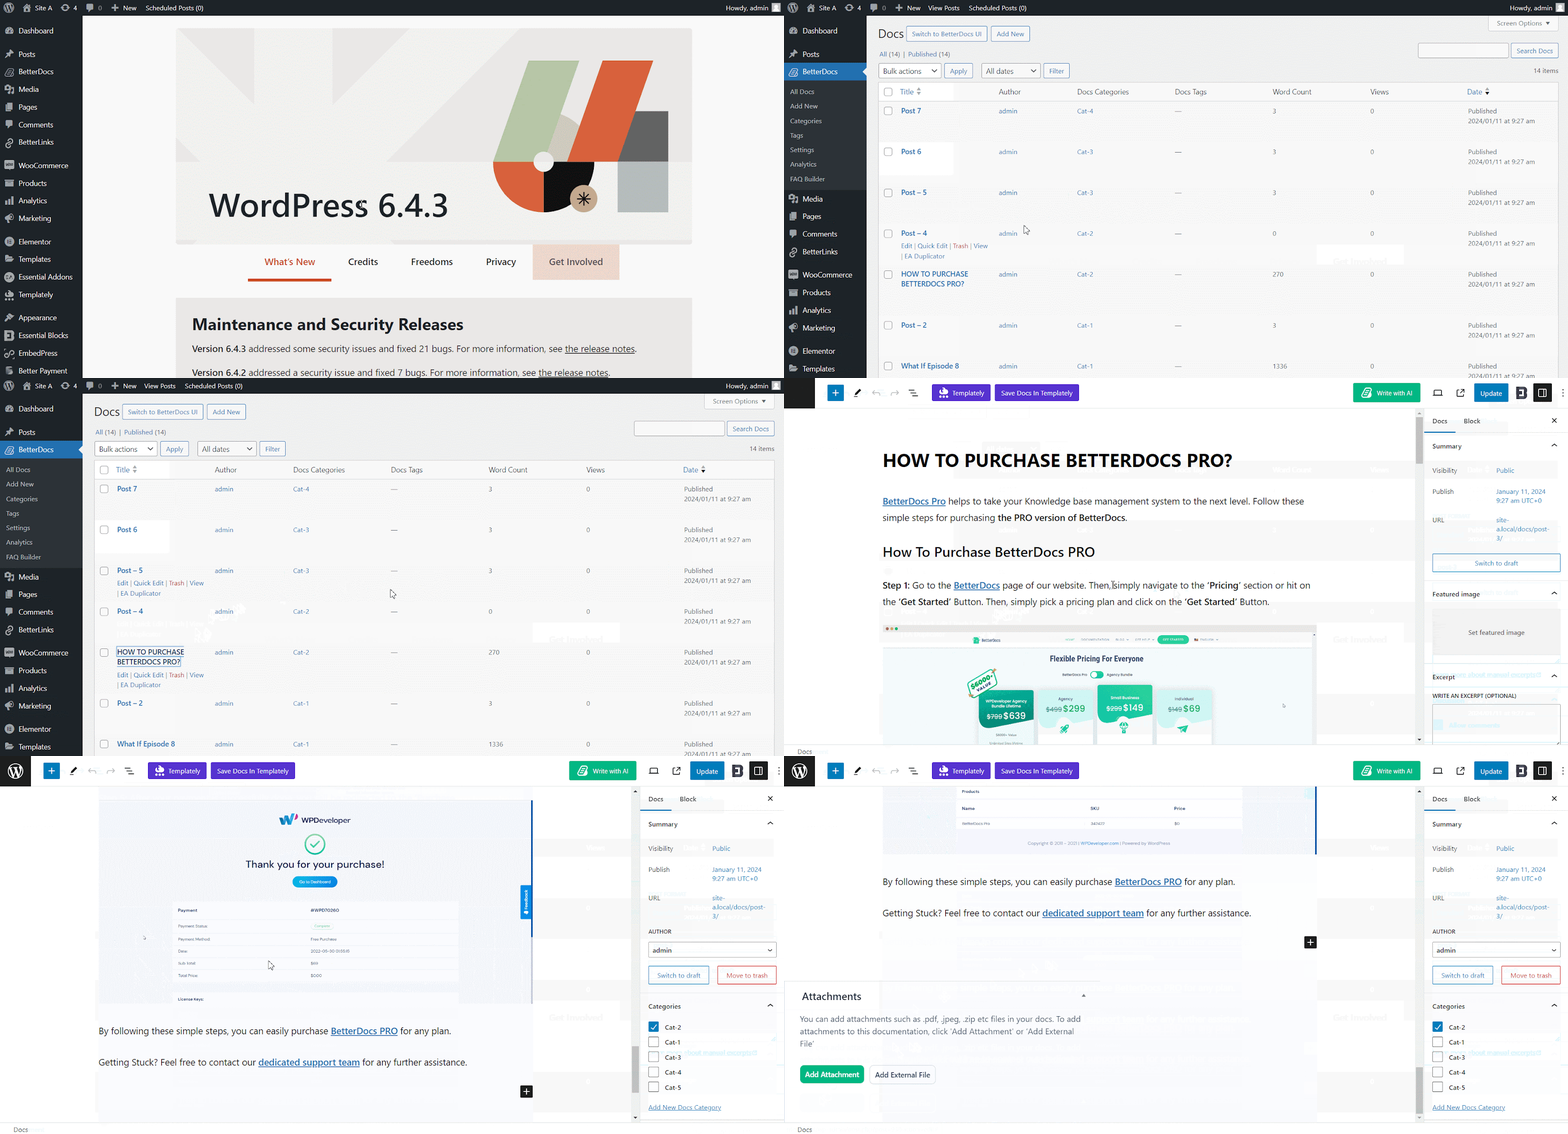
Click the ‘Add Attchement’ button and select files from the ‘Media Library’ or upload files from the local storage. The files will be attached to the doc instantly. Once you are done adding the files, update the doc to save changes.

Since BetterDocs provides full site editor support, some of its features are dependent on the themes you are using. If you are using a template-based multipurpose theme like Flexia, the ‘Add Attachment’ block feature by BetterDocs will be integrated automatically and your attachments will be displayed in documents without any modification required.

However, if you are using a block-based global theme (Twenty Twenty-Four, for example), your attachments will not display on the documents page by default. You need to add the ‘BetterDocs Attachment’ block on ‘Single Doc’ in the site editor to use this feature. Follow step 4 to learn how to do that.

Step 4: Add BetterDocs Attachment In Site Editor #
Navigate to Appearance → Editor → Templates → Single Docs from your WordPress dashboard.
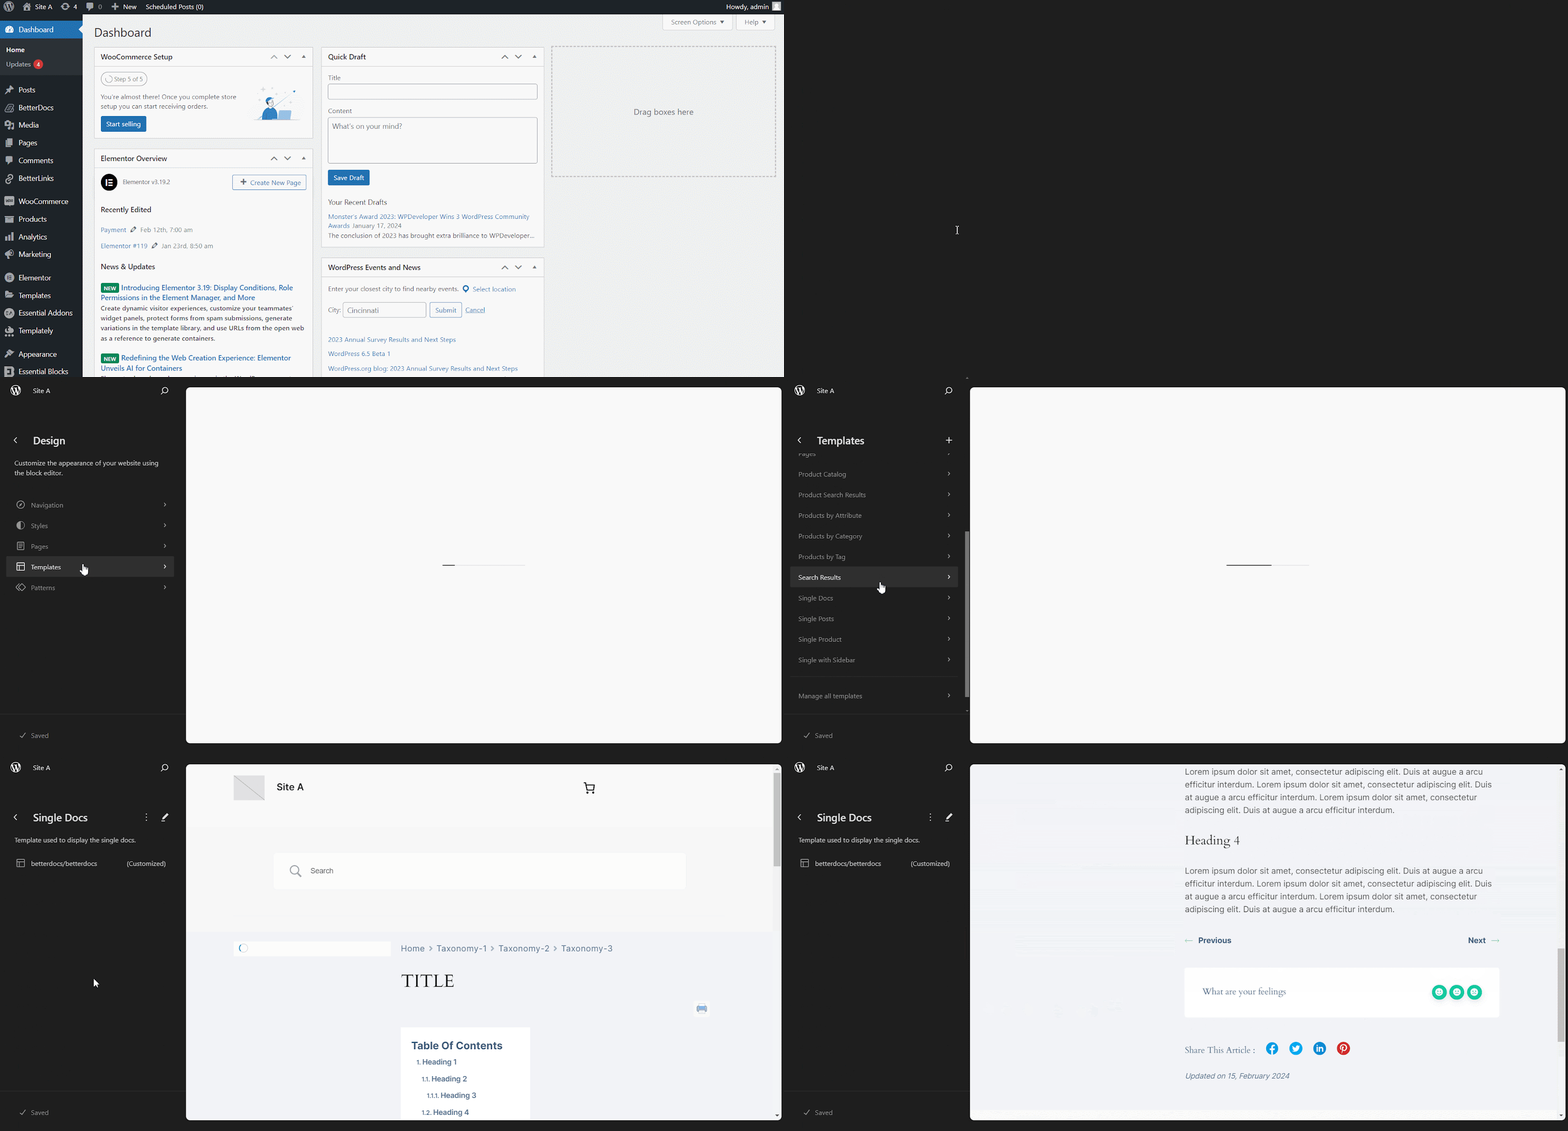
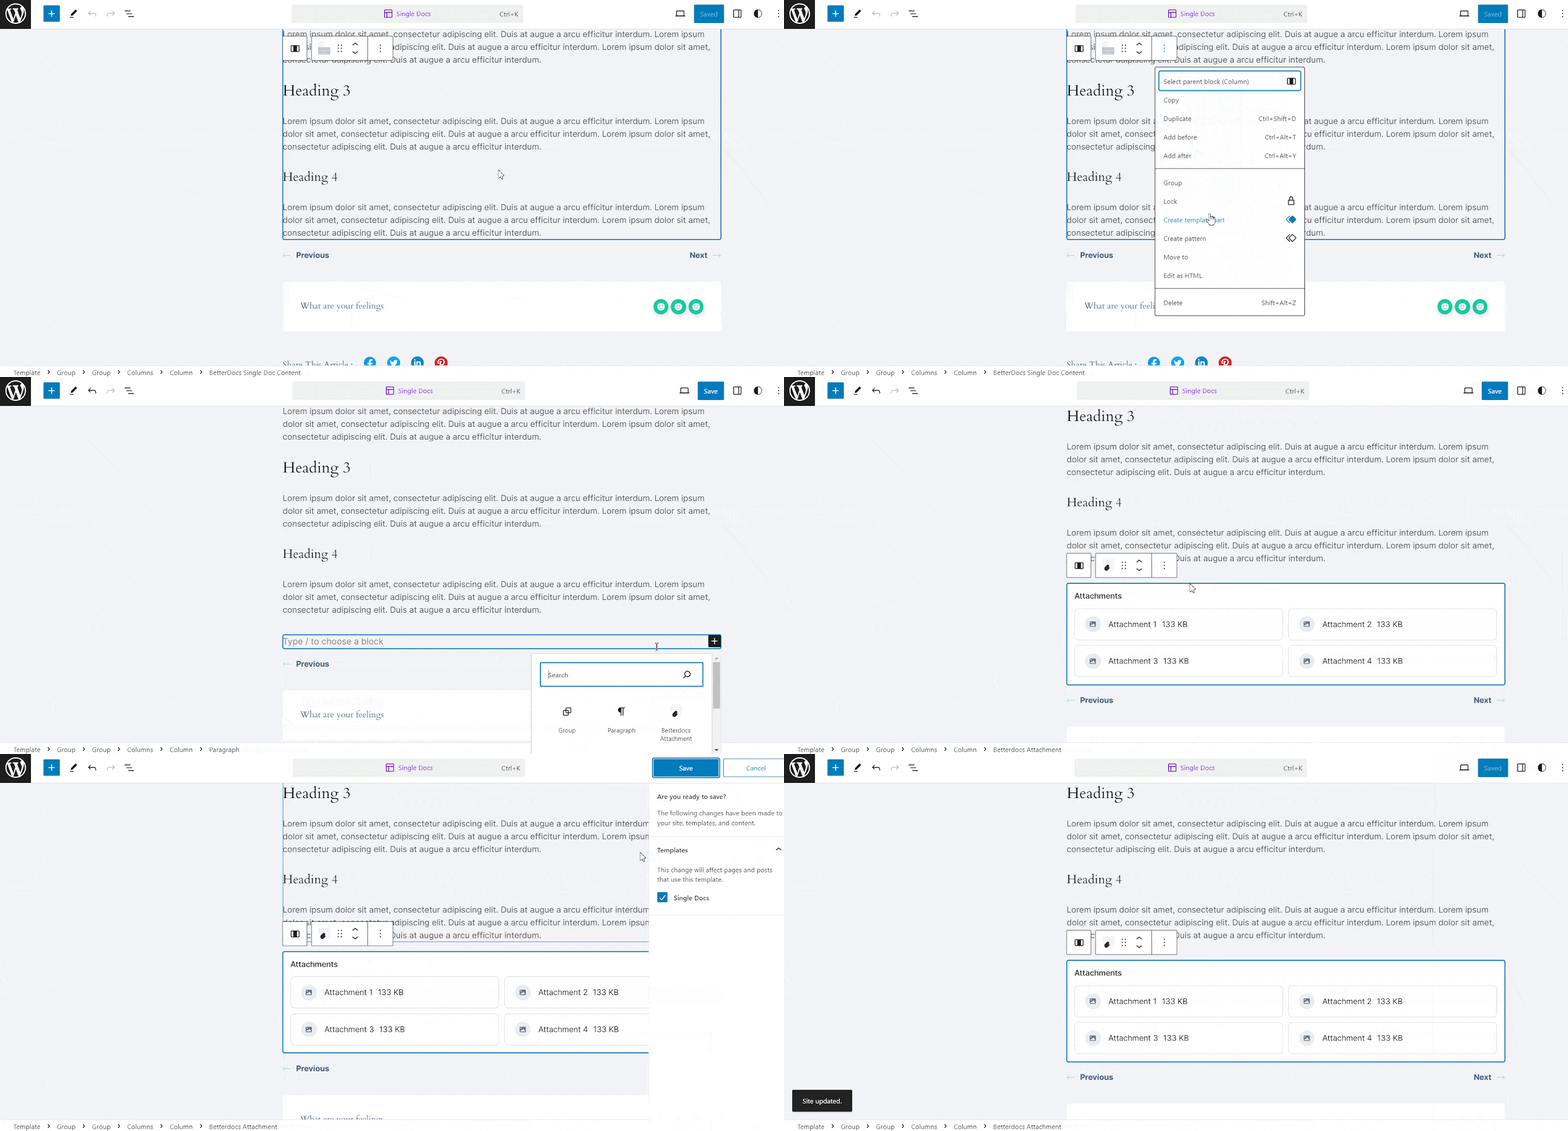
Now, drop down to the bottom (at the end of the doc) or where you want to show the attachments. Select a block and from the three dot options click ‘Add before’ or ‘Add after’ to add another block. Then, add the ‘BetterDocs Attachment’ block to the specific area. Once done, hit the ‘Save’ button.
Final Outcome #
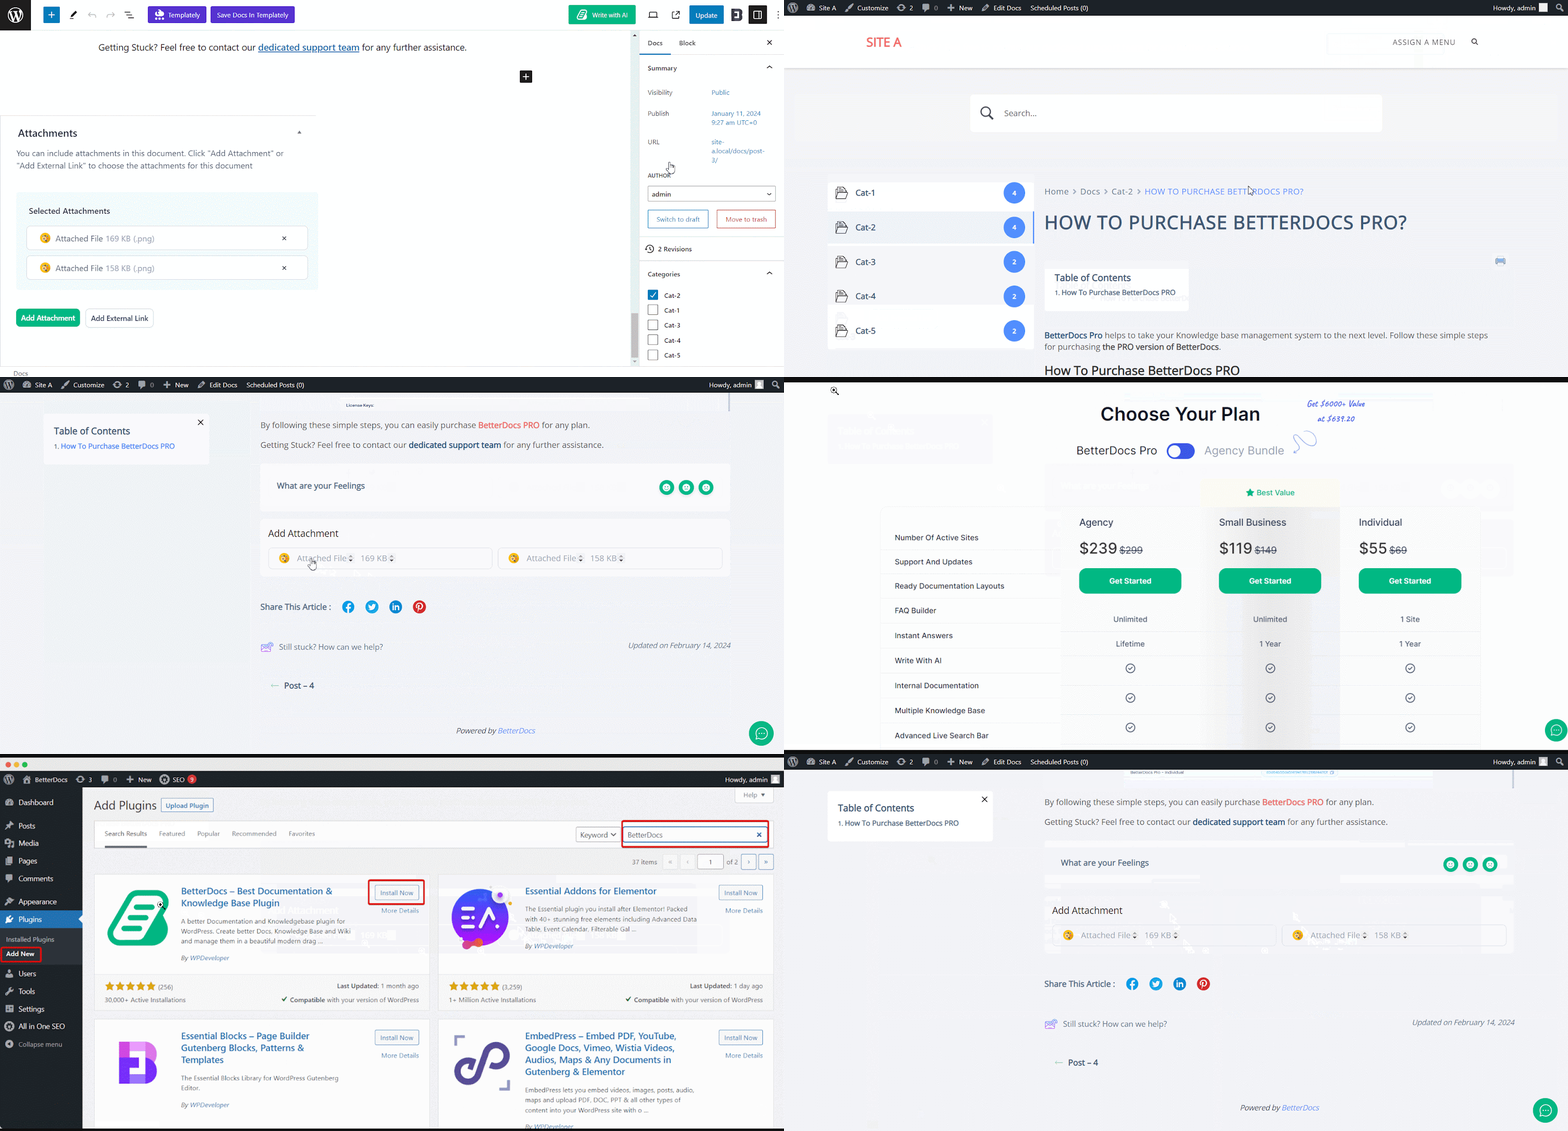
After attaching and updating, you can now visit the single document page to see the files at the bottom.
That is how easily you can add attachments to docs using BetterDocs.
Getting stuck? Feel free to Contact Our Support for further assistance.


